Assembly, 1 attach chipper chute and extension tray, 1 attach chipper chute and extension tray 8 – Echo 71854 User Manual
Page 10: Warning important, Warning
8 INCH PTO CHIPPERS
8
Before inspecting or servicing any part of this ma-
chine, disengage PTO, shut off tractor engine, and
make sure all moving and/or rotating parts have come
to a complete stop.
Warning
imPorTanT
if any bolts or nuts are dropped in the machine, be
sure to remove them before starting the machine.
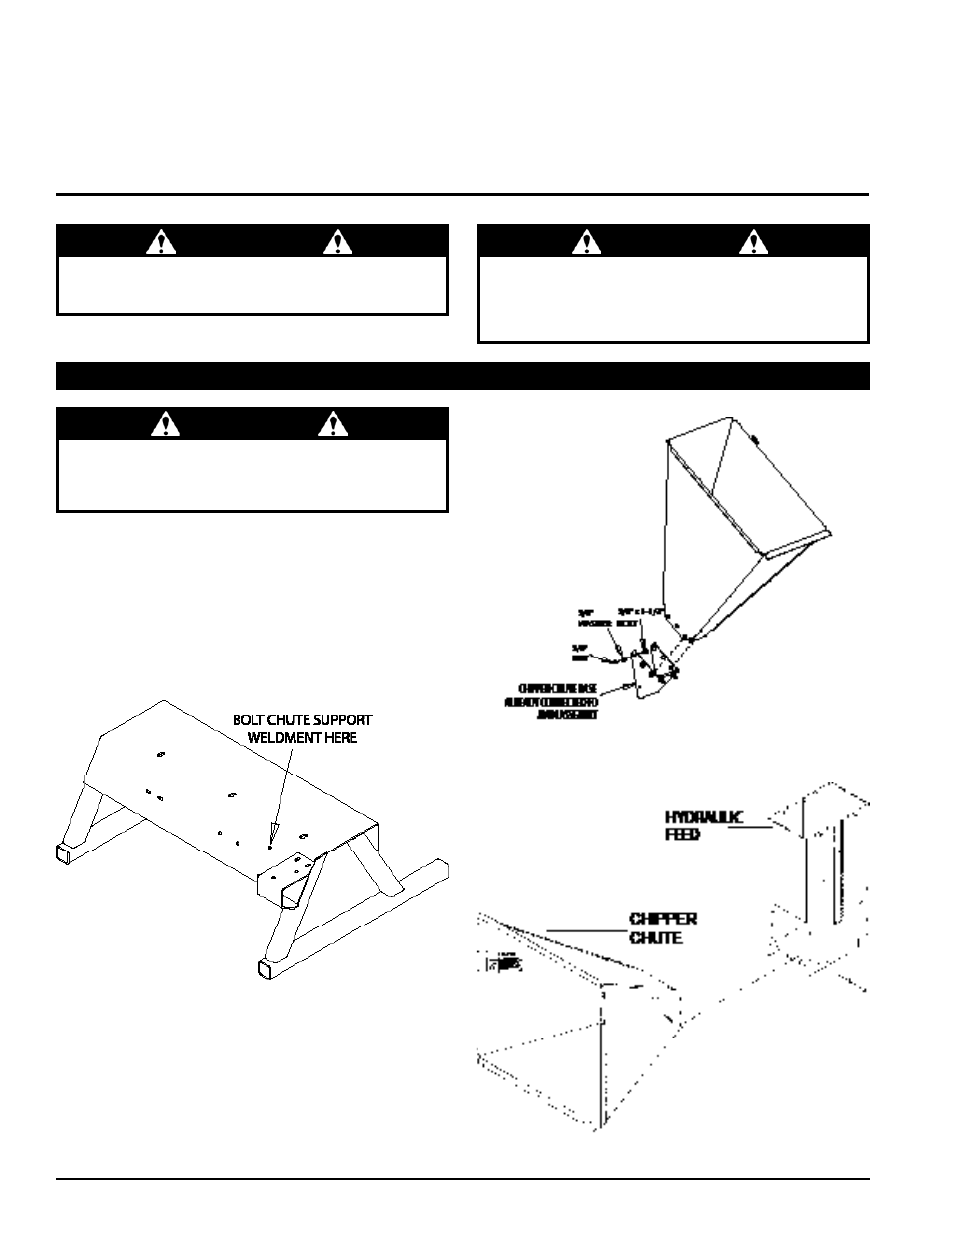
2.1 aTTacH cHiPPer cHuTe and exTension TraY
Figure 2.1.2, Attaching the chipper chute (gravity feed models)
assemblY
Section
Warning
do not operate this unit without the chipper chute cor-
rectly installed. rotating cutting blades can cause se-
rious personal injury.
Figure 2.1.3, Attaching the chipper chute (hydraulic models)
2.1.1 aTTacHing cHuTe suPPorT (72854, 72854s)
remove chipper from shipping crate. Place unit on
1.
a level surface before attempting to assemble. See
the Torque chart in Section 8, Specifications, for the
minimum tightening torque of bolts and screws.
attach the chute support to the front side of the chipper
2.
base with one 3/8" x 1" bolt, washer and nut. refer to
figure 2.1.1 for proper positioning of the weldment.
Figure 2.1.1, Chute support positioning
2.1.2 aTTacHing cHiPPer cHuTe
Mount the chipper chute to the frame mounting bracket
1.
using eight 3/8" x 1" bolts and locknuts (see figure
2.1.2). use three bolts on each side and two on the
bottom. for hydraulic feed models, mount the chipper
chute directly to the feed roller as shown in figure
2.1.3.
2