3 connecting with a universal quick attach, 4 connecting a hydraulic operated attachment, Connecting with a universal quick attach – JLG G5-18A Service Manual User Manual
Page 32: Connecting a hydraulic operated attachment
Boom
3.12
G5-18A/2505
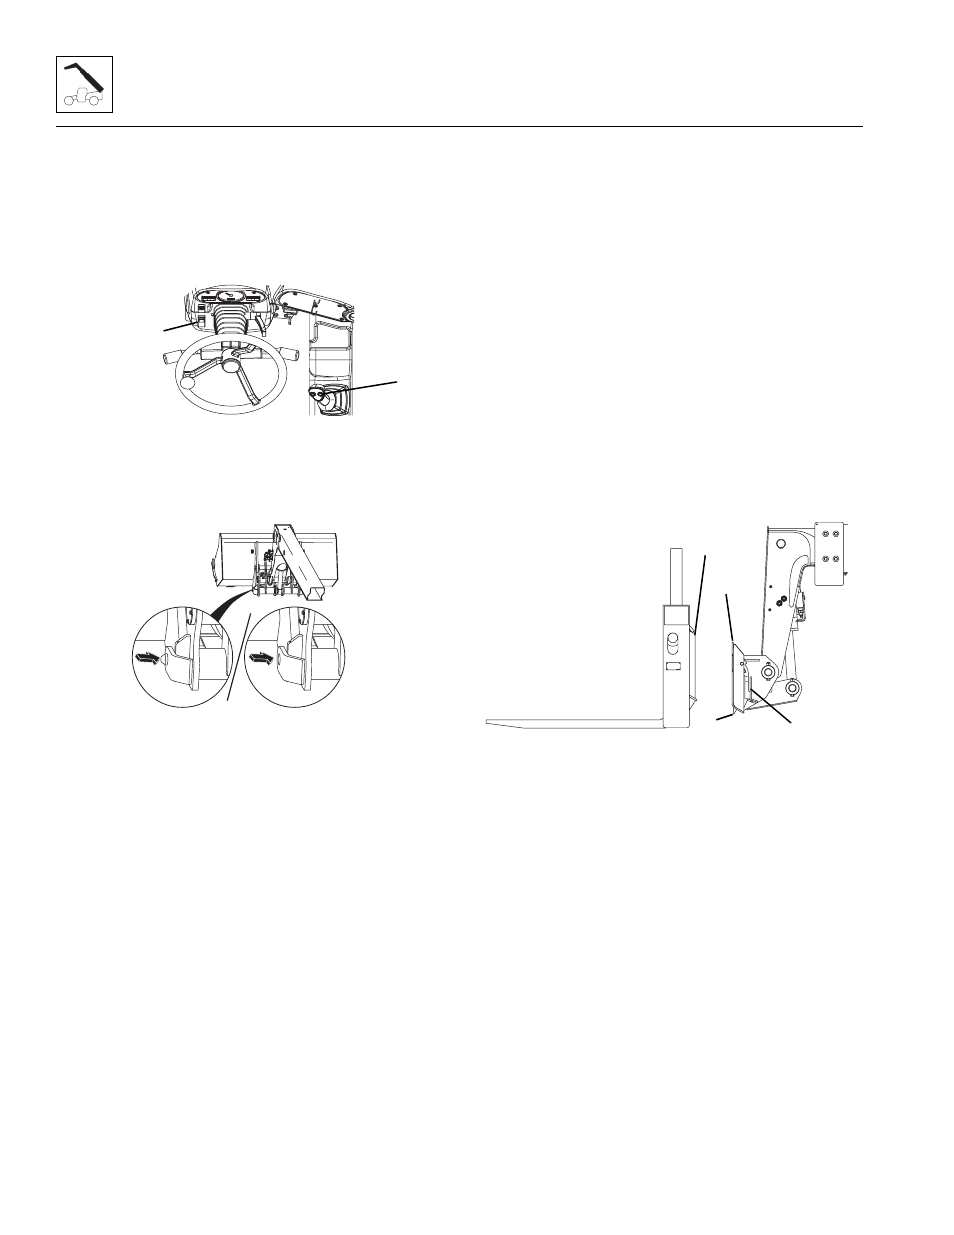
2. Align attachment pin (2) with recess in
attachment (3). Raise boom slightly to engage
attachment pin in recess.
3. Engage quick attach device.
4. Press and hold button (5) and button (6), at the
same time move the joystick right to engage or left to
disengage the quick attach device.
5. Raise the boom to eye level and visually check that
the quick attach pin protrudes through the hole. If the
pin does not protrude through the hole, place the
attachment on the ground and return to step 2.
6. If attachment is equipped, connect auxiliary
hydraulic hoses to the corresponding auxiliary
hydraulic fittings on the side of the boom head. See
Section 3.5.4, “Connecting a Hydraulic Operated
Attachment.”
3.5.3
Connecting with a Universal Quick
Attach
This installation procedure is designed for one-person
operation.
1. Retract quick attach device to provide clearance.
Check to be sure the lock pin handles (7) and pins
(8) are pulled up.
2. Align engaging edge (9) with recess in
attachment (10). Raise boom slightly to engage
attachment pin in recess.
3. Engage quick switch device.
4. Shut off engine. Exit cab and lower lock pin handles
and engage lock pins.
5. If attachment is equipped, connect auxiliary
hydraulic hoses to the corresponding auxiliary
hydraulic fittings on the side of the boom head. See
Section 3.5.4, “Connecting a Hydraulic Operated
Attachment.”
3.5.4
Connecting a Hydraulic Operated
Attachment
1. Install the hydraulic Attachment. See Section 3.5.2,
“Connecting with a Hydraulic JLG Quick Attach,”
Section 3.5.3, “Connecting with a Universal Quick
Attach,” or Section 3.5.4, “Connecting a Hydraulic
Operated Attachment,”
2. Lower the attachment to the ground and set the park
brake.
3. Press and hold button (11), at the same time move
the joystick to the right to relieve pressure at the
female auxiliary fitting (12).
4. Connect the attachment hose to the female auxiliary
fitting.
5. Press and hold button (11), at the same time move
the joystick to the left to relieve pressure at the male
auxiliary fitting (12).
6. Connect the attachment hose to the male auxiliary
fitting.
MY2610
5
6
MY2600
ENGAGED
DISENGAGED
MY2630
10
9
7
8