Addictive Desert Designs 2010 - 2013 Ford Raptor Rear Frame Gusset/Bump Stop Kit User Manual
Page 2
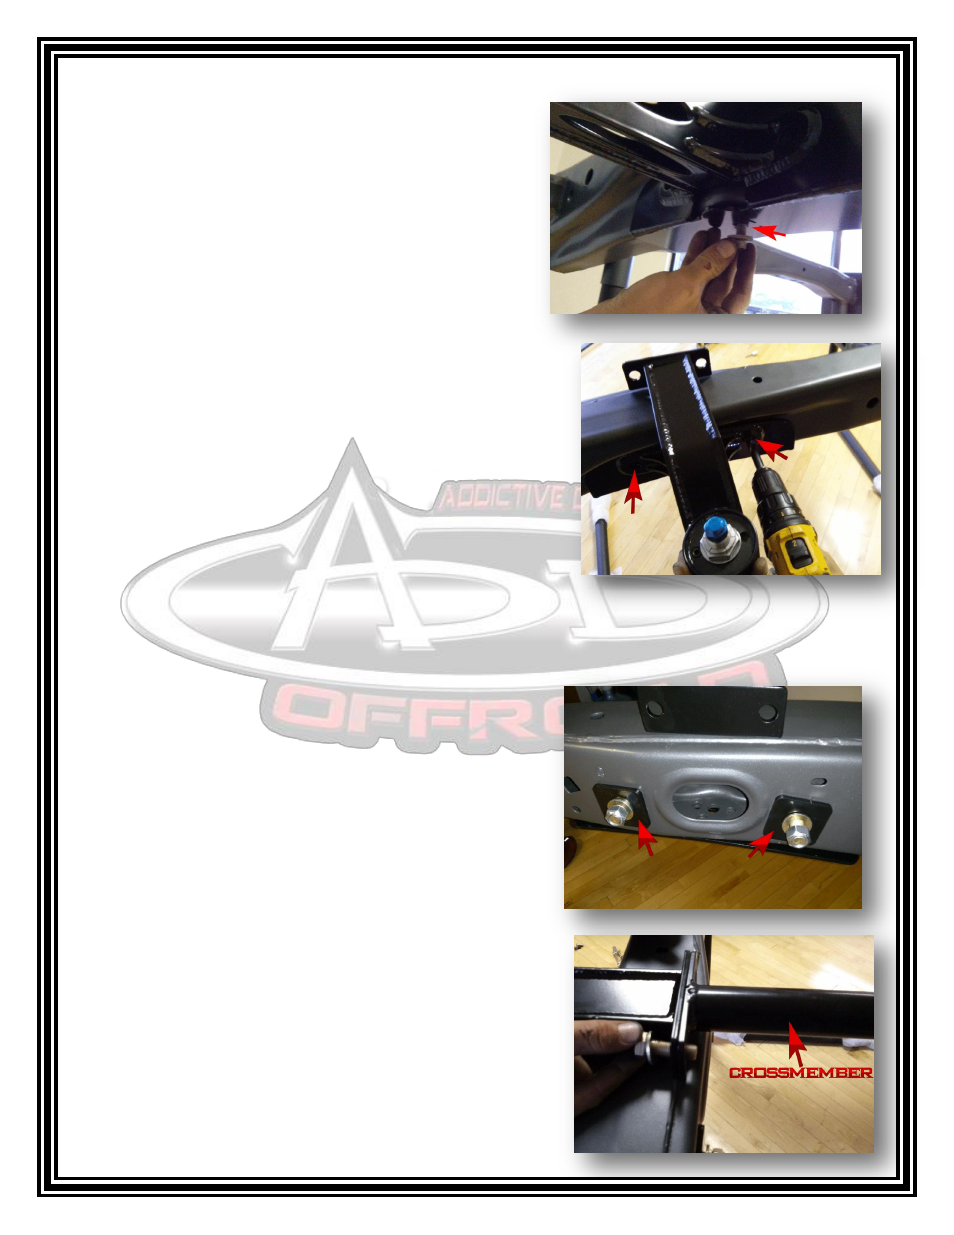
2. Locate the Bump Stop Assemblies, determine which
are the driver and passenger sides. Use the hole
from the factory bump stop and install bolt to hold
the side frame gusset bracket to the frame. Make
sure to tighten the factory 13mm bolt to ensure that
the plate is mounted securely before moving to the
next step. Do this on both sides of the truck
3. Using the Bump Stop Assemblies as a template, drill a ½”
hole through the frame gusset and into the inside portion
of the stock frame. Pay attention to drill as straight as
possible.
**** Caution: Be careful not to drill into the factory hard
brake lines on the inside of the framerail on the driver’s
side of the truck.
4. Use the 4½” x ½” Grade 8 Bolts to go through the bump
stop bracket assembly, the side frame gusset plate, and through the stock frame. Place one ½”
washer on the bolt and insert from the outside inward.
5. Locate the 3/16” thick square 2” x 2” plates. Place
these plates on the bolt on the inside of the frame rail.
Then place a standard ½” washer over the threaded
end and start the nut on the bolt. ***Do not tighten
these bolts yet. It will be tightened later.
6. Locate the 1-1/2” tube cross member. Slide the tube up
over the exhaust and on top of the frame rail. Line
these plates up with the bump stop can assembly.
***The cross member mount in the center is tapered
with the longer (bigger) side toward the Rear of the
truck. This will line up with the under frame support.