Installation instructions – Smittybilt JN47 Side Bars User Manual
Page 2
For Technical Support/Warranty Information please call 310-762-9944
Smittybilt, 1600 Walnut Parkway, Compton, CA 90220
Installation Instructions
Side Bars (Part # JN460 & JN47)
1997- 2006 Wranglers & Unlimited
Step 2: Remove the two factory bolts located near the bottom rear of the front wheel-well. (Figure 2)
Mount the front bracket to the body using two of the provided 8 x 1.25 x 35 mm bolts. (Figure 2)
Attach the side bar to the front bracket using the supplied 12mm hardware.
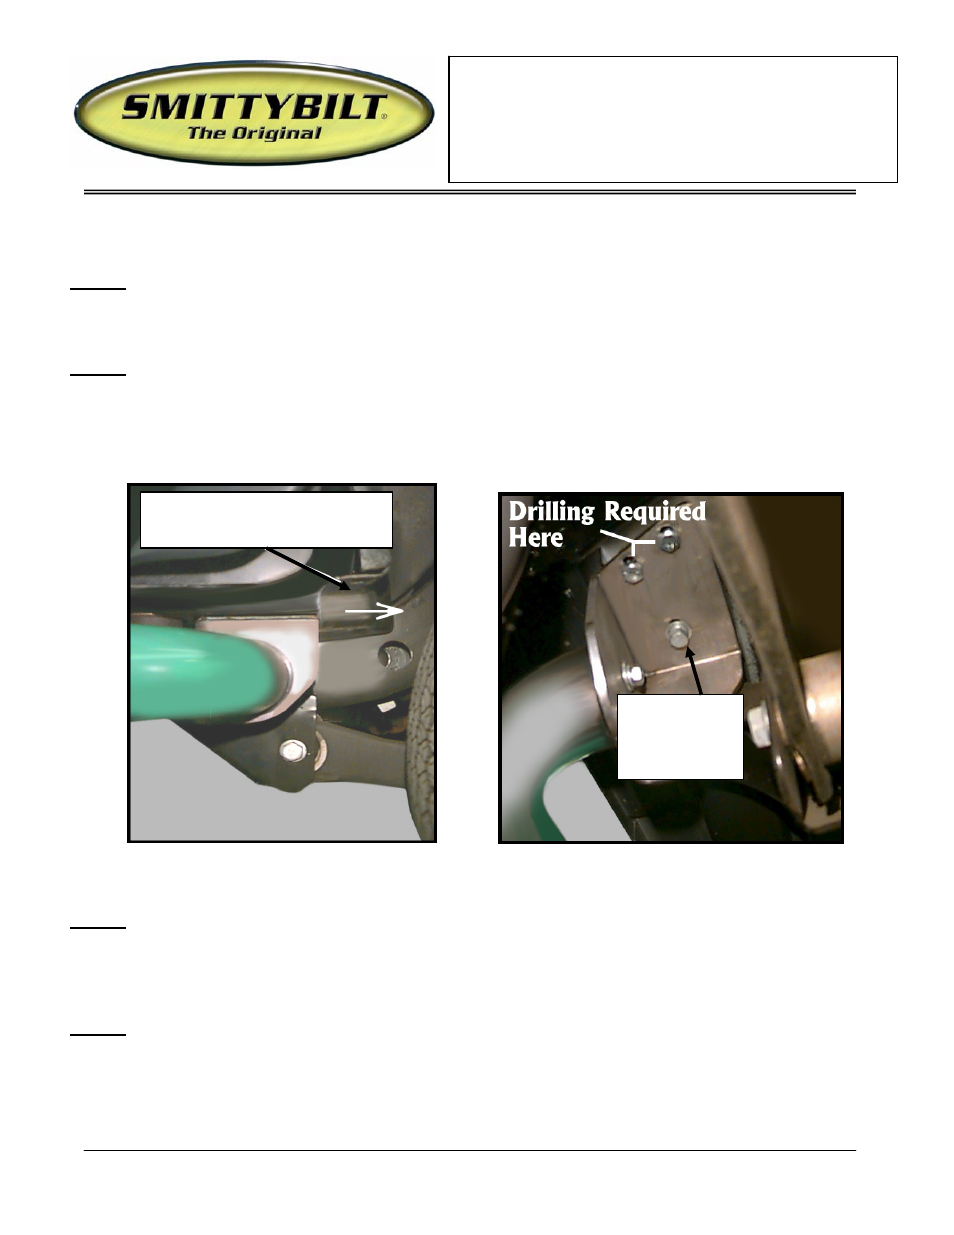
Step 3: Detach the front lower section of the rear fender-well inner lining be removing the plastic pins that
secure it. You only need to remove pins located in the area as show in (Figure 3). Hold the read of the
side bar up against the bottom of the body. Align the single hole on the rear bar bracket with the hole
I in the bottom of the body. Mark the other two holes on the body using the holes in the bracket as a
template. (Figure 4) Remove bar from front bracket and set to the side at this time.
Remove plastic pins here and
pull liner back.
Align this
hole with
hole in body.
(Figure 3) (Figure 4)
Step 4: Drill two 3/8” holes where you marked in Step 3. CAUTION: Before drilling, be sure to check
the backside area for any hazards or obstructions. Identify the correct top plate for this side of the
vehicle.
Step 5: Attach the front of the bar to the front bracket. Push the rear bracket up against the bottom of the
vehicle lining up the 3 holes. Slide the backing plat through the fender well area. Using three 10mm
bolts attach the rear bracket to the top plate going through the body. (Figure 4) Note: You
may need to trim the fender-well liner in order to fit back into position around the bracket.