Apple Macintosh Hebrew Language Kit User Manual
Page 10
A-7
NOIR/PANTONE 7 7
2. Insert the Install 1, English disk into your floppy drive
(or insert the Macintosh Hebrew Language Kit CD
disc into your CD-ROM drive).
You should see the Installer icon in the Install 1, English
disk’s window.
3. Open the Installer by double-clicking its icon.
A welcome screen appears.
4. Click Continue.
The Install dialog box appears.
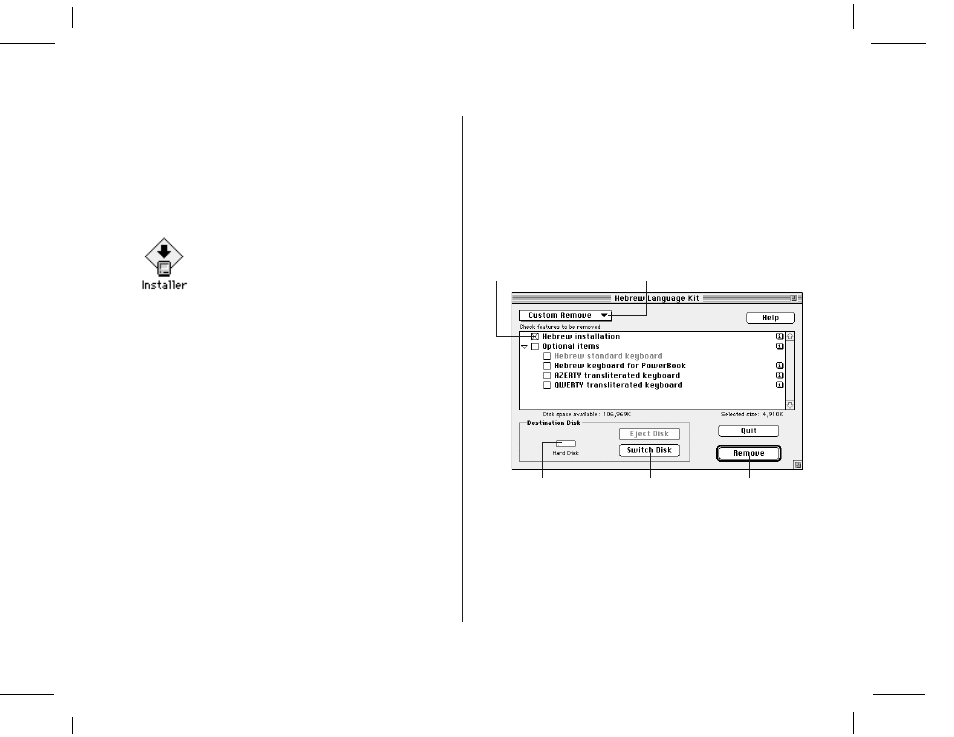
5. Press the pop-up menu at the upper-left corner of the
dialog box and choose Custom Remove.
6. Make sure that the disk named is the disk from which
you want to remove your Hebrew language software.
If the wrong disk name appears, click Switch Disk until you
see the name of the correct disk.
7. Click the items you want to remove.
8. Click Remove.
There is a short wait while the files are removed.
Chapter 2: Setting Up
9. If you see a message telling you to restart your
computer, click Restart.
Hebrew is not removed until you restart your computer.
v Note: If your language kit was installed on a disk different
from your startup disk, you will only be asked to quit the
Installer application. v
Make sure this is the name
of the disk where the
language kit is installed.
Click here to remove
the selected files.
Click here to
switch to a
different disk.
Press this pop-up
menu and choose
Custom Remove.
Click the checkbox
of the items you
want to remove.