Apple Macintosh Cyrillic Language Kit User Manual
Page 7
A-4
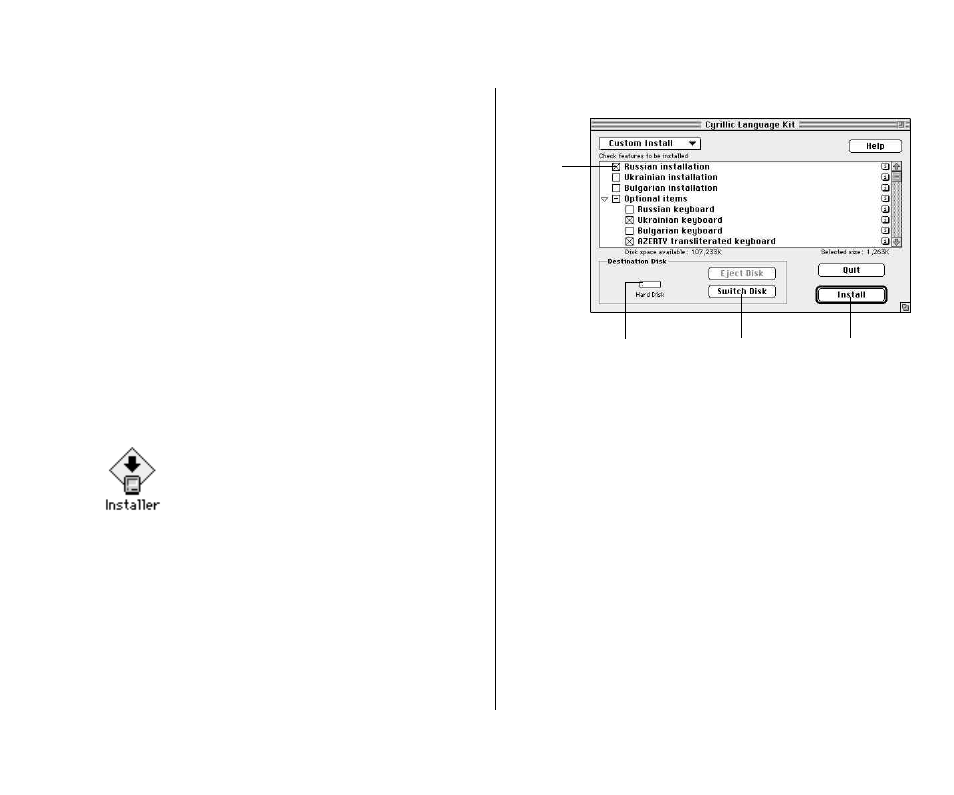
6. Click the items you want to install to select them.
7. Click Install.
Messages tell you when you need to insert another disk. It
takes a few minutes to complete the installation.
8. If you see a message telling you to restart your
computer, choose Restart.
v Note: If you installed on a disk different from your startup
disk, you will first be asked to quit the Installer application.
You must designate the hard disk where you installed the
Cyrillic Language Kit as your startup disk, then restart your
computer to activate Cyrillic language support. v
Your computer now supports the Cyrillic writing system.
Unless you’ve already installed Bulgarian, Russian, or Ukrainian
language support, you should install at least one of these choices. You
can choose as many of the optional installation items as you want.
1. Quit any open application programs.
If you have any virus-detection software, turn it off.
v Note: It’s best to start your computer with all extensions
turned off before doing the installation. To do so, hold the
Shift key down while your computer is starting. v
2. Insert the Install 1, English disk into your floppy disk
drive (or insert the Macintosh Cyrillic Language Kit
CD disc into your CD-ROM drive).
You should see the Installer icon in the Install 1, English
disk’s window.
3. Open the Installer by double-clicking its icon.
A welcome screen appears.
4. Click Continue.
The Custom Install dialog box appears.
5. Make sure that the hard disk named is the one where
you want to install Cyrillic.
If a different disk name appears, click the Switch Disk button
until you see the name of the correct disk.
Chapter 2: Setting Up
Click the
checkbox
of each
item you
want to
install.
Click here to
install the Cyrillic
Language Kit.
Click here to
switch to a
different disk
for installation.
Make sure this is
the name of the
disk where you
want to install the
language kit.