Generation ii swingout tire carrier installation – Hyline Offroad JK SERIES STANDARD REAR TIRE CARRIER User Manual
Page 2
T:\Hyline Offroad, LLC\Installation Instructions\JK-21STC\JK-21STC Installation Instructions.doc
Page 2 of 4
REV 3 1/9/2012
Generation II Swingout Tire Carrier Installation
Step 1 – If you have not already installed your Hyline Offroad Rear Bumper that accepts this tire carrier please do
so using the Installation Instructions for P/n JK-20SRB(T).
***BEFORE INSTALLING TIRE CARRIER ON THE BUMPER
***COMPLETE STEPS 2 & 3
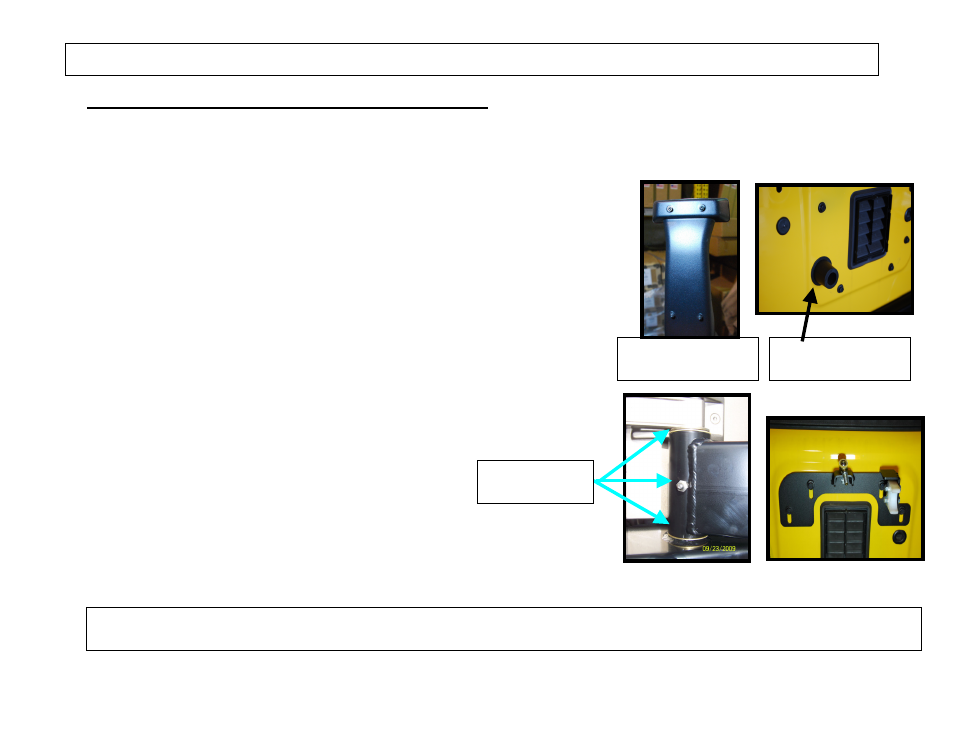
Step 2 – First remove the Brake Light Back Cover by unscrewing the 4 torx
screws using the T20 bit (Fig.1) & unplug wires. Wires should hang
freely. Then, remove the stock Tire Carrier by unbolting the eight bolts
using the 13mm” Socket. Then remove the 2 black rubber mounts that
the stock tire pressed against. These remove by simply pulling them
away from the body on an angle. (See Fig.2)
Step 3 – Install the Stainless Steel Grease Fitting using the 7/16” Wrench.
The grease fitting has pipe threads which are tapered to obtain
a leak free seal. Because of the tapered threads you may not
be able to completely screw in the grease fitting. Note: Location of
fitting might vary from picture in Figure 3.
Step 4 – Install the supplied tailgate bracket using 4 bolts
that were previously removed from stock tire carrier (Do Not Tighten
Yet). Install Rod End Fitting using one 3/8” flat washer & 3/8”-24 hex
Nut & tighten. Also install the white plastic Alignment block using
two-5/16” bolts, four-5/16” flat washers & two-5/16” hex lock nuts.
PLEASE READ INSTRUCTIONS BEFORE BEGINNING INSTALLATION
Figure 2
Remove Tire Carrier
& Rubber Bumpers
Figure 1
Remove Brake Light
Back Cover
Brass Washers
& Grease Fitting
Figure 4
Figure 3
Note: Two Plastic Alignment Blocks have been provided. Use whichever block works best to align swingout carrier parallel to the tailgate.
Typically 2012-Present JK’s will use the shorter block.