Straight stitching, Puntadas rectas, Point droit – Brother XL5300 User Manual
Page 46
○○○○○○○○○○○○○○○○○○○○○○○○○○○○○○○○○○○○○○○○○○○○○○○○○○○○○○○○○○○○○○○
○○○○○○○○○○○○○○○○○○○○○○○○○○○○○○○○○
37
STRAIGHT AND ZIGZAG STITCHING
PUNT
AD
AS RECT
AS
Y ZIGZA
G
POINTS DR
OITS ET POINTS ZIGZA
G
○ ○ ○ ○ ○ ○ ○ ○ ○ ○ ○ ○ ○ ○ ○ ○ ○ ○ ○ ○ ○ ○ ○ ○ ○ ○ ○ ○ ○ ○ ○ ○ ○ ○ ○ ○ ○ ○ ○ ○ ○ ○ ○ ○ ○ ○ ○ ○ ○ ○ ○ ○ ○ ○ ○ ○ ○ ○ ○ ○ ○ ○ ○
Straight Stitching
XL5300 XL5200 XL5100
Pattern
Stitch Length
Stitch Width
PX300 PX200 PX100
2
2
3
Straight Stitch
1-4
5-0*
12
10
10
Triple Stretch Stitch
Fixed 2.5
* Turn the stitch width dial to adjust the needle position. Setting the dial to “5”
selects the left needle position; setting the dial to “0” selects the right needle
position.
Starting Sewing
1. Turn the pattern selection dial to select the desired stitch. Set the
pattern selection dial to Straight Stitch or Triple Stretch Stitch for
the type of stitch required.
2. Raise the needle to its highest position and lift the presser foot lever.
3. Pull up the lower thread by turning the balance wheel toward you
(counterclockwise) and place both the upper and lower threads
behind the presser foot.
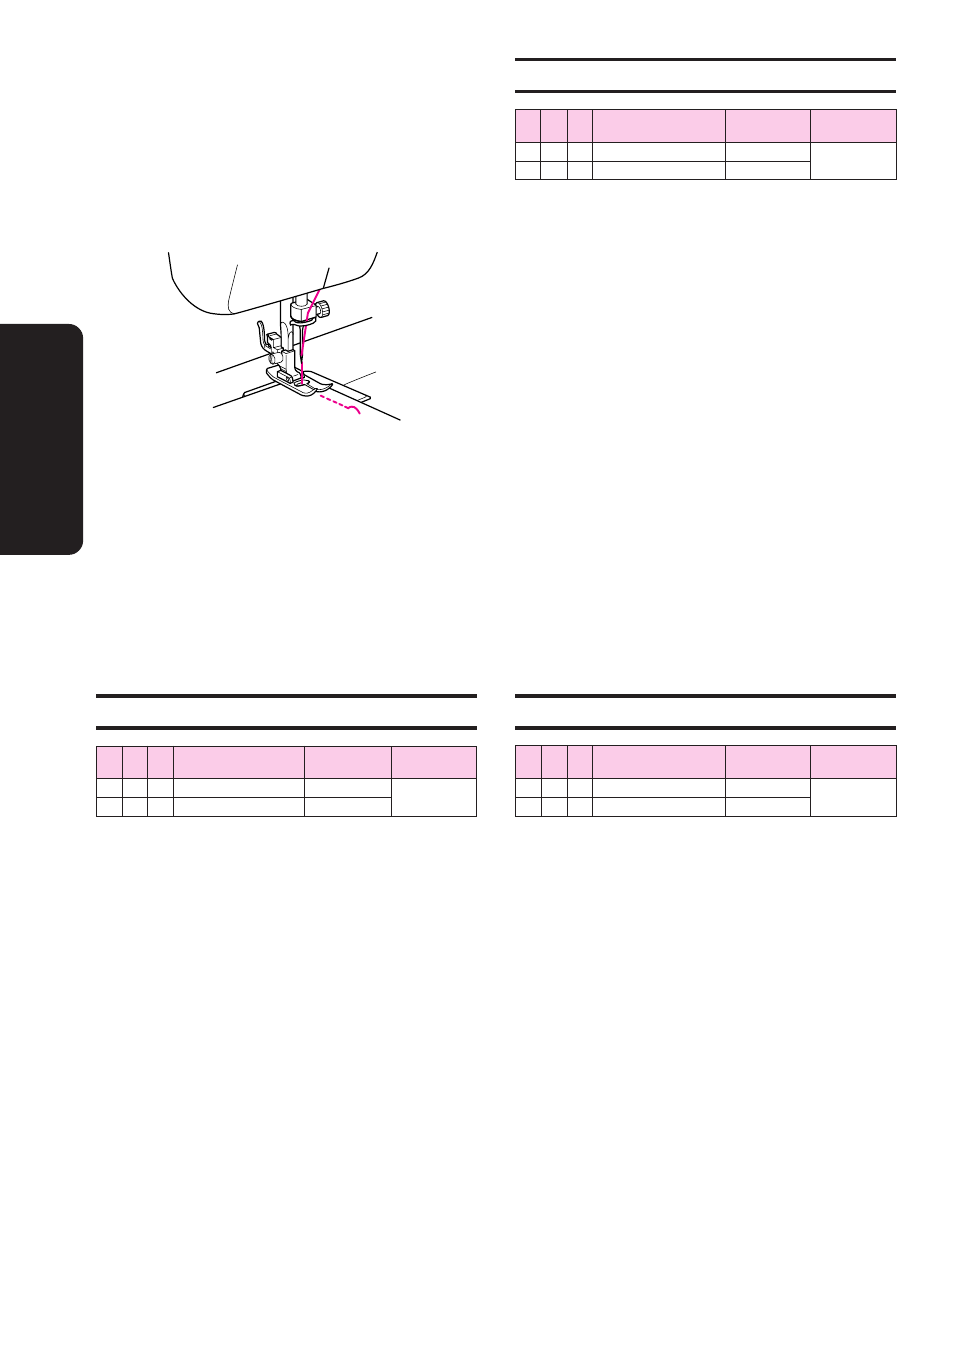
4. Place the fabric under the presser foot with the needle 1 cm (3/8")
from the edge of the fabric.
5. Lower the presser foot.
Backtacking
Reverse stitching is used to lock or reinforce the end of the stitch.
6. Press down on the reverse sewing lever as far as possible, then
lightly step on the foot controller. Sew 5 to 10 stitches in the re-
verse direction.
7. Release the reverse sewing lever and step down on the foot con-
troller to start sewing in the forward direction.
Puntadas rectas
XL5300 XL5200 XL5100
Número de puntada
Largo de puntada
Ancho puntada
PX300 PX200 PX100
2
2
3
Puntada recta
1-4
5-0*
12
10
10
Puntada triple elástica
Fija 2,5
* Gire el selector de ancho de puntada para ajustar la posición de la aguja. Si
coloca el selector en la posición “5”, se selecciona la posición de la aguja a
la izquierda; si coloca el selector en “0”, se selecciona la posición de la aguja
a la derecha.
Para empezar a coser
1. Gire el selector de puntadas para seleccionar la puntada desea-
da. Ponga dicho selector de puntadas en puntada recta o punta-
da triple elástica para el tipo de puntada deseado.
2. Levante la aguja a su posición más alta y levante la palanca del
prensatelas.
3. Saque el hilo inferior girando la ruedecilla hacia usted (en el sen-
tido contrario a las manecillas de un reloj) y tire los hilos superior
e inferior hacia la parte trasera del prensatelas.
4. Coloque el tejido debajo del prensatelas con la aguja de 1 cm
(3/8") de la orilla del tejido.
5. Baje el prensatelas.
Retroceso
La puntada de retroceso se utiliza para finalizar una costura o refor-
zarla.
6. Baje la palanca de retroceso hasta el final y presione suavemen-
te el pedal. Cosa de 5 a 10 puntadas en la dirección de retroceso.
7. Suelte la palanca de retroceso y pise el pedal para volver a coser
hacia adelante.
Point droit
XL5300 XL5200 XL5100
Modèle
Longueur de point
Largeur de point
PX300 PX200 PX100
2
2
3
Point droit
1-4
5-0*
12
10
10
Triple point élastique
Fixe 2,5
*
Tourner le sélecteur de largeur de point pour régler la position de
l’aiguille. Régler le sélecteur sur “5” pour placer l’aiguille à gauche et
sur “0” pour la placer à droite.
Pour commencer à coudre
1. Tourner le sélecteur de modèle jusqu’à la sélection du point souhaité. Régler le
sélecteur sur “point droit” ou “triple point élastique” en fonction du type de
point souhaité.
2. Remonter complètement l’aiguille et relever le levier du pied-de-biche.
3. Remonter le fil inférieur en tournant le volant vers soi (dans le sens opposé aux
aiguilles d’une montre) et tirer les deux fils, inférieur et supérieur, vers l’arrière
du pied-de-biche.
4. Placer le tissu sous le pied-de-biche et mettre l’aiguille à 1 cm du bord du tissu.
5. Abaisser le pied-de-biche.
Pour arrêter une couture en marche arrière
La piqûre en marche arrière sert à arrêter ou à consolider une couture.
6. Abaisser complètement le levier de couture en marche arrière et appuyer légè-
rement sur la pédale. Coudre 5 à 10 points en marche arrière.
7. Remonter le levier de couture en marche arrière et recommencer à coudre en
avant en appuyant sur la pédale.