Choose your email solution – Nokia E62 User Manual
Page 15
28
29
BlackBerry Connect
Choose Your Email Solution
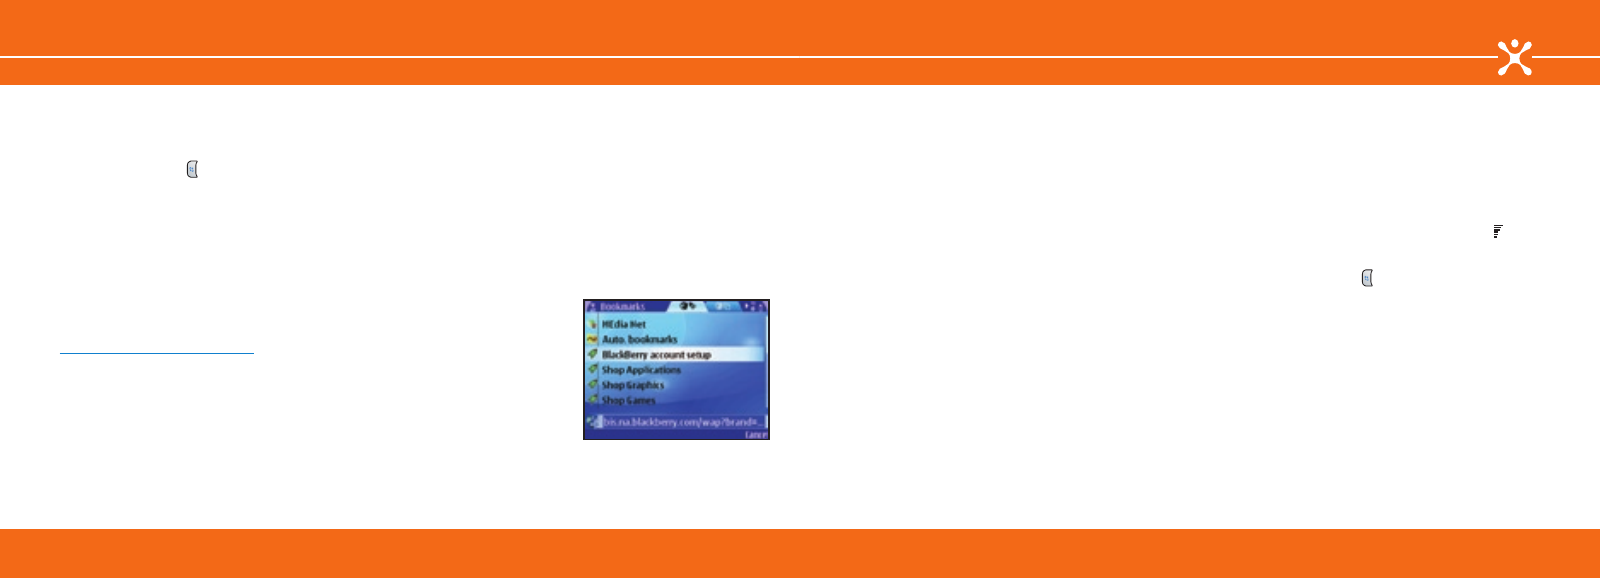
3. Register your device and integrate your ISP email accounts
using one of the two methods below:
From your device:
• Select the
Menu
key ( ) >
MEdia Net
then scroll down
the Bookmarks list and select
BlackBerry account setup
(fig. 22).
• If you are a new user, select
Create New Account
from
the Web page that displays. Then follow the on-screen
instructions to create your username, password and
to integrate your personal email accounts. If you are a
returning user, enter your user ID and password and select
Login
.
From your compatible computer:
• From your PC browser, visit
www.cingular.com/blackberrystart
.
• If you are a new user, select
Create New Account
and
enter the PIN and IMEI of your device when prompted.
You can find the PIN and IMEI using the instructions
provided in step 2 on the previous page. Follow the on-
screen instructions to create your username, password
and to integrate your personal email accounts. If you are a
returning user, enter your user ID and password and select
Login
.
Your BlackBerry Internet Service should now be set up.
4. (Optional). BlackBerry Internet Service synchronizes email
items ONLY. To synchronize your calendar and contacts,
proceed with the Getting Started CD-ROM and select the
option
Install Nokia PC Suite Only
. After installing Nokia
PC Suite, select the
Synchronize
option and in the Settings
menu, uncheck the box for email so that your emails will not
be duplicated on your device.
fig. 22
Choose Your Email Solution
Mail for Exchange
With Mail for Exchange, you can wirelessly access your email,
calendar, and contacts from your Microsoft Exchange account
on your Nokia E62. You can synchronize your data manually
or schedule the synchronization automatically so your data is
always up-to-date on your device and on your computer.
This guide explains how to:
• Install and open Mail for Exchange on your Nokia E62.
• Create a synchronization profile that controls what and
when you synchronize.
• Synchronize your device to get your email, calendar, and
contact entries from your Microsoft Exchange 2003 server.
Note: Mail for Exchange works with Microsoft Exchange
2003 servers with Service Pack 2 (SP2) only. The use of Mail
for Exchange requires a PDA Connect for Microsoft Direct
Push data plan or another eligible PDA Connect plan. Contact
Cingular at 1-866-CINGULAR (1-866-246-4852) for more
information.
Before you begin
You will need to do the following to complete the set up of
your Mail for Exchange account:
1. Complete the initial Nokia E62 device set up using the
Getting Started Guide.
2. Find the name of your Microsoft Exchange 2003 server.*
3. Obtain the Domain from where you download your email.*
4. Find your network user name and password.
* Contact your company’s IT help desk.
Please complete all set up steps listed in this guide.
Installing Mail for Exchange on the device
To begin the Mail for Exchange installation directly from your
Nokia E62, follow the steps below.
1. Power on your device to connect to the mobile network (if
not already on). You will know that your device is connected
to the network when you see the signal bars ( ) in the
upper left-hand corner of the device display. Your device
needs to be in a network coverage area to continue.
2. Select the
Menu
key ( ) >
>
E-mail inst.
to open
the email installation application. Read the application
information.
3. Select
Options
>
Installable clients
.
4. Scroll down to
Mail for Exchange
, then select
Options
>
Install
.
5. Fill in the required information (location, name, mobile
number, email address), accept the End User Software
Agreement and select
Send
.
6. The file will begin to download automatically and download
details will display on your device (fig. 23 on the next page).