Choose your email solution – Nokia E62 User Manual
Page 11
20
21
fig. 11
fig. 12
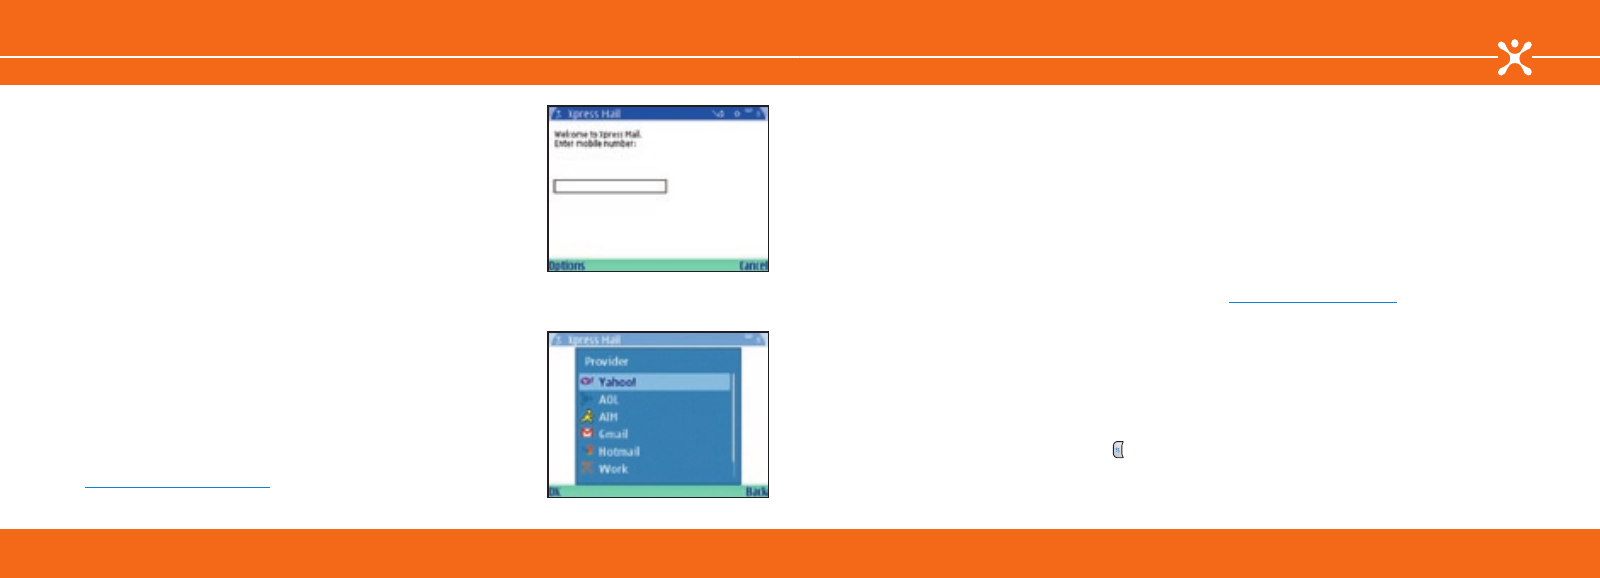
2. Enter your 10 digit mobile number (numbers only) and select
Options
>
Next
(fig. 11).
3. Choose your email service provider from the list displayed
and select
OK
(fig. 12). If your email provider is not listed
select
More
to view additional providers.
4. Enter your ISP username and password, then select
Options
>
Done
.
5. Xpress Mail will begin to synchronize your email with your
Nokia E62. When complete, you will be redirected to your
Xpress Mail inbox.
6. (Optional). Xpress Mail for personal email synchronizes email
items ONLY. To synchronize your calendar and contacts,
proceed with the Getting Started CD-ROM and select the
option
Install Nokia PC Suite Only
. After installing Nokia
PC Suite, select the
Synchronize
option and in the Settings
menu uncheck the box for email so that your emails will not be
duplicated on your device.
Setting Up Corporate Email with Xpress Mail
To begin the Xpress Mail set up for corporate email, you must
first create an Xpress Mail account and download the desktop
software.
Using the browser on your PC:
1. Go to
http://xpressmailpe.cingular.com
and select
Register
Now
.
2. Fill in the required fields on the
Acount Activation
screen.
Choose Your Email Solution
Xpress Mail Personal Edition
You will be prompted to create an Xpress Mail username and
password. Make note of the username and password as they
will be needed later.
3. At the download page, select
Download
to select the
desktop software.
4. Select
Open
or
Run
to begin the installation of the desktop
software to your PC.
5. Select
Yes
when asked if you want to install the desktop
software.
6. Select
Next
to begin set up and follow the on-screen
instuctions. When prompted, enter the username and
password created in step 2 above.
7. When Xpress Mail has successfully connected to your
corporate email account, the installed desktop software will
minimize and you will be redirected to a web page with the
message “
Congratulations. You are connected
” and will be
prompted to complete the set up on your Nokia E62.
After you have installed Xpress Mail on your device, created an
Xpress Mail account and downloaded the desktop software to
your PC, follow these steps to continue with Xpress Mail set up.
From your Nokia E62:
1. Open Xpress Mail by selecting the
Menu
key ( ) >
Apps.
>
Xpress Mail
.
2. Enter your 10 digit mobile number (numbers only) and select
Options
>
Next
.
3. Select
Work
, then seleck
OK
.
4. Select
Personal
then select
OK
.
5. Enter your Xpress Mail username and password created
earlier online, then select
Options
>
Done
.
6. Xpress Mail will begin to generate the encryption keys
and to synchronize your email with your Nokia E62. When
complete, you will receive a message that the process has
been successful and be redirected to your Xpress Mail
inbox.
7. (Optional). Xpress Mail for corporate email can also
synchronize your calendar and contact items. Consult your
Xpress Mail User Guide for instructions to enable calendar
and contact synchronization. You can find this guide at
www.cingular.com/xpressmail
.
Xpress Mail Personal Edition
Choose Your Email Solution