Connecting the advanced port replicator iii plus – Toshiba Tecra A7 User Manual
Page 126
User’s Manual
8-11
Optional Devices
■
RJ11 Modem jack
■
External monitor port
■
Parallel port
■
Serial port
■
PS/2 mouse port
■
PS/2 keyboard port
■
DC IN 15V jack
■
Security lock slot
■
Audio line-in, line-out jacks
■
Universal Serial Bus 2.0 port (four)
■
i.LINK (IEEE 1394) port
■
DVI port (This port is supported by some models)
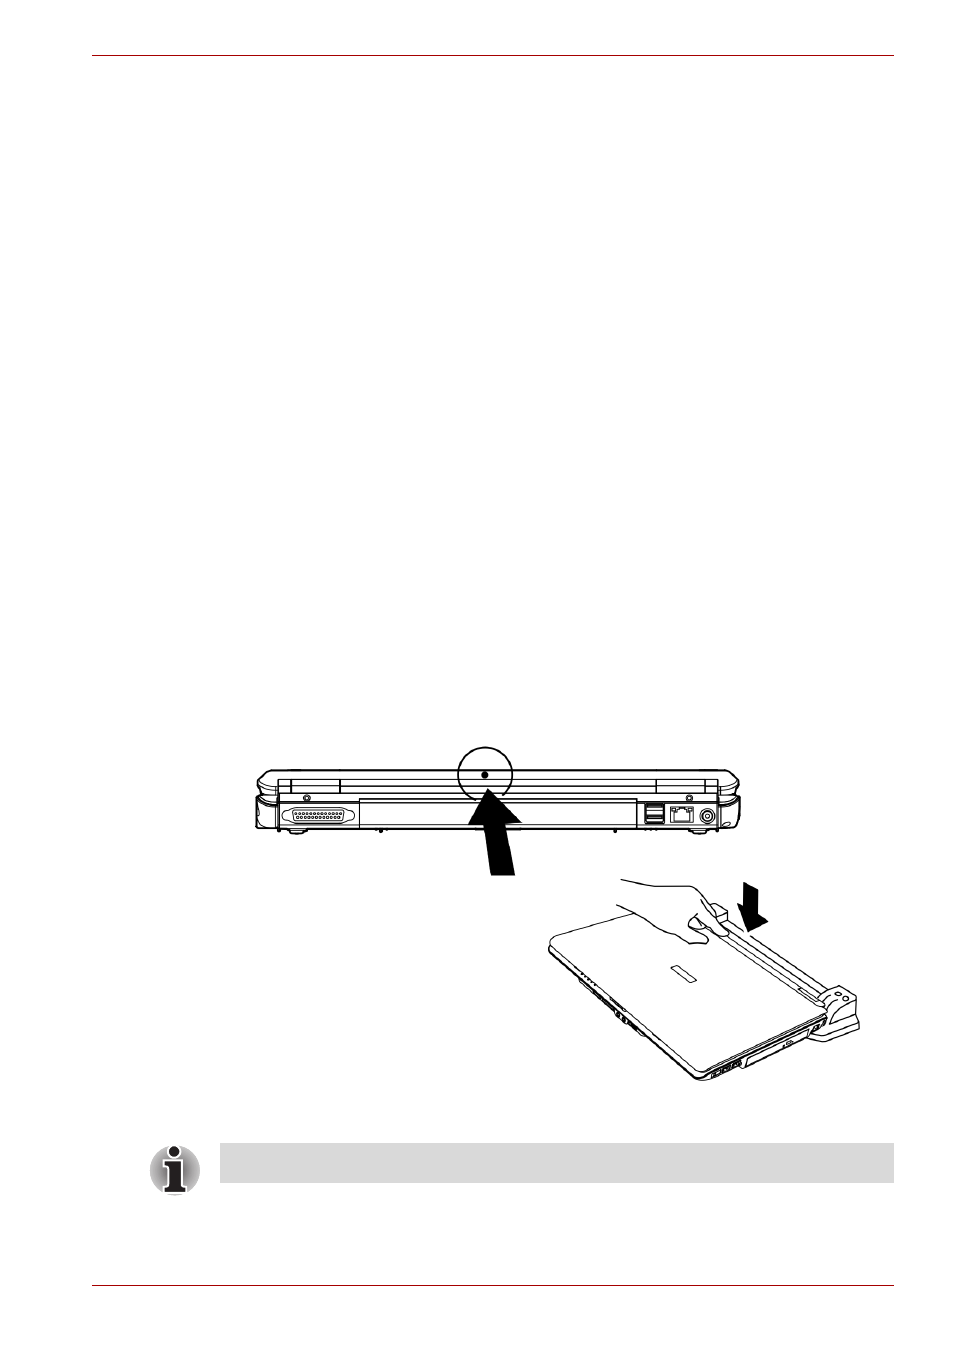
Connecting the Advanced Port Replicator III Plus
When connecting your TOSHIBA computer to the Advanced Port
Replicator III Plus (APR III Plus), please note the location of the expansion
port on your computer for proper alignment. Your computer will also have a
(S) symbol that indicates the docking position (depend on model you
purchased).
To properly connect the computer to the APR III Plus, first make sure that
the Slide Adjuster on the APR III Plus is set to the correct slot position for
your computer. Then check that the center mark arrow (located on the top-
back portion of the computer chasis as shown in Figure 1 below) on the
computer is aligned with the center mark (S) on the APR III Plus.
Press down the top-back portion of the computer to ensure a proper
connection (Figure 2).
When a Port Replicator is connected to the computer, remove all cables
connected to the computer.
Figure 1
Figure 2
Your system may vary from that shown in the above connection (Figure 2).