The input assign menu, Analog input, Component input (vsx-827 only) – Pioneer VSX-527-K User Manual
Page 50: The speaker system setting (vsx-827 only), The video parameter setting (vsx-827 only), Video converter
Home Menu
7
7
50
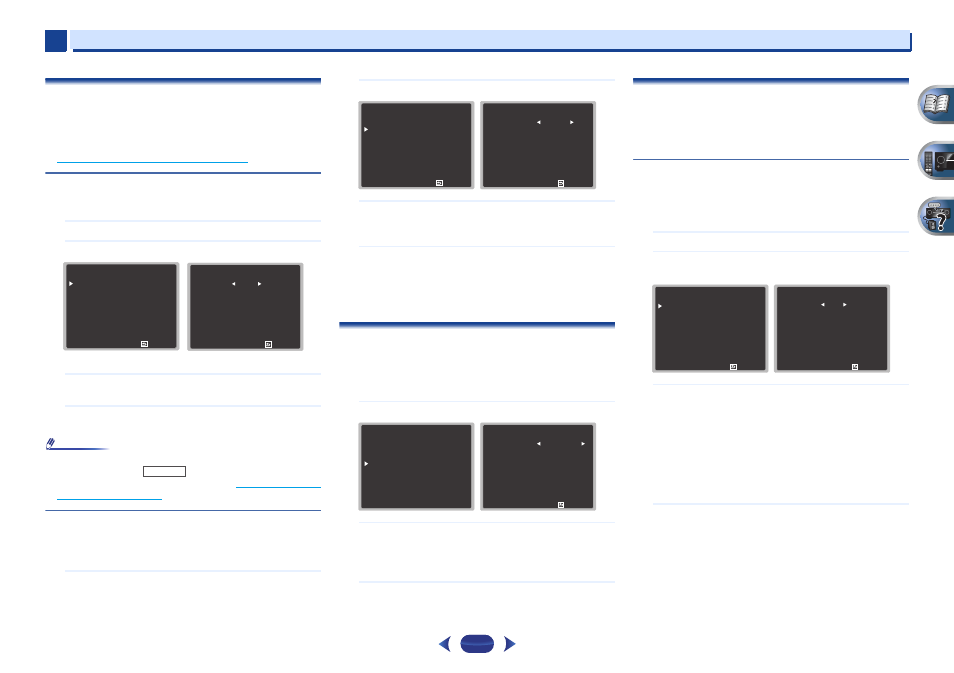
The Input Assign menu
Assigns input function for analog audio input terminal and
component video input terminal (component video input
terminal for VSX-827 only).
•
For the assignment of the digital signal inputs, see
Selecting the audio input signal on page 25
.
Analog Input
ANALOG IN1
audio input terminal is assigned to CD under
factory settings, but this can be changed to TV input.
1
Select ‘Input Assign’ from the Home Menu.
2
Select ‘Analog Input’ from the Input Assign menu.
3
Select the desired input option for the ANALOG IN1
audio input terminal.
4
When you’re finished, press
RETURN
.
You return to the Input Assign menu.
Note
•
When playing analog input audio, switch to the CD or TV
input menu, press
and press
SIGNAL SEL
several times to choose A (Analog). (see
Selecting the audio
input signal on page 25
)
Component Input (VSX-827 only)
COMPONENT VIDEO IN1
input terminal is assigned to DVD
under factory settings, but this can be changed to SAT/CBL
input.
1
Select ‘Input Assign’ from the Home Menu.
2
Select ‘Component Input’ from the Input Assign menu.
3
Select the desired input option for the COMPONENT
VIDEO IN1 input terminal.
Select between DVD, SAT/CBL or OFF.
4
When you’re finished, press
RETURN
.
You return to the Input Assign menu.
•
Make sure you have connected the audio from the
component to the corresponding inputs on the rear of
the receiver.
The Speaker System setting (VSX-827 only)
Specify either using the surround back speaker (or the
speaker B), or the front height speaker connection with the B-
speaker terminals.
•
Default setting: Surr. Back
1
Select ‘Speaker System’ from the Home Menu.
2
Select the speaker system setting using
/
.
•
Surr. Back
– Sound is output from the surround back
speaker or the speaker B.
•
Height
– Sound is output from front height speaker.
3
When you’re finished, press
RETURN
.
You return to the Home Menu.
The Video Parameter setting (VSX-827 only)
This receiver can up-convert the video signal input from the
composite or component video terminals; the output is from
the HDMI OUT terminal. The following shows the various
settings for this function.
Video Converter
This setting specifies valid/invalid for the function that
converts the input video signal from each composite video
terminal. When OFF is selected, Resolution and Aspect can
not be set.
1
Select ‘Video Parameter’ from the Home Menu.
2
Select ‘Video Converter’ from the Video Parameter
menu.
3
Select the setting for converting each type of video
input.
•
ON
– The signal is output also to the HDMI OUT
terminal.
•
OFF
– The signal input from the HDMI terminal of the
selected input function will be output from the HDMI
OUT
terminal. The signal input from the composite
and component video terminals will not be output from
the HDMI OUT terminal.
4
When you’re finished, press
RETURN
.
You return to the Video Parameter menu.
3 . I n p u t A s s i g n
R e t u r n
a . A n a l o g I n p u t
b . C o m p o n e n t I n p u t
3 a . A n a l o g I n p u t
R e t u r n
A n a l o g C D
VSX-827
RECEIVER
3 . I n p u t A s s i g n
R e t u r n
a . A n a l o g I n p u t
b . C o m p o n e n t I n p u t
3 b . C o m p o n e n t I n p u t
R e t u r n
C o m p o n e n t DV D
H o m e M e nu
1 . Au t o M C AC C
2 . M a nu a l S P S e t u p
3 . I n p u t A s s i g n
4 . S p e a k e r S y s t e m
5 . V i d e o Pa r a m e t e r
6 . H D M I S e t u p
7 . Au t o Pow e r D ow n
8 . N e t wo r k S t a n d by
9 . F L D e m o M o d e
4 . S p e a k e r S y s t e m
R e t u r n
S P S y s t e m S u r r. B a ck
5 . V i d e o Pa r a m e t e r
R e t u r n
a . V i d e o C o nv e r t e r
b . R e s o l u t i o n
c . A s p e c t
5 a . V i d e o C o nv e r t e r
DV D
S AT / C B L
R e t u r n
[ ON ]
O N