Adjusting the filter, Adjusting the front and rear speaker, Output – Pioneer AVH-X8600BT User Manual
Page 103: Using the subwoofer output 103, Audio adjustments, Adjusting the front and rear speaker output, Using the subwoofer output
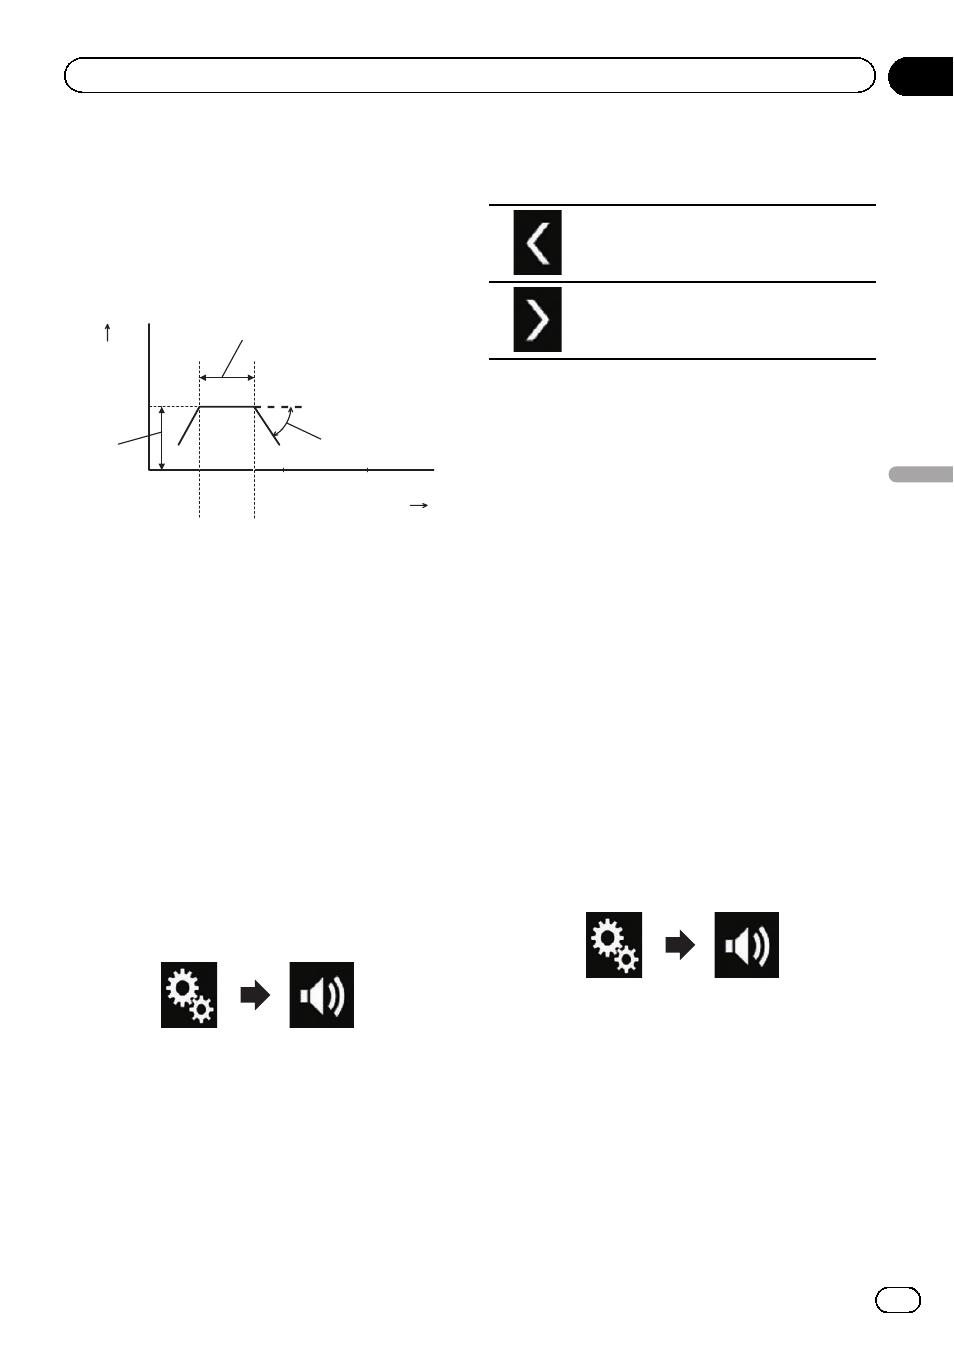
Adjusting the filter
The following adjustments can be made dur-
ing filter adjustments. Make the appropriate
adjustments for the reproduced frequency
band and characteristics of the connected
speaker unit.
20
1 k
0
10 k
Frequency (Hz)
3
4
5
2
Level (dB)
100
1
1 Reproduced frequency band
2 Slope adjustment
3 Cut-off frequency of the LPF
4 Cut-off frequency of the HPF
5 Level adjustment
Adjusting the front and rear
speaker output
You can set the frequency range for the sound
output from the front and rear speakers.
1
Press the HOME button to display the
Top menu screen.
2
Touch the following keys in the follow-
ing order.
The
“Audio” screen appears.
3
Confirm that
“Rear Speaker” is set to
“On”.
p The default setting is “On”.
4
Touch [Cross Over].
The
“Cutoff” screen appears.
5
Touch the following keys to select
“Front” or “Rear”.
Selects the adjustable previous speak-
er.
Selects the adjustable next speaker.
6
Touch [HPF] to turn on.
7
Drag the line graph horizontally to ad-
just the range of cut-off frequency from
“50” Hz to “200” Hz.
p The default setting is “100” Hz.
8
Drag the tip of the slope to adjust the
range of level between
“–6” dB/oct and “–
18
” dB/oct.
p The default setting is “–12” dB/oct.
Using the subwoofer output
This product is equipped with a subwoofer out-
put mechanism, which can be turned on or
off.
1
Press the HOME button to display the
Top menu screen.
2
Touch the following keys in the follow-
ing order.
The
“Audio” screen appears.
3
Touch [Subwoofer] to set the subwoo-
fer output
“On”.
p The default setting is “Off”.
4
Touch [Subwoofer].
The
“Cutoff” screen appears.
Engb
103
Chapter
20
Audio
adjustments
Audio adjustments