Setting the date/time – Olympus E-620 User Manual
Page 15
15
EN
Basic guide
Setting the date/time
ENG.
W
s
’--.--.--
--:--
SET
BACK
OFF
5SEC
cMENU DISPLAY
FIRMWARE
REC VIEW
j±0 k±0
Date and time information is recorded on the card together with
the images. The file name is also included with the date and time
information. Be sure to set the correct date and time before using
the camera.
CARD SETUP
NORM
CUSTOM RESET
PICTURE MODE
GRADATION
IMAGE ASPECT
SET
N
BACK
4:3
Y
Y/M/D
CANCEL
M
D
TIME
2009
Y
Y/M/D
CANCEL
M
D
TIME
2009 03 01 14
00
Y
Y/M/D
M
D
TIME
SET
CANCEL
2009 03 01 14 00
Y
Y/M/D
M
D
TIME
SET
CANCEL
SET
’09.03.01
14:01
BACK
ENG.
W
s
OFF
5SEC
cMENU DISPLAY
FIRMWARE
REC VIEW
j±0 k±0
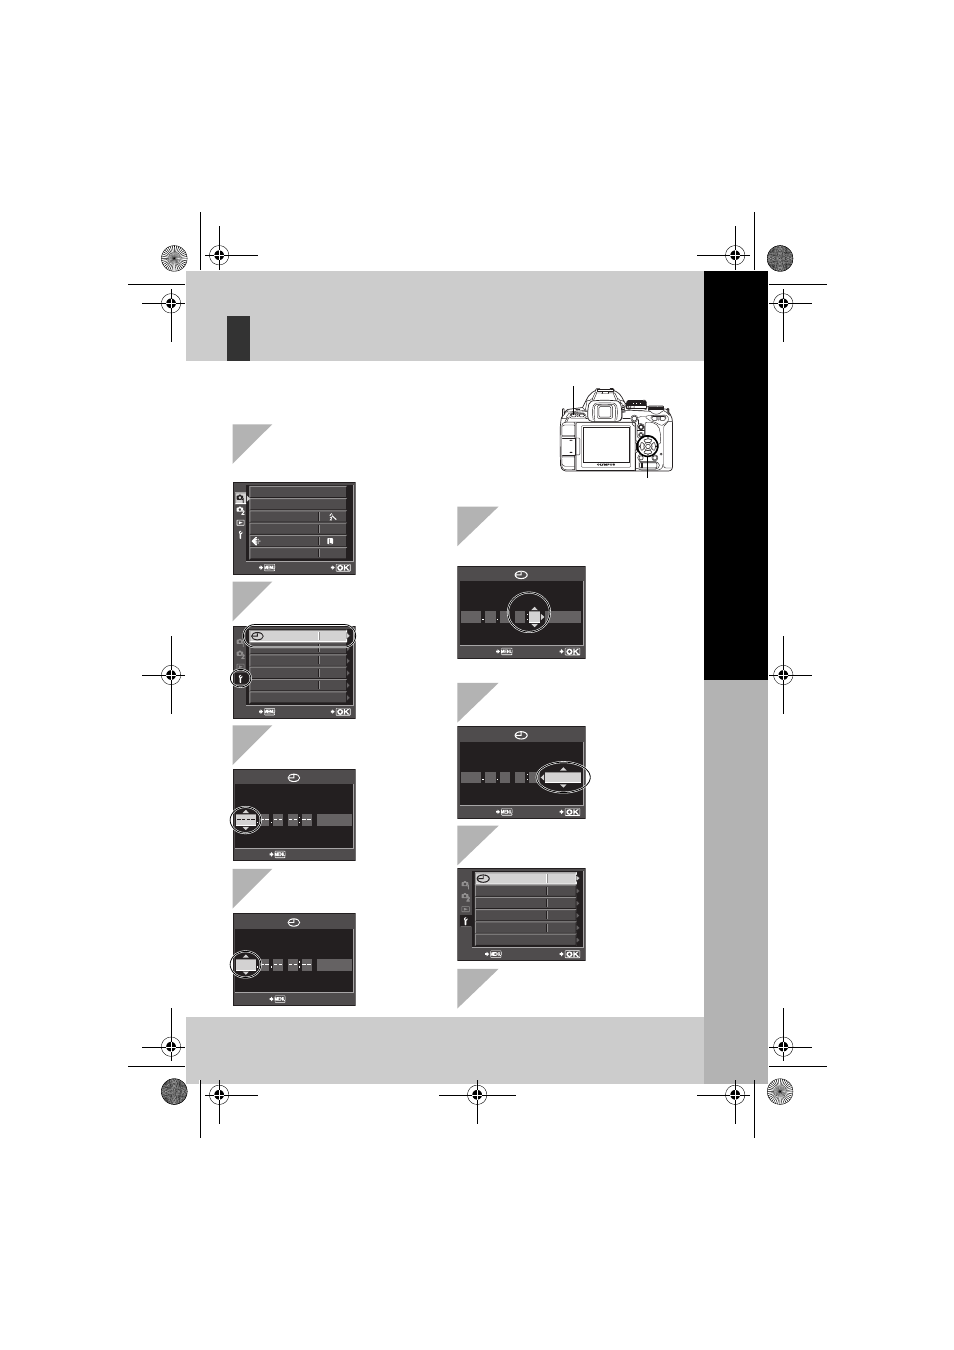
1
Press the
MENU button
2
Use
fg to select [d], then
press
i
3
Use
fg to select [X], then
press
i
4
Use
fg to select [Y], then
press
i
5
Repeat this procedure until the
date and time are completely set
6
Use
fg to select the date
format
7
Press the
i button
8
Press the
MENU button to exit
MENU button
• The time is displayed in the 24-hour format.
Arrow pad
fghi
• The menu screen is displayed on the
LCD monitor.
Pr
ep
ar
at
ions
f
o
r sh
oot
in
g
E-620_MASTER.fm Seite 15 Dienstag, 17. Februar 2009 11:04 11