0 installation / operation – AEG Rear Camera System RV 3.5 User Manual
Page 20
10
3
4
2
1
5
6
7
8
9
11
Step 2: Hole for camera cable
Now look for an opening / drill hole near the li-
cense plate opening into the interior of the vehicle
to feed the connector cable plug of the camera
into the interior of the vehicle. For added visibility
and easy installation remove the interior trim near
the license plate. If the vehicle has no opening,
drill a hole using an 11 mm (diameter) drill bit in
the area covered by the license plate.
Caution: be sure there are no elec-
trical wires or other automotive parts
in the area where you will be drilling
which could be damaged!
To protect the borehole in the metal panel from
corrosion the metal edges should be coated with
a suitable paint coating (e.g. automaker‘s touch-
up pen) and allow to dry adequately.
1
2
3
4
5
6
7
9
10
11
1
Image 2
Step 1: Remove license plate
First remove the rear license plate and, if appli-
cable, also the license plate frame (see image 2).
Caution! Due to differences in technical and
design-related vehicle types, these instructions for
use do not apply to all vehicle models.
4.1 Installing the backup camera
system
4.0 INSTALLATION /
OPERATION
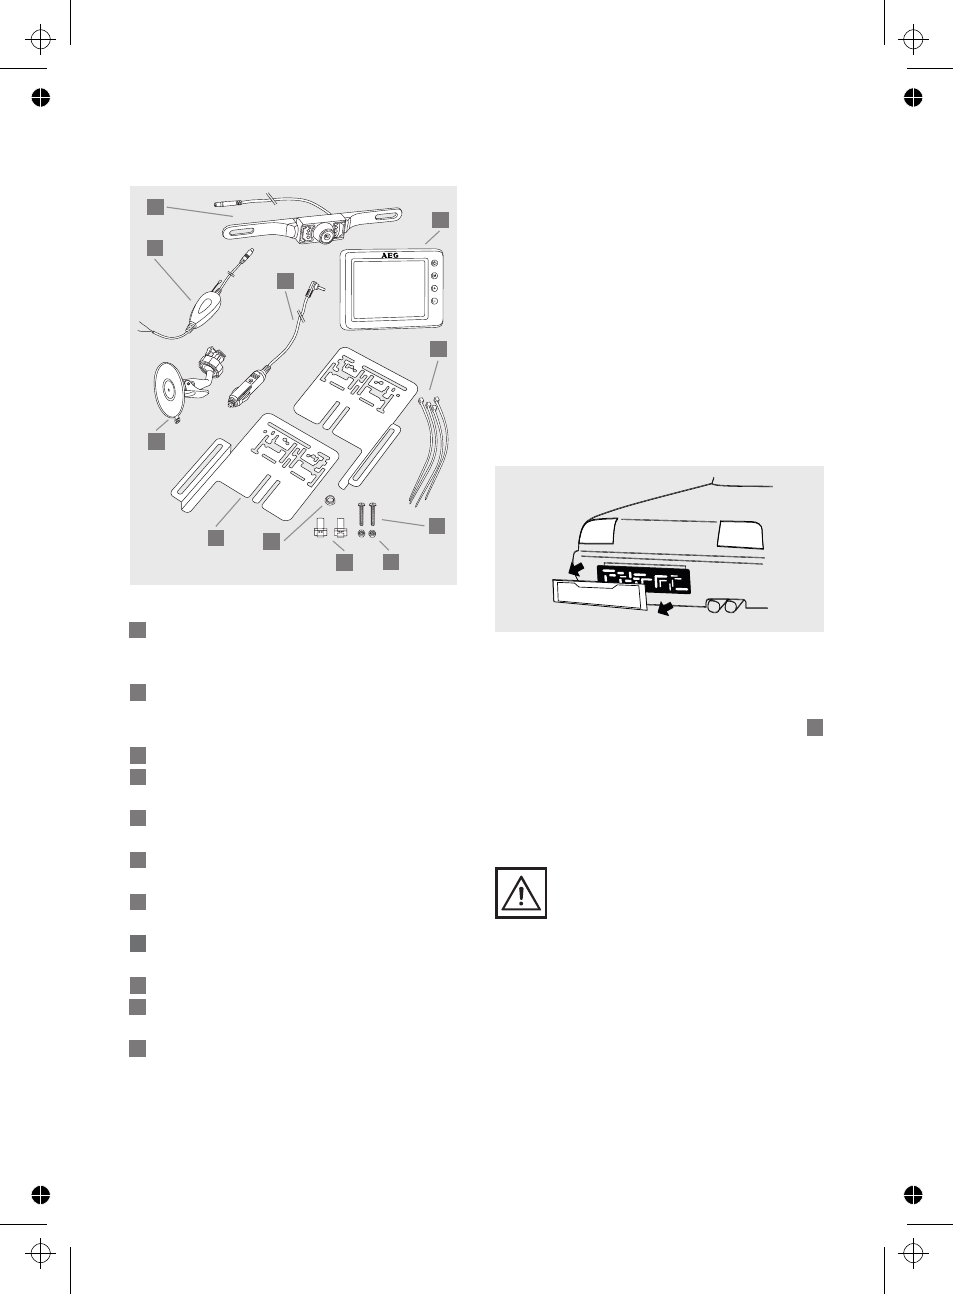
Camera with 7 infrared LEDs and connec-
tion cable with plug for connecting to the
transmitter
Monitor cable with 12 V plug for con-
necting to the cigarette lighter, with 1A
(ampere) fuse
LCD monitor 3.5" (8.9 cm)
Cable ties for securing the transmitting
equipment
Thread screws for attaching the camera to
the mounting bracket
Clamping nuts for securing the thread
screws
Clamped connections for connecting to
reversing light wires
Plastic ring as edge protector for the cable
feed boreholes
Brackets for mounting the camera
Monitor arm with suction cup base for
securing the monitor to the windshield
Radio transmitter with connector cable and
socket to the camera, including connector
cable with a red and black cable for
connecting to the reversing light und affixed
adhesive strip for attaching the transmitter.
3.2 Product overview
20
8
Image 1
97152_R
ckfahrkamera_RV3.5_ Manual _07_03_12_Print
Mittwoch, 7. M
rz 2012 11:42:16