E2 clearing the paper path – Xerox WorkCentre XD103f Digitaler Kopierer - Laserdrucker-10252 User Manual
Page 44
36
– E2 Clearing the Paper Path
When a paper misfeed occurs the red misfeed indicator flashes on the
copier diagram, and an E2 status code will flash in the display window.
Paper misfeeds may occur in the areas shown below. Follow the steps
below to locate and clear the misfeed.
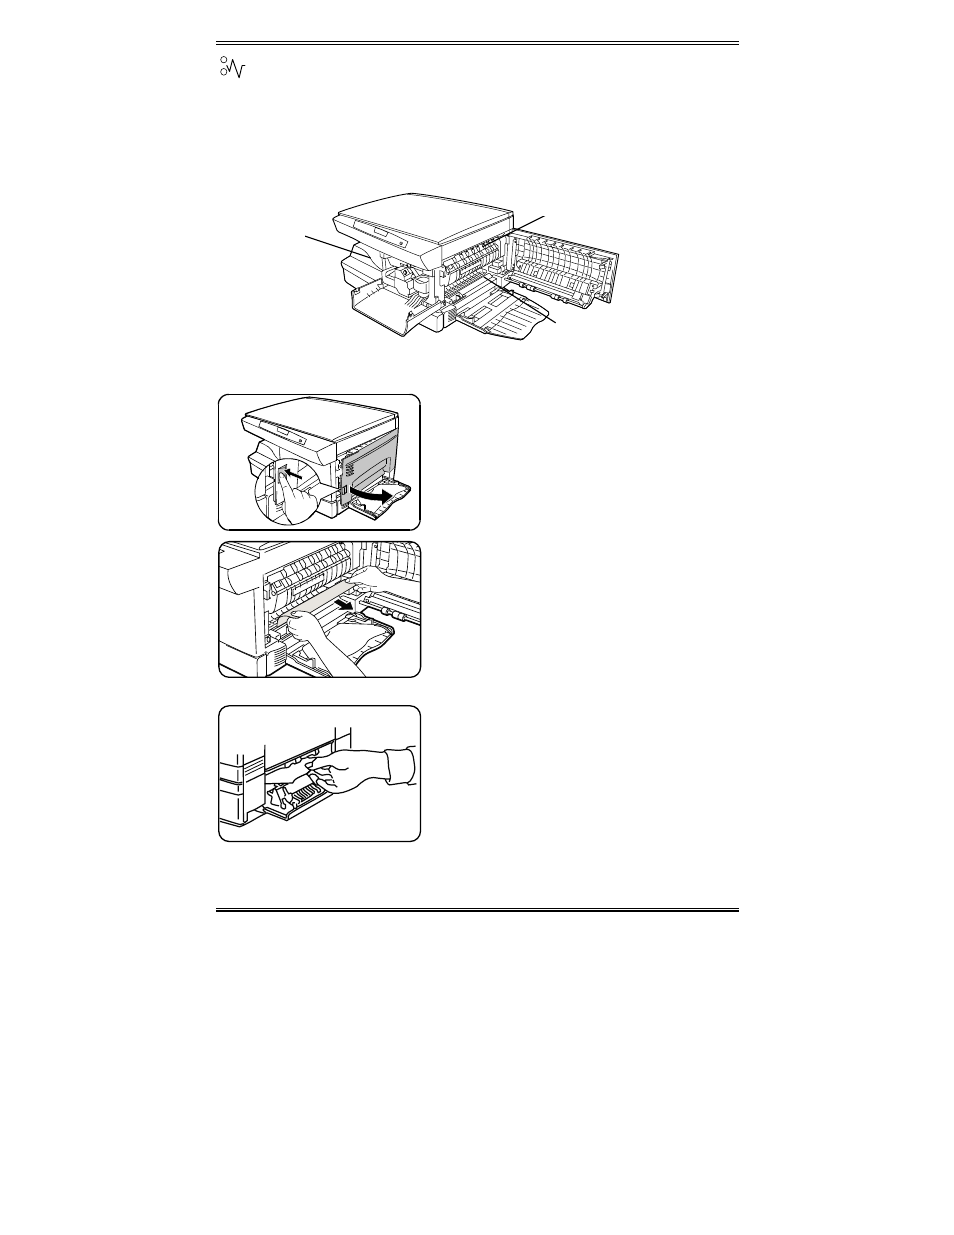
Paper Feed Area
Note: Ensure that the alternate paper tray
is lowered (XD104/ 105f/ 130df/ 155df
only).
1. Press the release lever to open the side
cover.
Caution: Do not touch the shiny drum
cartridge surface. Scratches or smudges
will result in poor copy quality.
Do not remove paper through the bypass.
Unfused toner may adhere in the area,
resulting in smudged copies.
2. Carefully remove the misfed paper in
the direction shown.
Steps 3 – 5 for XD120f/130df/155df only
3. Lower the right side tray 2 access door.
4. Remove the misfed paper.
5. Close the access door.
If paper cannot be removed, skip to the
Fuser Area.
6. Closer the side cover.
Fuser Area
Paper Feed Area
Exit Area
- WorkCentre XD100 Digitaler Kopierer - Laserdrucker-9581 WorkCentre XD130df Digitaler Kopierer - Laserdrucker-9586 WorkCentre XD155 Digitaler Kopierer - Laserdrucker-10257 WorkCentre XD105f Digitaler Kopierer - Laserdrucker-10253 WorkCentre XD120 Digitaler Kopierer - Laserdrucker-9584 WorkCentre XD130df Digitaler Kopierer - Laserdrucker-10256 WorkCentre XD105f Digitaler Kopierer - Laserdrucker-9583 WorkCentre XD120 Digitaler Kopierer - Laserdrucker-10254 WorkCentre XD125f Digitaler Kopierer - Laserdrucker-10255 WorkCentre XD125f Digitaler Kopierer - Laserdrucker-9585 WorkCentre XD155 Digitaler Kopierer - Laserdrucker-9587 WorkCentre XD100 Digitaler Kopierer - Laserdrucker-10251 WorkCentre XD103f Digitaler Kopierer - Laserdrucker-9582