Installation – Xerox WorkCentre XD103f Digitaler Kopierer - Laserdrucker-10252 User Manual
Page 17
9
Installation
(continued)
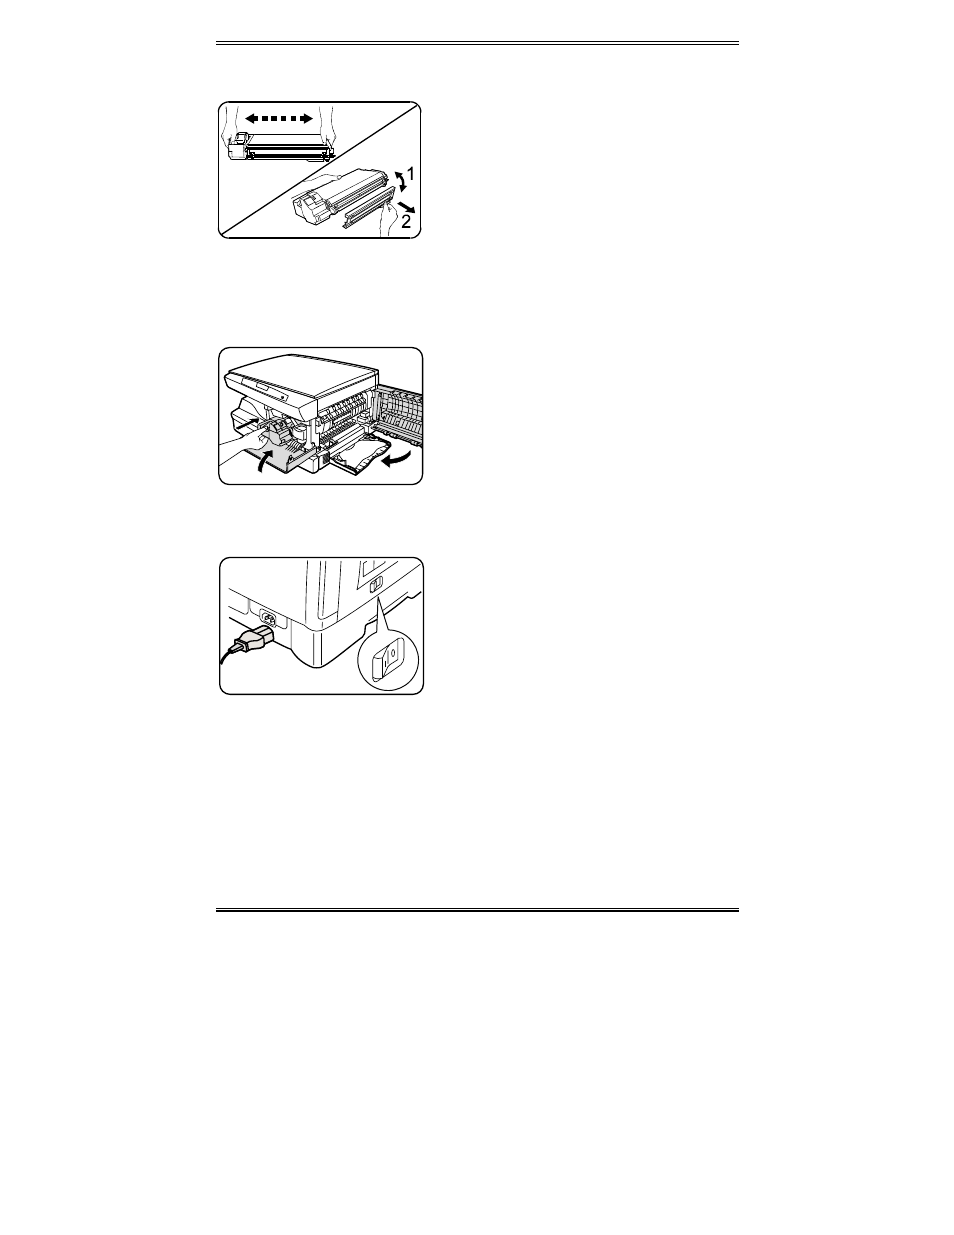
13. Remove the starter toner cartridge from
the silver bag. Vigorously shake the
cartridge to loosen the toner.
•
Thoroughly shaking the cartridge will
assure maximum copies per
cartridge.
•
Xerox has included a Starter Toner
Cartridge. Purchased replacement
toner cartridges will yield
approximately three times the
number of copies.
14. Remove the toner cartridge cover.
1
2
3
15. Slide the toner cartridge into the
WorkCentre until it locks into place.
16. Close the front cover and the side
cover.
Skip to the Printer Driver Software
Installation section in this User Guide to
set up the WorkCentre XD for printing.
17. Plug the power cord into the
WorkCentre and then into a grounded
outlet.
18. Turn on the power switch. In
approximately two seconds the ready
indicator will light. Copying is now
possible.
Note: Save the carton and packing
materials. They should be used to repack
the WorkCentre if it has to be shipped for
servicing or moved.
- WorkCentre XD100 Digitaler Kopierer - Laserdrucker-9581 WorkCentre XD130df Digitaler Kopierer - Laserdrucker-9586 WorkCentre XD155 Digitaler Kopierer - Laserdrucker-10257 WorkCentre XD105f Digitaler Kopierer - Laserdrucker-10253 WorkCentre XD120 Digitaler Kopierer - Laserdrucker-9584 WorkCentre XD130df Digitaler Kopierer - Laserdrucker-10256 WorkCentre XD105f Digitaler Kopierer - Laserdrucker-9583 WorkCentre XD120 Digitaler Kopierer - Laserdrucker-10254 WorkCentre XD125f Digitaler Kopierer - Laserdrucker-10255 WorkCentre XD125f Digitaler Kopierer - Laserdrucker-9585 WorkCentre XD155 Digitaler Kopierer - Laserdrucker-9587 WorkCentre XD100 Digitaler Kopierer - Laserdrucker-10251 WorkCentre XD103f Digitaler Kopierer - Laserdrucker-9582