Hardware setup, E-20, Click the [setup] button – Konica Minolta magicolor plus User Manual
Page 20: Click the desired item to select it
E-20
Use this procedure to set the captureboard’s operating environment from the computer. The factory defaults are
shown below.
Setting item
Description
Factory default
Color Mode
Color mode for scanning, Color/Black & White
Black & White
Density
Density for scanning, Standard/Dark
Standard
Date/time setting
Set of the date and time for the time stamp
Japan Standard Time
File Format
Sets the format of the images stored on the USB memory
device.
JPEG/PNG/PDF
PNG
Paper Size
A4/Letter
A4
Aspect Ratio
Sets the aspect ratio for printed images.
Original Image/Match Paper Size
Match Paper Size
Erase Reminder
Sheet rear surface erase reminder function: Disable/Enable
Disable
Restrict color mode
Setting for disabling printing/storing in the color mode
Disable
Resolution
Selection of resolution for images stored in the memory and
images transferred to the computer : Standard
Standard : 1/2 the vertical/horizontal size of the scanned image
High : 1/1 the vertical/horizontal size of the scanned image
Standard
Header/footer (date/
time stamp)
Upon shipment from factory :
Writing of date/time when printing/storing : Enabled/Disabled
Original editing : Header/footer data output *
Enabled
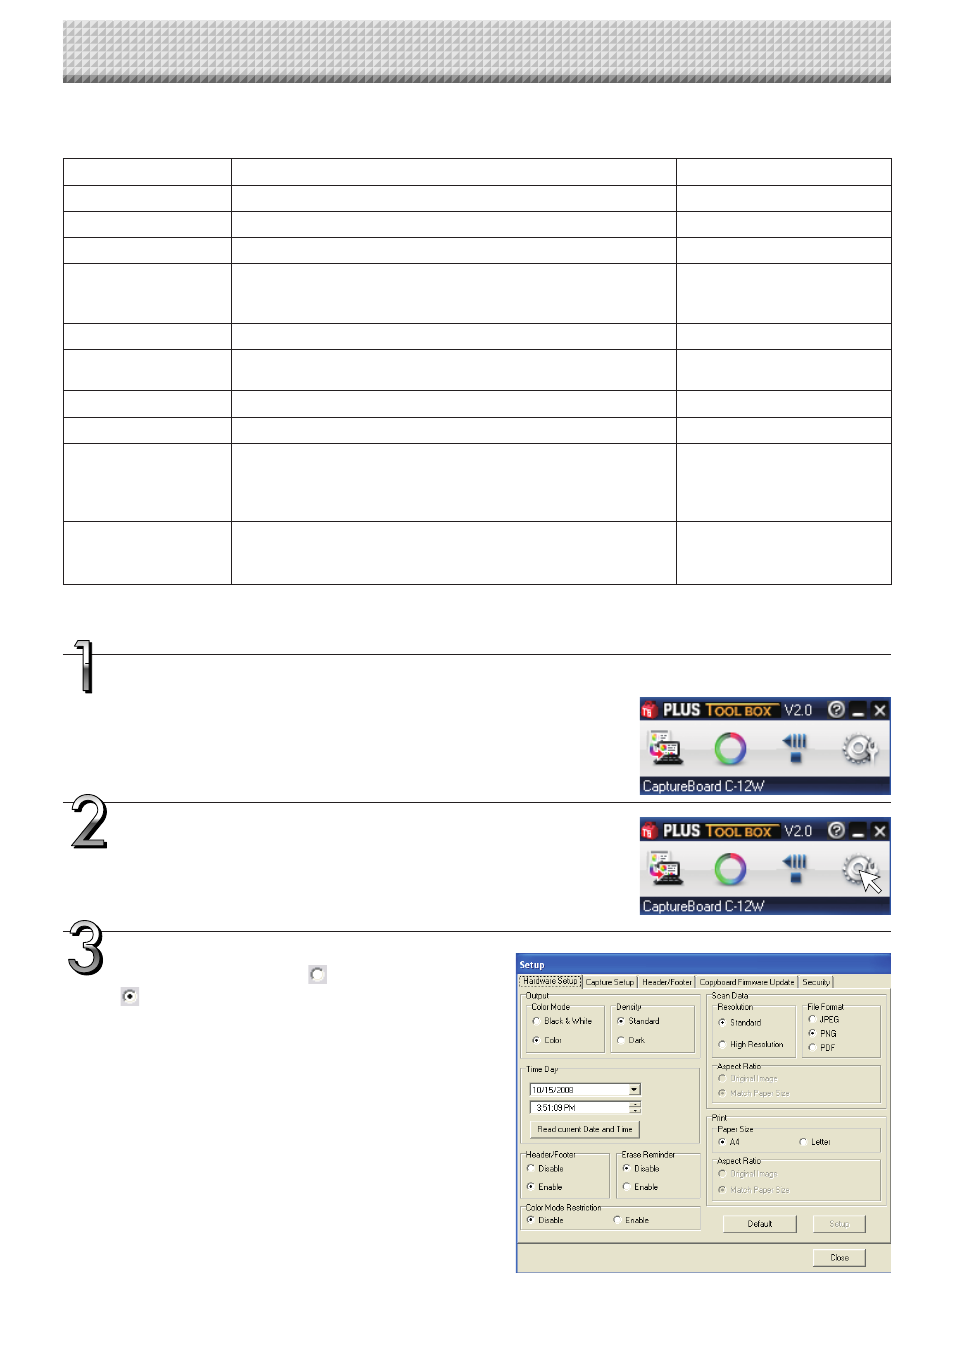
Hardware Setup
Turn on the captureboard’s power, start up the computer, then make the USB
connections.
The “PLUS TOOLBOX” main menu appears on the computer.
Click the [Setup] button.
The [Hardware Setup] screen appears.
Click the desired item to select it.
For the radio buttons, when
is clicked, it switches to
(only one radio button can be selected within each
item).
* The date/time stamp can be displayed at the user’s discretion as part of the header/footer data.
Upon shipment from the factory, only the time stamp is displayed.
● Output setting
Color Mode
This sets the color of the output image.
Color: Four colors (red, green, blue and black)
Black & White: Black only
Density
This sets the density of the output image.
If the output image is too light with the standard setting,
set to "Dark".