Vogels PFW 6851 User Manual
Page 12
Page 12
Installation Instructions
PFW 6851
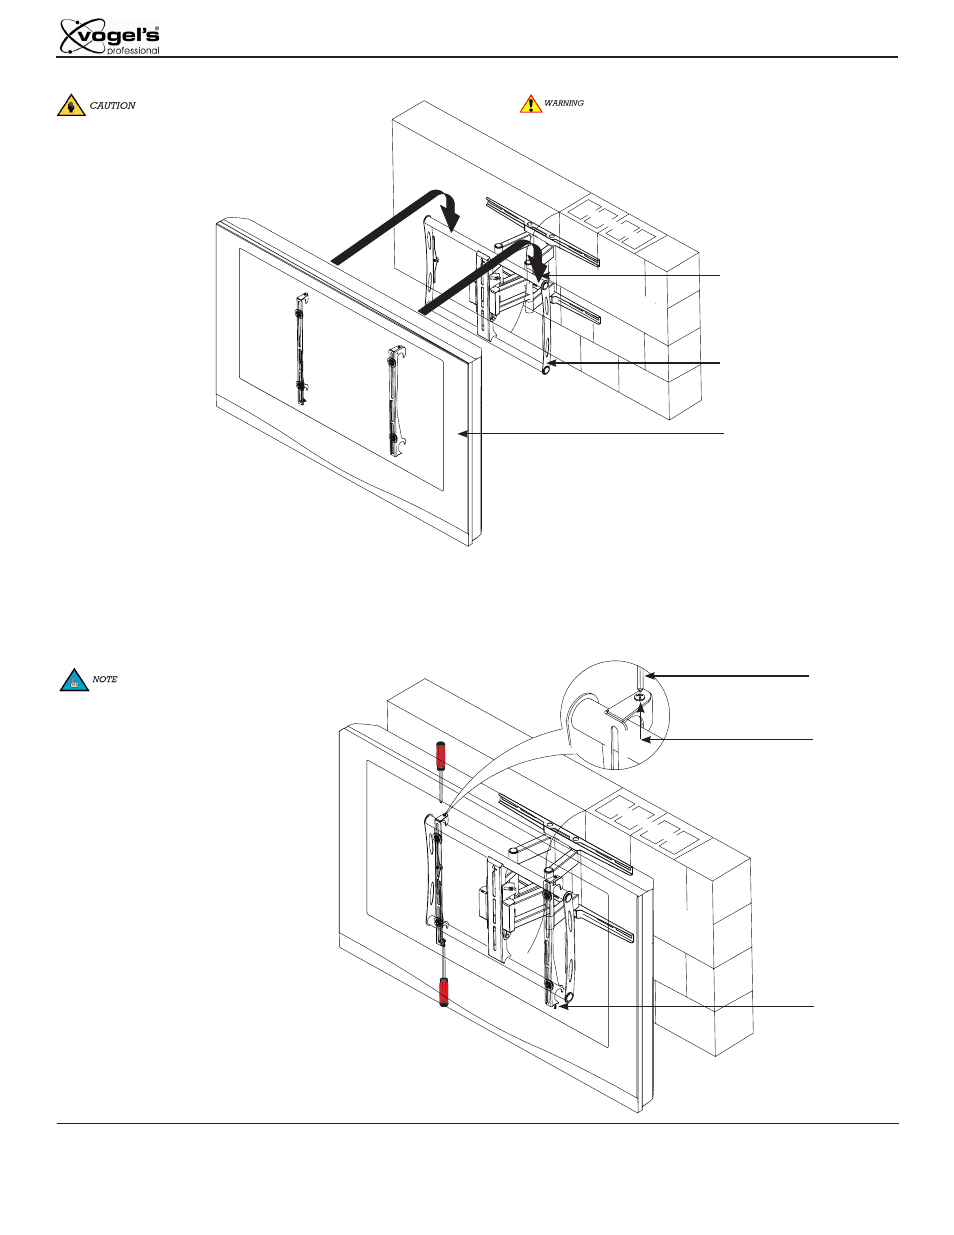
Attaching the Flat Panel to the Wall Plate
Upper
Mounting
Bar
Lower
Mounting
Bar
Flat Panel
Two people are required for this step.
Do not release the flat panel until verifying the
connection between the universal mounting brackets
and the upper and lower mounting bars.
Step 1. Place the universal brackets and the flat panel over and onto the upper and lower mounting bars of the PFW 6851 and lower it
down. Do not release the flat panel until the flat panel is resting securely on the upper and lower mounting bars.
Securing and Leveling the Flat Panel
Screwdriver
Locking
Screw
(Pre-installed)
Leveling
Screw
(Pre-installed)
Step 1. Use a screwdriver to adjust the
two (2) M6 x 30 leveling screws,
located on the top of the
mounting brackets.
In the event that the flat panel
is tilted too far to one side, the
leveling screws will allow you
to compensate for this tilt by
simply adjusting the screws
with a screwdriver (see
illustration to the right for a
clearer view).
Step 2. Once the flat panel is level, use a
screwdriver to tighten the two (2)
M6 x 30 locking screws, located
on
the
bottom
of
the
mounting brackets. Do not
over-tighten these screws.