Vogels PFW 6852 User Manual
Page 7
PFW6852
Installation Instructions
Visit the Vogel’s website at http://www.vogels.com
Page 7
n
n
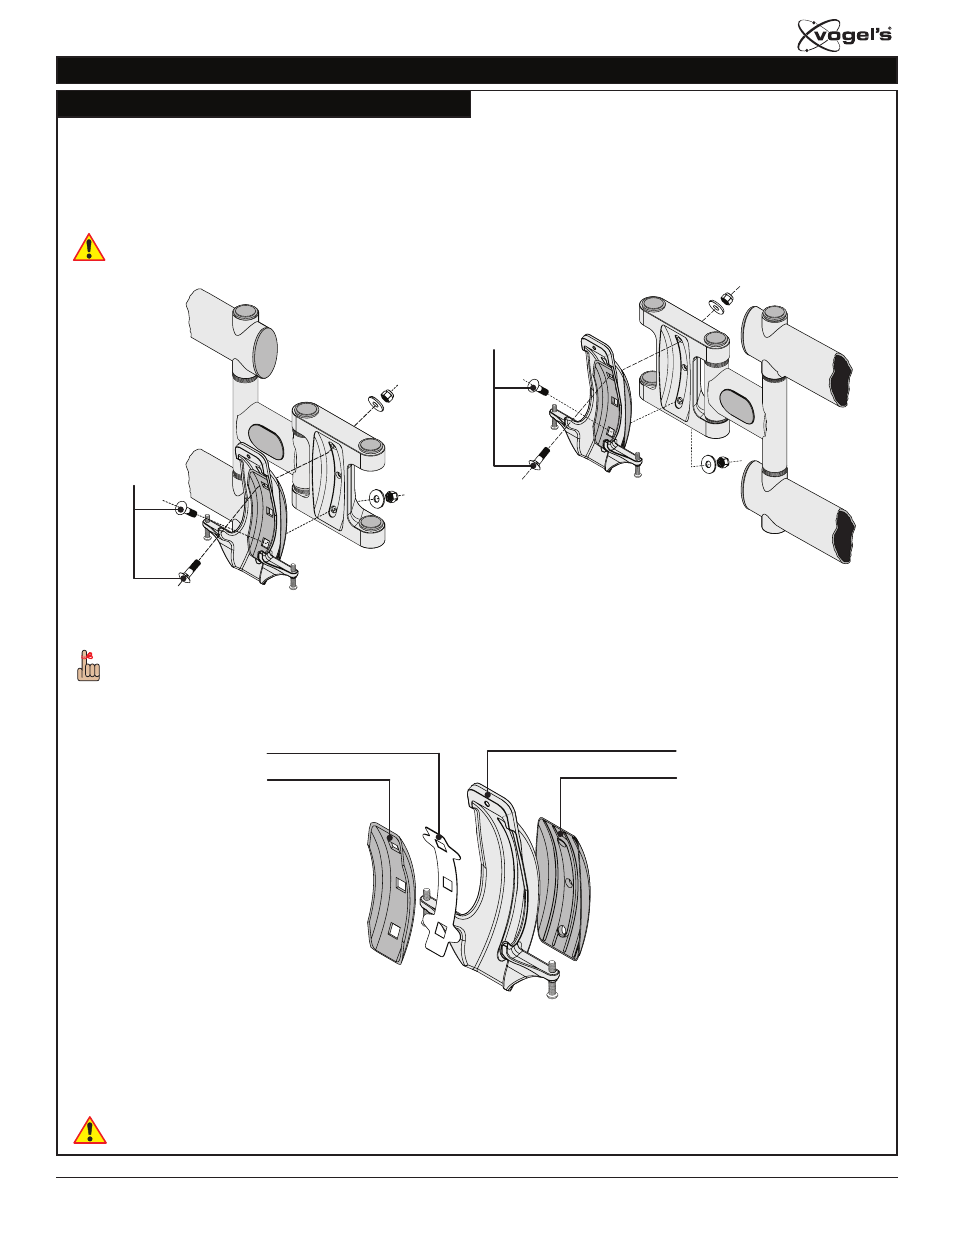
Remove the Nose Piece by removing the tension bolts, tension bolt nuts, and washers.
n
o
Detach the Nose Piece assembly, rotate it 180°, and place it back onto your Swingout Arm.
n
p
Slide the tension bolts back into the holes and attach the tension bolt nuts and washers from the backside of the
Nose Piece assembly.
n
q
Tighten the tension bolts.
Do not overtighten the tension bolts.
Nose Piece Orientation
Installing the Swingout Arm (cont’d)
Left-Hand Swingout Orientation
Right-Hand Swingout Orientation
Tension Bolt Nuts
and Washers
Tension Bolt Nuts
and Washers
Tension Bolts
Tension Bolts
Nose Piece
Nose Piece
The Nose Piece consists of four parts that must stay together in the order that they were manufactured. If they
become separated during any of the Nose Piece Orientation steps, re-assemble the parts in the order shown
below.
If you will be installing your PFW6852 mount on to a wood stud surface, proceed to the
“Wood Stud Installation”
section.
If you will be installing your PFW6852 mount on to a concrete surface, proceed to the
“Concrete Installation”
section.
If you are installing your PFW6852 mount to wood studs, the drywall must be at least 1/2” thick.
Outer Radial Bearing
Outer Radial Dish
Inner Radial Dish
Inner Radial Bearing