Table 1: tp-185 front and rear panel features, Table 1 – Kramer Electronics TP-185 User Manual
Page 8
Defining the TP-185 8 Channel UXGA/Audio/RS-232 to CAT 5 Transmitter
5
5
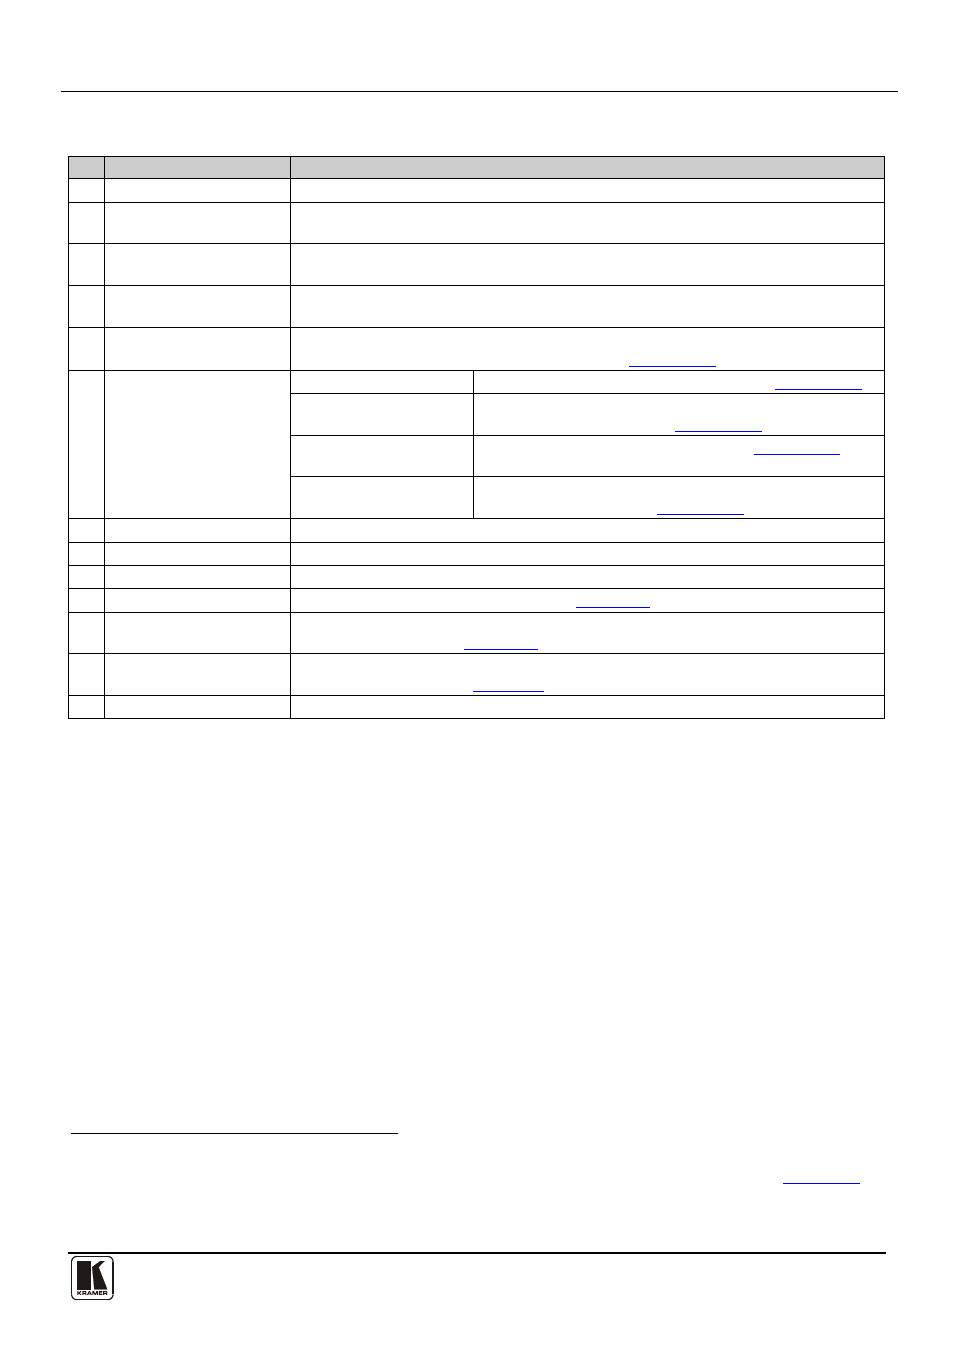
Table 1: TP-185 Front and Rear Panel Features
#
Feature
Function
1
POWER LED
Lights green when the unit is turned on
2
VIDEO INPUT 15-pin HD
Connectors
Connect to the VGA/UXGA video sources (from 1 to 8)
3
OUT STP/UTP RJ-45
Connectors
Connect to the TP receivers (from 1 to 8)
4
AUDIO INPUT 3.5mm
Mini Jacks
Connect to the unbalanced stereo audio sources (from 1 to 8)
5
RS-485 TERM DIP-switch Sets the termination of the RS-485 bus
: ON for RS-485 bus termination with 120
Ω
(default), OFF for no RS-485 bus termination (see
Section 7.1.1
6
SETUP DIP-switch
Reply DIP-switch 1
Enables and disables the Reply feature (see
Section 7.1.2
Address DIP-switches 2,
3 and 4
Determines the reply source (hardware mode) or machine
number (software mode) see
Baud Rate DIP-switches
5, 6 and 7
Section 7.1.3
Determines the serial port baud rate (see
Section 7.1.4
Hardware/Software
DIP-switch 8
Determines whether the data transmission path is set by
software or hardware (see
Section 7.1.5
7
AC Mains Connector
Connect to the AC mains power
8
AC Mains Fuse
AC mains power fuse
9
AC Mains Power Switch
Turns the unit power ON or OFF
10 RS-232 Terminal Block
Connect to a PC or remote controller (see
Section 6.4
11
)
RS-485 Terminal Block
Pins B (–) and A (+) are for RS-485; Pin G (Ground) may be connected to the shield of
the cable if required (see
Section 6.3
12
)
FACTORY RESET Button Press and hold while powering up the unit to reset the data transmission setup to its
factory default value
(see
Section 10
13
PROG Button
For service use only
1 See item 9
2 The first and the last units on the RS-485 line should be terminated (on). Other units should be unterminated (off), see
Section 7.1.1
3 Turn the unit off using the power switch and then turn it on while pressing the Factory Reset button. The unit will power up and load
its memory with the factory default definitions