6 connecting and configuring the tp-185, 1 connecting the tp-185, Connecting and configuring the tp-185 – Kramer Electronics TP-185 User Manual
Page 10: Connecting the tp-185
Connecting and Configuring the TP-185
7
7
6 Connecting and Configuring the TP-185
This section comprises connecting:
• The TP-185 (see
Section 6.1
• To the TP-185 via RS-232 (see
)
Section 6.2
• To the TP-185 via RS-485 (see
Section 6.3
• Multiple TP-185 units via RS-485 (see
Section 6.4
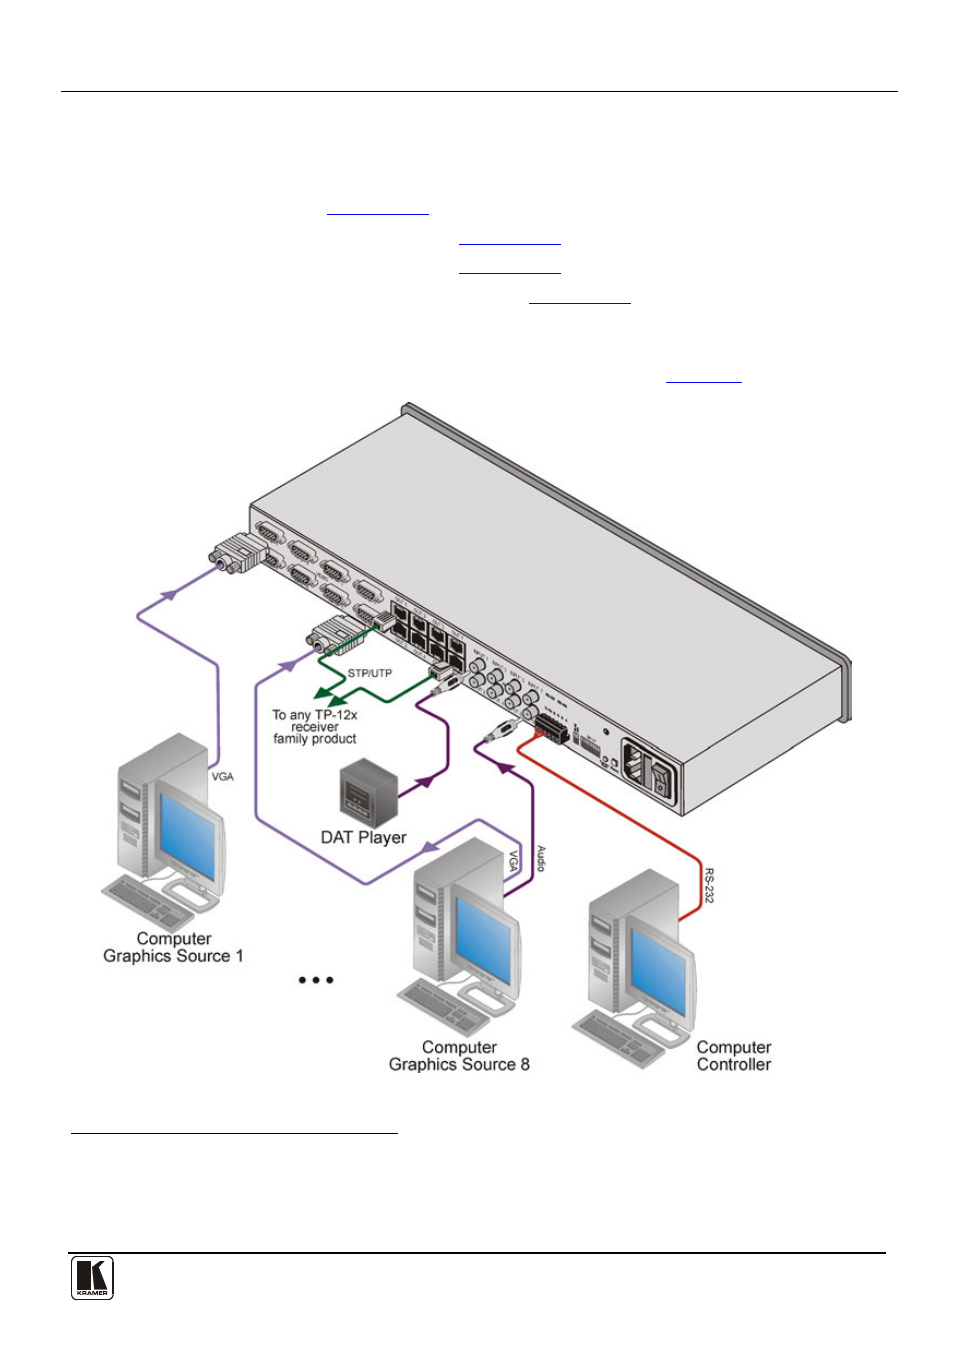
6.1 Connecting the TP-185
To connect
the TP-185, as illustrated in the example
in
Figure 2: Connecting the TP-185, 8 Channel UXGA/Audio/RS-232 to CAT 5 Transmitter
1 You do not need to connect all inputs and outputs
2 Switch off the power on each device before connecting it to your TP-185. After connecting your TP-185, switch on its power and then
switch on the power on each device. DO NOT push in the rear panel Flash Program PROG button , it is only used for upgrading to the
latest Kramer firmware
- VM-114H (22 pages)
- VM-114H2C (25 pages)
- VM-114H4C (23 pages)
- VS-81ETH (41 pages)
- VS-81ETH (27 pages)
- VM-9T (13 pages)
- VP-12NHD (15 pages)
- VP-5R (20 pages)
- VP-6A (15 pages)
- PT-5R/T (13 pages)
- TP-102HD (13 pages)
- TP-104HD (33 pages)
- TP-112HD (13 pages)
- TP-114 (13 pages)
- TP-202 (15 pages)
- TP-205A (15 pages)
- TP-210 (14 pages)
- TP-210A (15 pages)
- tp-219hd (16 pages)
- TP-305A (15 pages)
- TP-310A (18 pages)
- TP-410 (34 pages)
- VM-1H4C (17 pages)
- VP-200xlT (31 pages)
- VP-300THD (12 pages)
- VPM-2 (42 pages)
- SI-1VGA (2 pages)
- SID-DP (2 pages)
- SID-DVI (2 pages)
- SID-H (2 pages)
- SID-VGA (2 pages)
- SID-X1 (23 pages)
- SID-X1 (2 pages)
- SID-X1N (23 pages)
- SID-X2N (31 pages)
- SID-X3N (22 pages)
- 622R (17 pages)
- VS-169TP (45 pages)
- VS-169TP (7 pages)
- WSI-1VGA (2 pages)
- TP-107AV (32 pages)
- SV-552 (22 pages)
- WP-501 (16 pages)
- RC-62 (94 pages)
- RC-5B2 (137 pages)