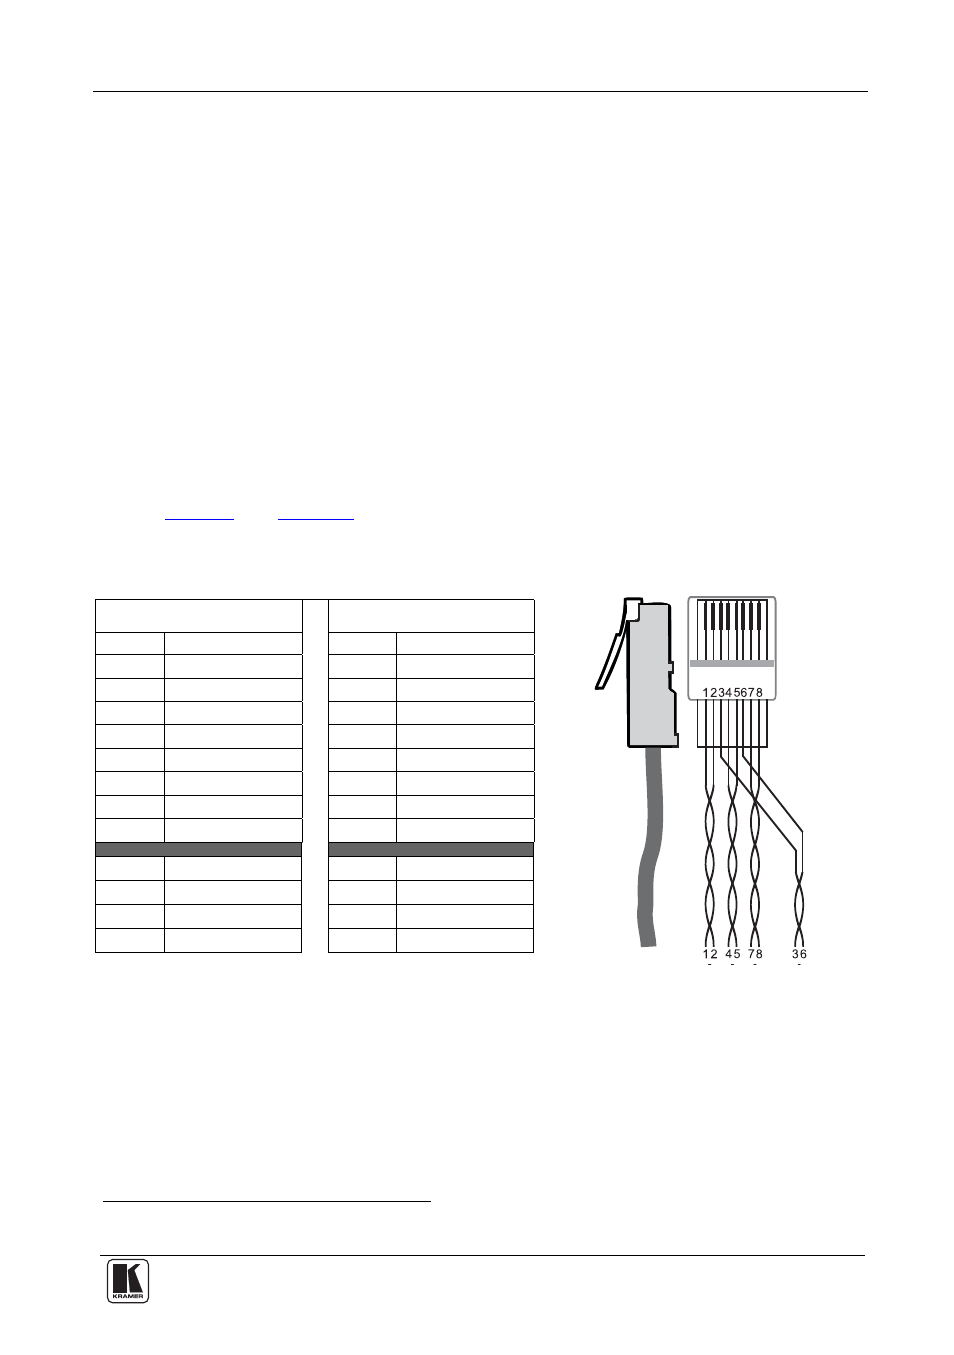
1 installing the wp-110 xga line transmitter, Installing the wp-110 xga line transmitter, Figure 6: cat 5 pinout – Kramer Electronics PT-110 User Manual
Page 13: Table 5: cat 5 pinout
Using the XGA Line Transmitter(s) / Receiver
11
5.1
Installing the WP-110 XGA Line Transmitter
To install your WP-110 XGA Line Transmitter:
1. Connect the LINE OUT RJ-45 connector to the pre-installed UTP wiring
in the wall box opening that connects via UTP cabling to the LINE IN
RJ-45 connector of the PT-120 or TP-120.
2. Connect your 12V DC power supply to the POWER SUPPLY pins
,
taking care that polarity is correct.
3. Insert
the
WP-110 directly into the wall box opening, and then mount
the front panel securely using the screws.
4. Connect the XGA source to the XGA IN 15-pin HD (F) connector.
5.2
Wiring the CAT 5 LINE IN / LINE OUT RJ-45 Connectors
define the CAT 5 PINOUT, using a straight pin-to-pin
cable with RJ-45 connectors:
Table 5: CAT 5 PINOUT
Figure 6: CAT 5 PINOUT
EIA /TIA 568A
EIA /TIA 568B
PIN
Wire Color
PIN
Wire Color
1
Green / White
1
Orange / White
2 Green
2 Orange
3
Orange / White
3
Green / White
4 Blue
4 Blue
5
Blue / White
5
Blue / White
6 Orange
6 Green
7
Brown / White
7
Brown / White
8 Brown
8 Brown
Pair 1
4 and 5
Pair 1
4 and 5
Pair 2
3 and 6
Pair 2
1 and 2
Pair 3
1 and 2
Pair 3
3 and 6
Pair 4
7 and 8
Pair 4
7 and 8
1 Connect the wire labeled “+” to the +12V pin, and the wire labeled “–” to the GND pin