1 connecting via rs-232 (for example, using a pc), 2 operating the vm-24hdcp, 3 using the edid buttons – Kramer Electronics VM-24HDCP User Manual
Page 12: Connecting via rs-232 (for example, using a pc), Operating the vm-24hdcp, Using the edid buttons, Figure 3: connecting a pc, N 6.3, Ction 6.3, The output leds flash in sequence)
KRAMER: SIMPLE CREATIVE TECHNOLOGY
Connecting the VM-24HDCP
10
6.1
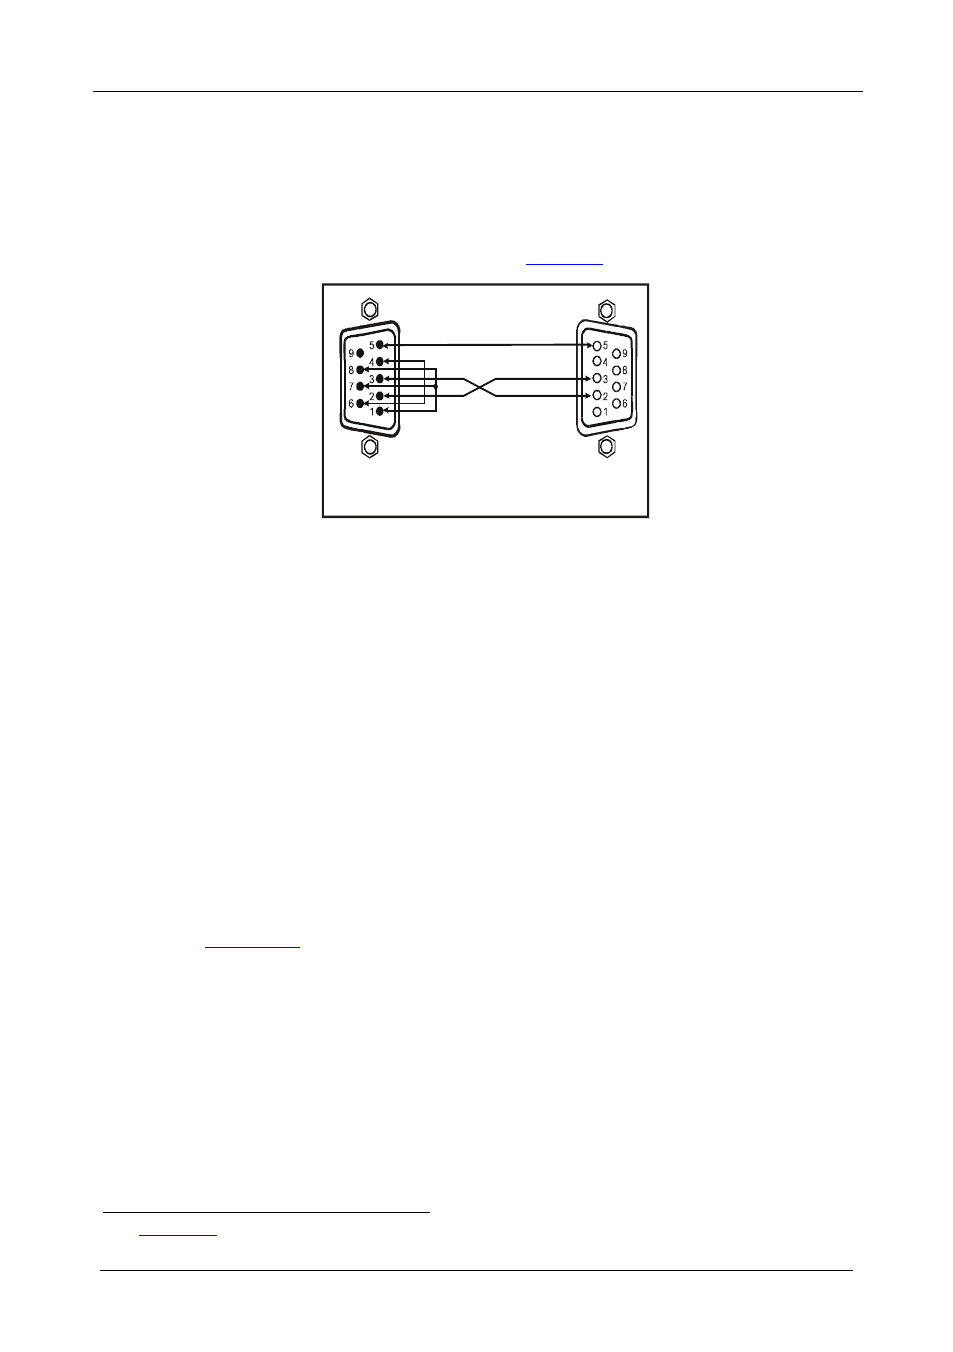
Connecting via RS-232 (for example, using a PC)
You can connect a PC (or other controller) to the VM-24HDCP via the
RS-232 port.
Connect the RS-232 9-pin D-sub port on your PC to the RS-232 9-pin D-sub
rear panel port on the VM-24HDCP, as
9-pin D-sub
(From PC)
9-pin D-sub
(Male)
If a shielded cable is used, connect the shield to PIN 5
PIN 4 is connected to PIN 6
PINs 8, 7, 1 are connected together
PIN 5 Connected to PIN 5 (Ground)
PIN 3 Connected to PIN 2
PIN 2 Connected to PIN 3
Figure 3: Connecting a PC
6.2
Operating the VM-24HDCP
Control the VM-24HDCP using the front panel buttons, or remotely via:
• RS-232 serial commands transmitted by a touch screen system,
PC, or other serial controller
• The Kramer infrared remote control transmitter or infrared remote
extension cable transmitter (optional)
To operate the VM-24HDCP via the front panel button:
1. Turn ON the POWER.
2. Press a SELECT IN front panel button (1 or 2) to select the desired input.
3. If required, press the EDID button to acquire or change the EDID data (see
Section 6.3
6.3
Using the EDID Buttons
You can acquire the EDID from:
• One output (the selected output LED flashes)
• The default EDID (all the output LEDs flash)
• Several connected outputs, the Auto-mix mode
1 See
Section
(the output LEDs
flash in sequence)