2 acquiring the edid, Acquiring the edid, Figure 3: connecting the vm-114h4c – Kramer Electronics VM-114H4C User Manual
Page 11: N 5.2, On 5.2, Ection 5.2, Figure 3
KRAMER: SIMPLE CREATIVE TECHNOLOGY
Using the VM-114H4C
8
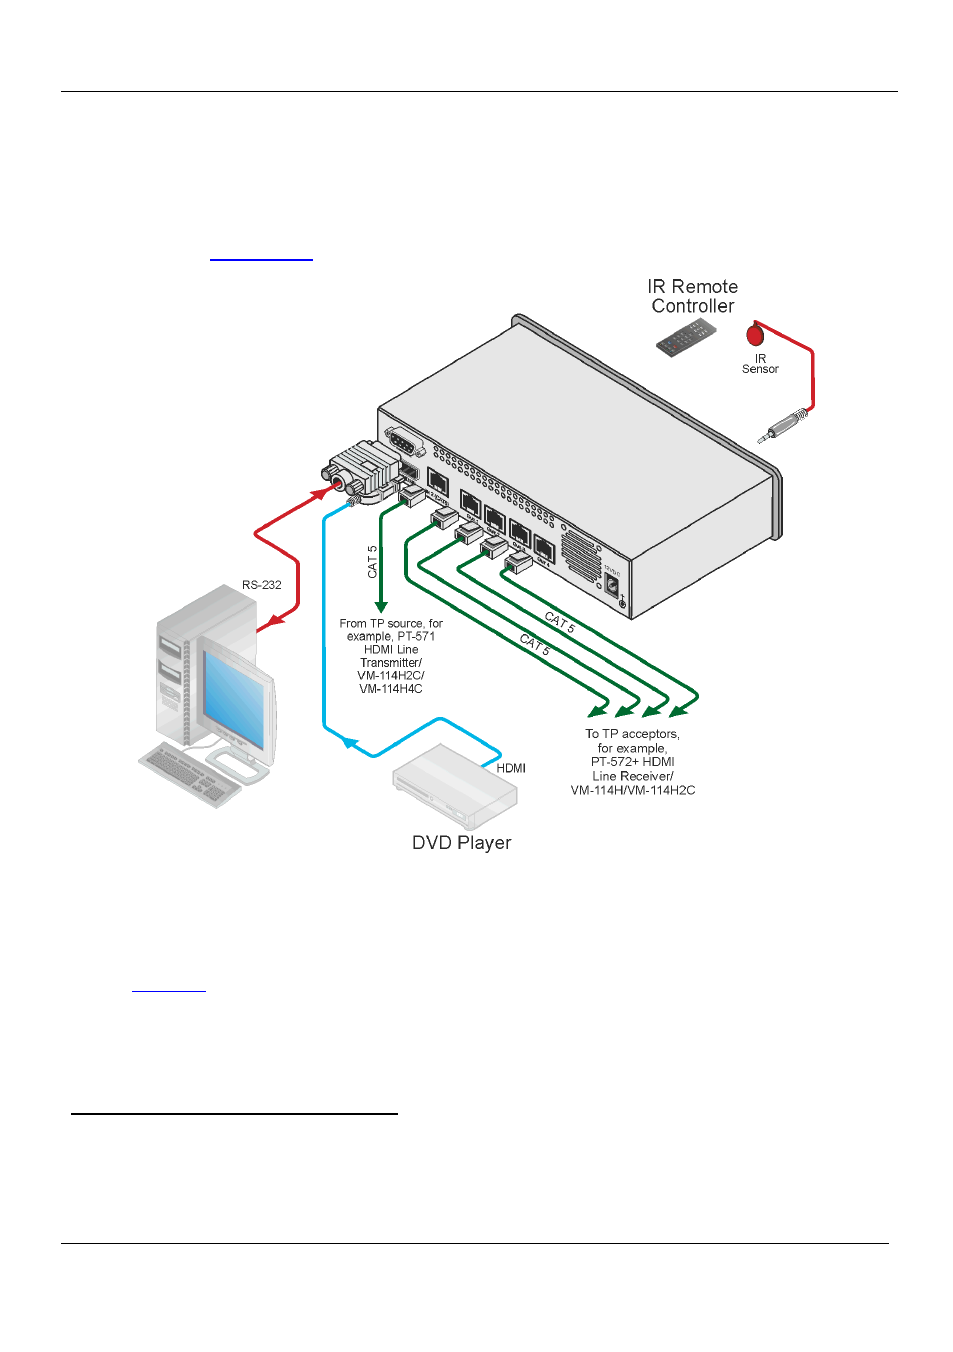
3. Connect the TP RJ-45 outputs to up to four TP acceptors (for example, the
PT-572+ Line Receiver
1
, the VM-114H or the VM-114H2C).
4. (Optional) Connect the front panel remote IR 3.5mm mini jack to the remote
IR sensor.
5. (Optional) Connect a PC via RS-232 to the RS-232 port on the VM-114H4C
(see
Section 5.3
Figure 3: Connecting the VM-114H4C
5.2 Acquiring the EDID
Each input on the VM-114H4C has a factory default EDID loaded
2
(see
9). This lets you connect the power before having to connect one of the
acceptors.
You can acquire the EDID
3
from:
• One output (the relevant output LED flashes)
1 Alternatively the TP-574 Twisted Pair Line Receiver
2 The VM-114H4C reads the EDID, which is stored in the non-volatile memory
3 This is usually done only once, when the machine is being set up in an installation. Once acquired, the EDID is saved in non-volatile
memory and further acquisition is not necessary