Vaddio ZoomSHOT WallVIEW Mini User Manual
Page 6
ZoomSHOT WallVIEW Mini
ZoomSHOT WallVIEW Mini System Document Number 342-0668 Rev A
Page 6 of 32
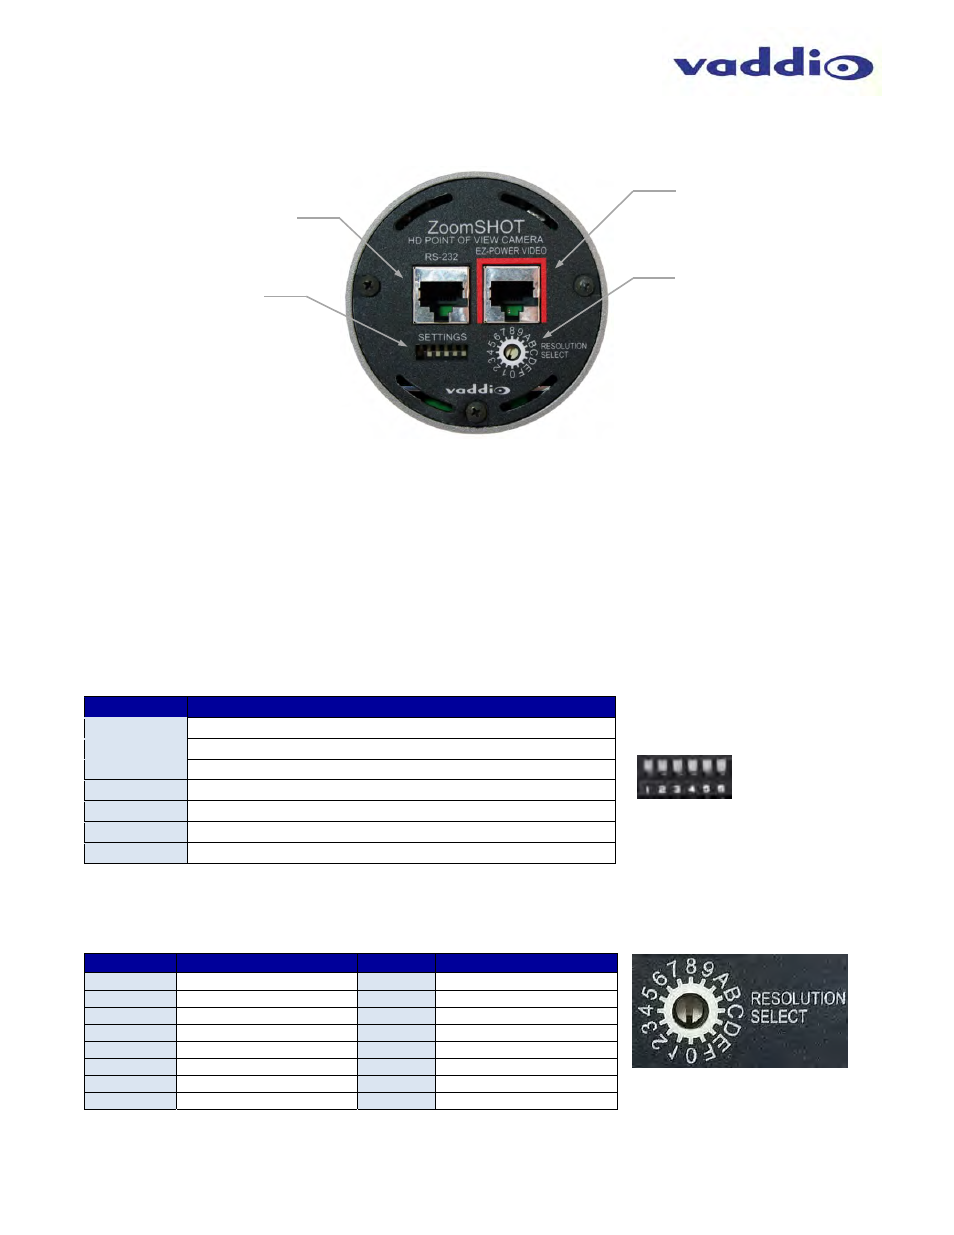
Rear Panel Connections with Feature Call-outs
Image: ZoomSHOT HD Camera
1)
RS-232 & IR Out: The RS-232 port accepts serial control protocol for camera control, as well as
automatically identifies the camera to the Quick-Connect USB Mini and Quick-Connect USB Interfaces so the
correct software is loaded and ready for the ZoomSHOT. IR Out or IR Forwarding is only available in the SR
Quick-Connect models.
2) EZ-Power/Video Port: This RJ-45 connector is only used with the Quick-Connect SR, Quick-Connect DVI-
D/HDMI SR Interface, Quick-Connect USB and USB Mini Interfaces to supply power and return HSDS
(differential) video from the camera over Cat-5 cable up to distance of 150’ (45.72m).
3) Dip Switch Settings: Settings for IR remote frequency, IR receiver on/off, image flip, test bars and defaults
can be configured on these switches. See the Switch Settings page for additional information. The dip switch
settings are as follows:
Table: ZoomSHOT Dip Switch Settings
4) HD Video Select: A rotary switch allows the user to choose the video resolution and format. The HD Video
Select rotary switch settings are as follows:
Table: WideSHOT HD VIDEO Selections
Rotary
Resolutions
Rotary
Resolutions
0
720p/59.94 (USB 2.0)
8
576p/5
0
1
1080i/59.94
9
--
2
1080p/59.94
A
--
3
--
B
--
4
720p/50
C
--
5
1080i/50
D
--
6
1080p/50
E
1080p/29.97
7
480p/59.94
F
1080p/25
Notes:
1)
For USB 2.0 video streaming, use position “0” (720p/59.94).
2)
Set the rotary switch to an assigned position. A medium grey privacy mask is displayed on unassigned positions.
Dip Switch
Function
1
Up = IR1, Down = IR2
2
Up = IR 1 or 2, Down = IR3
3
Up=IR ON, Down = IR OFF
4
Up = Normal Image, Down = Image Flip
5
Test Bars
6
Update Position - Leave UP unless updating firmware
All Down
Reset to Defaults - with power cycle
①
②
③
④
Point the notch in the switch stem to
assign the rotary position.