Prepare the plasma display – Panasonic TYWK103PV9 User Manual
Page 2
TQZJ082
Before installing the display to the wall-hanging bracket.
● The content of “3. Prepare the Plasma Display.” in the instruction manual for attachment (Page 11) has been replaced with the content given here.
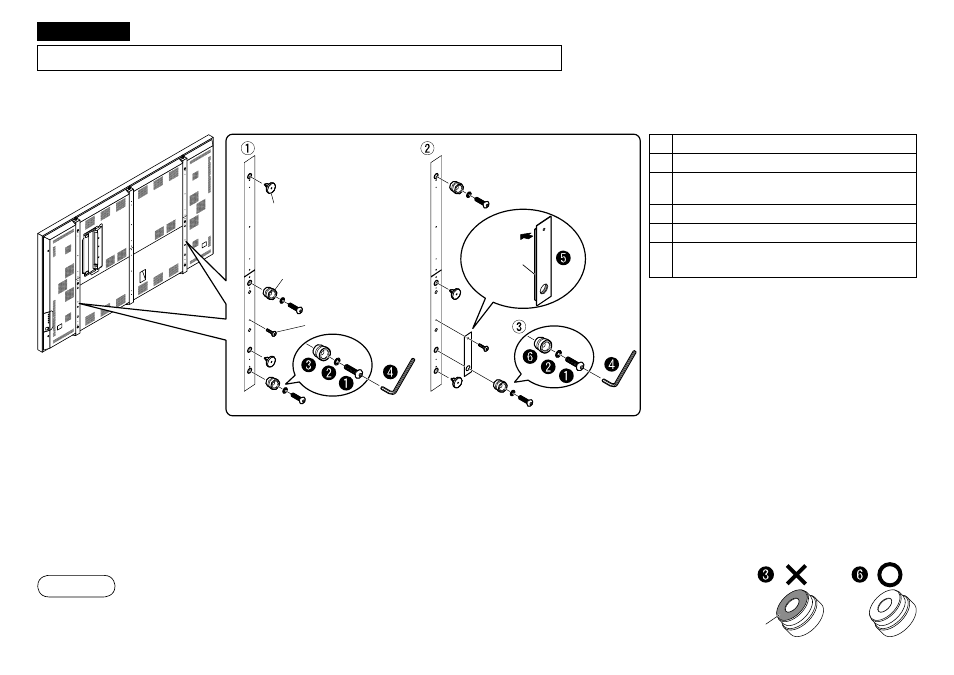
3. Prepare the Plasma Display.
Hexagon socket head button bolt
Spring washer
Stand hook
(provided with plasma display)
Allen key (provided with plasma display)
Plate
Stand hook
(supplied with the wall-hanging bracket)
On the rear panel of the plasma display, remove the eye-bolt caps (x4) at the left and right, the stand hooks (x4) at the left and right, and the M5
screws (x2) at the locations shown in the diagram.
Attach the removed eye-bolt caps (x4) and the removed stand hooks (x2) to the locations shown in the diagram. (Do not attach the lower stand
hooks (x6) at left and right.)
Also, attach the plates as shown in the diagram using the M5 screws.
Attach the stand hooks supplied with the wall-hanging bracket (x2) at left and right.
(Do not use the removed stand hooks on the lower side.)
● Parts and have the same shape. Always use Part , without the seal attached. (See
diagram at right)
● Use about 2 N·m of torque to tighten the M5 screws, and about 65 N·m of torque to tighten the
hexagon socket head button bolt.
Note
English
Eye-bolt cap
Stand hook
M5 screw
Seal
Gasket