Mounting the switch on a wall, Figure 6. attaching brackets for wall mounting – Allied Telesis AT-GS900/8POE User Manual
Page 36
Chapter 2: Installation
36
Mounting the Switch on a Wall
You can mount the AT-GS900/8POE Gigabit Ethernet switch on the wall
in a vertical position using the mounting brackets that are shipped with the
switch. The wall-mounting screws, plastic anchors, and other materials
necessary to mount the switch on a wall are not provided.
To mount the switch on a wall, perform the following procedure:
1. If attached, remove the rubber feet using a flat-head screwdriver.
2. Select a wall location for the device.
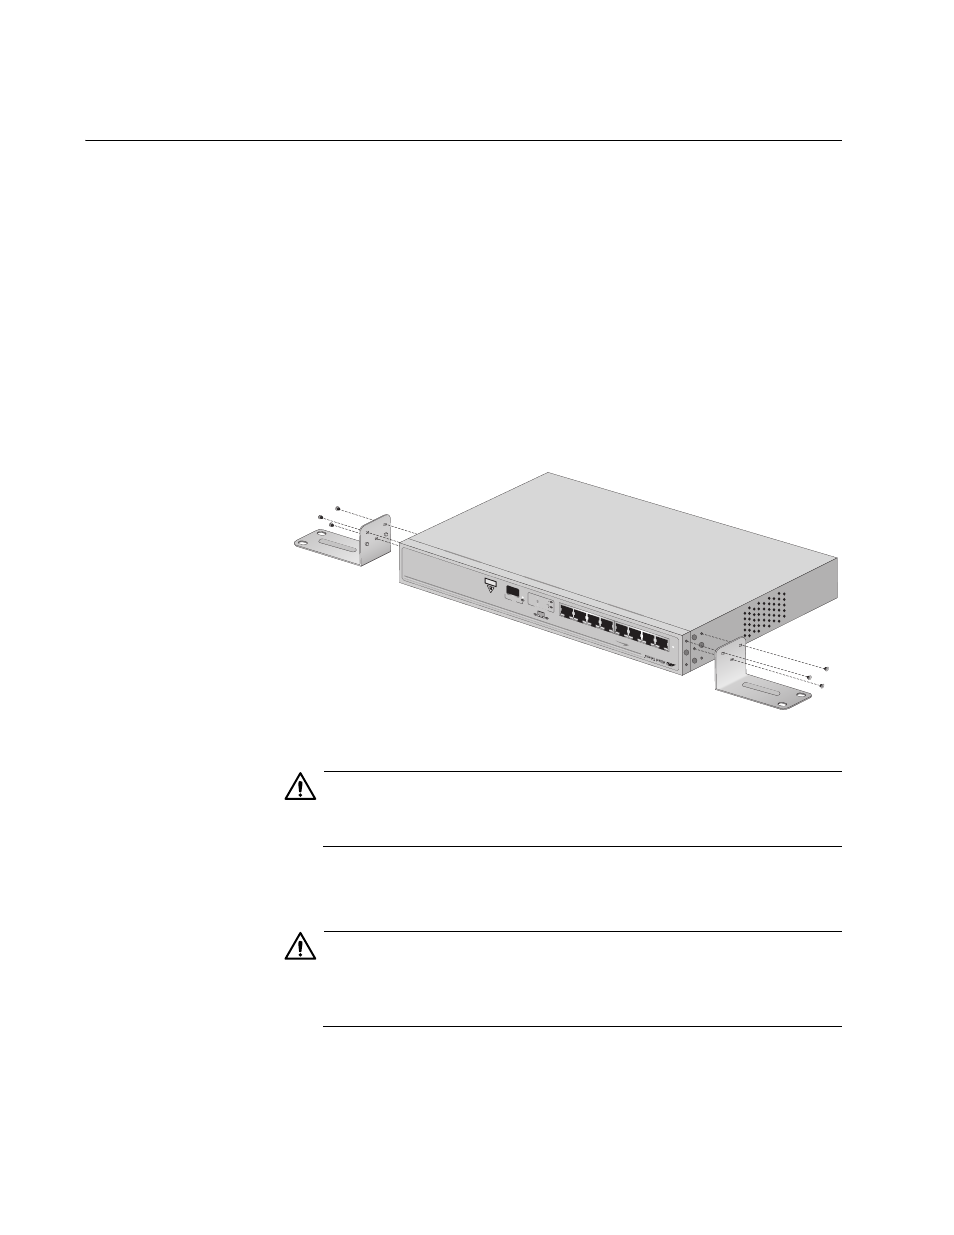
3. Turn the switch over and attach a mounting bracket (provided) to each
side of the switch using the bracket mounting screws (provided), as
shown Figure 6.
Figure 6. Attaching Brackets for Wall Mounting
Caution
The attached mounting brackets must be used to securely mount
the device on the wall.
E15
4. Position the switch on the wall with the top of the switch against the
wall and the ports facing up.
Caution
Make sure that the AT-GS900/8POE Gigabit Ethernet switch is
always mounted on the wall with the front panel facing up and the
back panel facing down.
777
967
PO
WE
R
1
2
3
4
5
6
7
8R
Po
E
CLA
SS
1
LA
SER
PR
ODU
CT
1000Ba
se-X
AT -
GS
900/
8PO
E
8 Po
rt 1
0/10
0/1
00
0 M
bp
s P
OE
S
witc
h w
ith
1 C
omb
o S
FP
Po
rt
PD
O
N
PD
ER
RO
R
10
00
L
IN
K
AC
T
10
/1
00
L
IN
K
AC
T
PO
RT
ACT
IVIT
Y
8
SF
P