Tailwheel assembly - lift, 1 a-frame - rh, 1 a-frame - lh – Alamo RX96 User Manual
Page 87: 2 brace, 2 hitch pin, 1 bushing, 1 spacer, 1 brace, 1 axle pivot pin, 2 bolt
ASSEMBLY
RX96 03/09
Assembly Section 3-3
© 2009 Alamo Group Inc.
ASSEMBL
Y
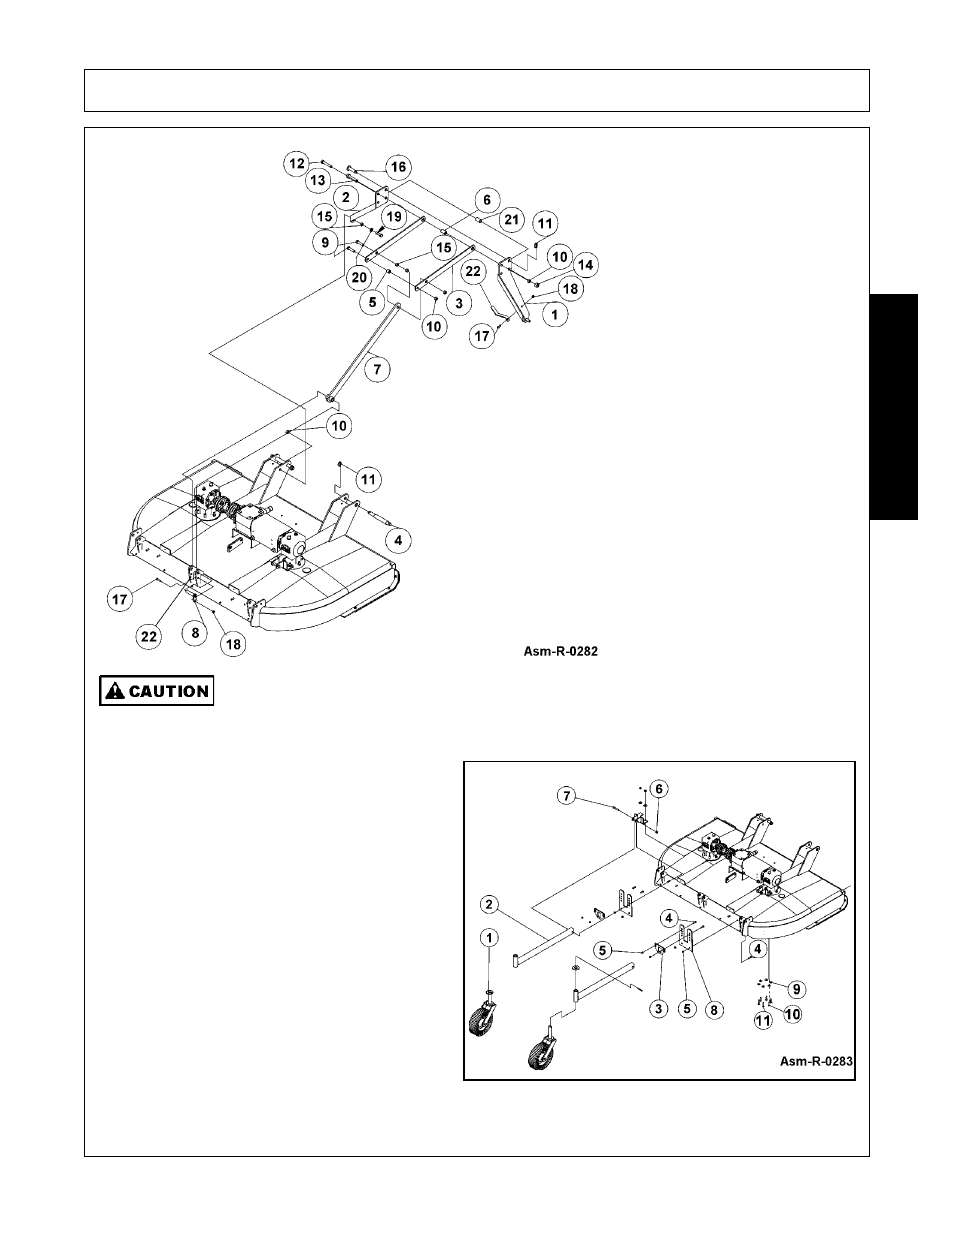
The Components of these machines are quite heavy. Block all components up securely
before working under machine.
TAILWHEEL ASSEMBLY - LIFT
1.
Attach Bracket (3) into Support Beam (8) and
attach to Frame Assembly with Bolts (4) &
Locknuts (5).
2.
Slide the Beam Weldment (2) through Bracket
(3) and Support Beam (8) and attach to Mower
Deck using Bolt (4) and Locknut (5).
3.
Insert Tailwheel Beam (2) through Bracket (3)
and Support Beam (8). Install to Gearbox Lug
through pair of holes which will give
approximate desired cutting height using Bolt
(7) and Locknut (6).
ITEM
QTY
DESCRIPTION
1.
1
A-Frame - RH
2.
1
A-Frame - LH
3.
2 Brace
4.
2
Hitch Pin
5.
1
Bushing
6.
1
Spacer
7.
1
Brace
8.
1
Axle Pivot Pin
9.
2
Bolt
10.
1
Nut
11.
3
Clip
12.
1
Bolt
13.
1
Bolt
14.
1
Locknut
15.
4
Spacer
16.
1
Pin
17.
2
Bolt
18.
2
Locknut
19.
2
Bolt
20.
3
Flatwasher
21.
1
Bushing
22.
1
Driveline Holder