Campbell Scientific Sentek EasyAG Installation Guide v 3.0 User Manual
Page 30
Installing EasyAG 80 probes
Copyright © 1991 – 2003 Sent ek Pt y Lt d All rights reserved
Page 27
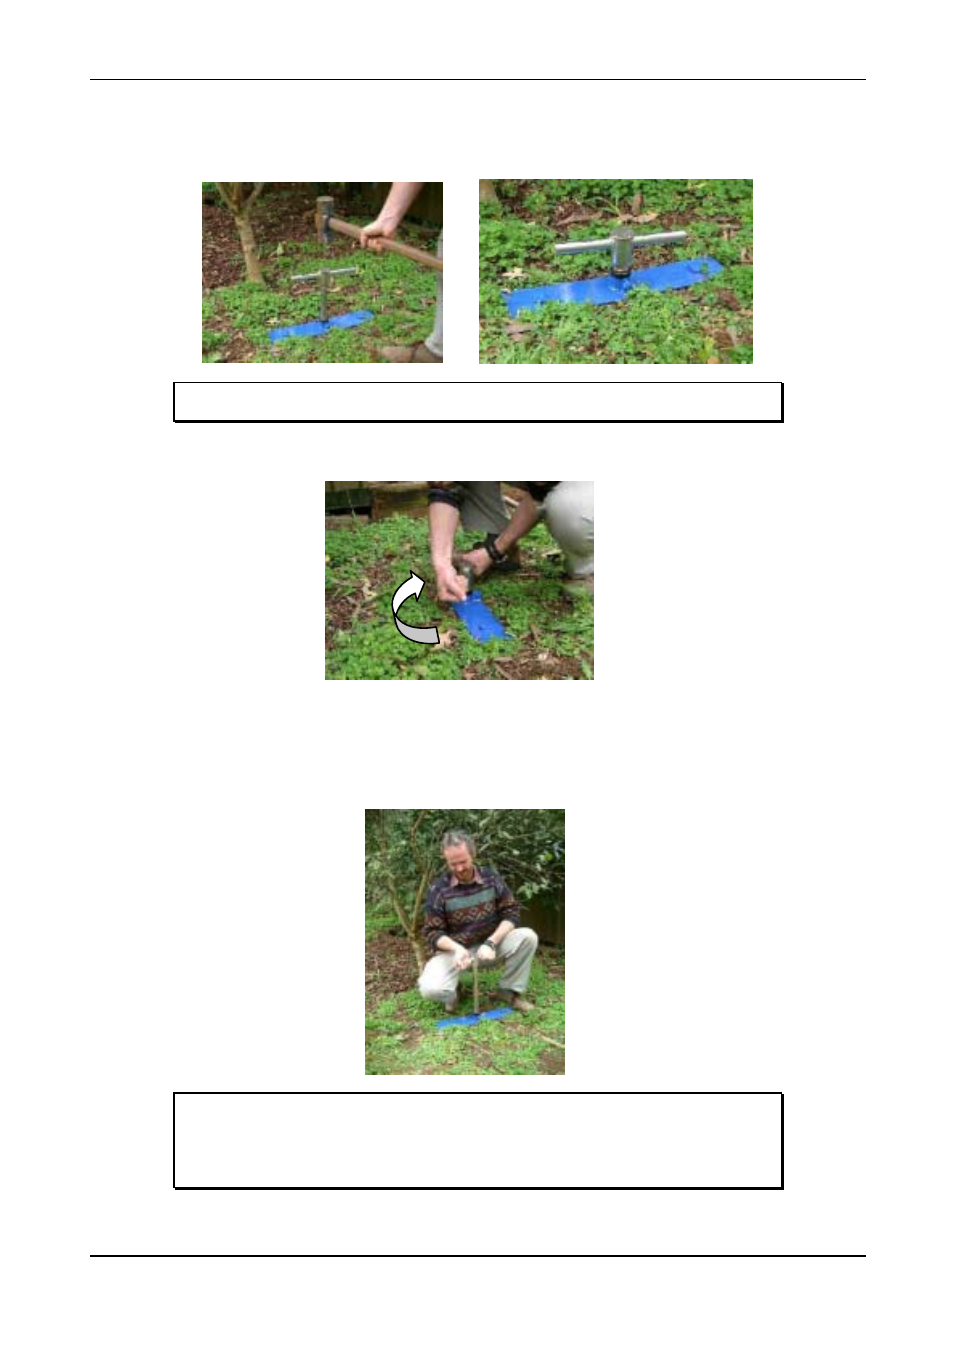
2. Using
a
sledgehammer, beat the AMS soil sampler into the ground until the beating head is just
above the stabilization plate
.
(While it is preferable to go all the way in one insertion, successful
installation may be possible in heavier soils with 2 insertions). Ensure accurate blows are made such
that lateral deflection of the soil sampler is minimized. Do not compress the soil with the final blow.
Warning
Do not compress the soil such that normal water infiltration is inhibited
3. Turn
the
AMS soil sampler one single complete rotation.
4. Carefully
lift
the
AMS soil sampler directly out of the ground. To remove the soil collected in the soil
sampler, simply beat on its side with the hand or foot. The design is such that the soil core taken is
slightly compressed, and of a lesser internal diameter than the soil sampler itself. In heavier textures,
the soil sampler cleaning tool is used to clear the soil sampler by simply screwing it into the
compressed soil. The extracted soil should be deposited away from the probe site.
Warning
If you experience difficulties at this point, remove the soil sampler in stages, or
obtain extra assistance to avoid back injury.
5. Remove
the
soil sampler polyguide.