Campbell Scientific Sentek EasyAG Installation Guide v 3.0 User Manual
Page 23
Installing EasyAG 50 probes
Copyright © 1991 – 2003 Sent ek Pt y Lt d All rights reserved
Page 20
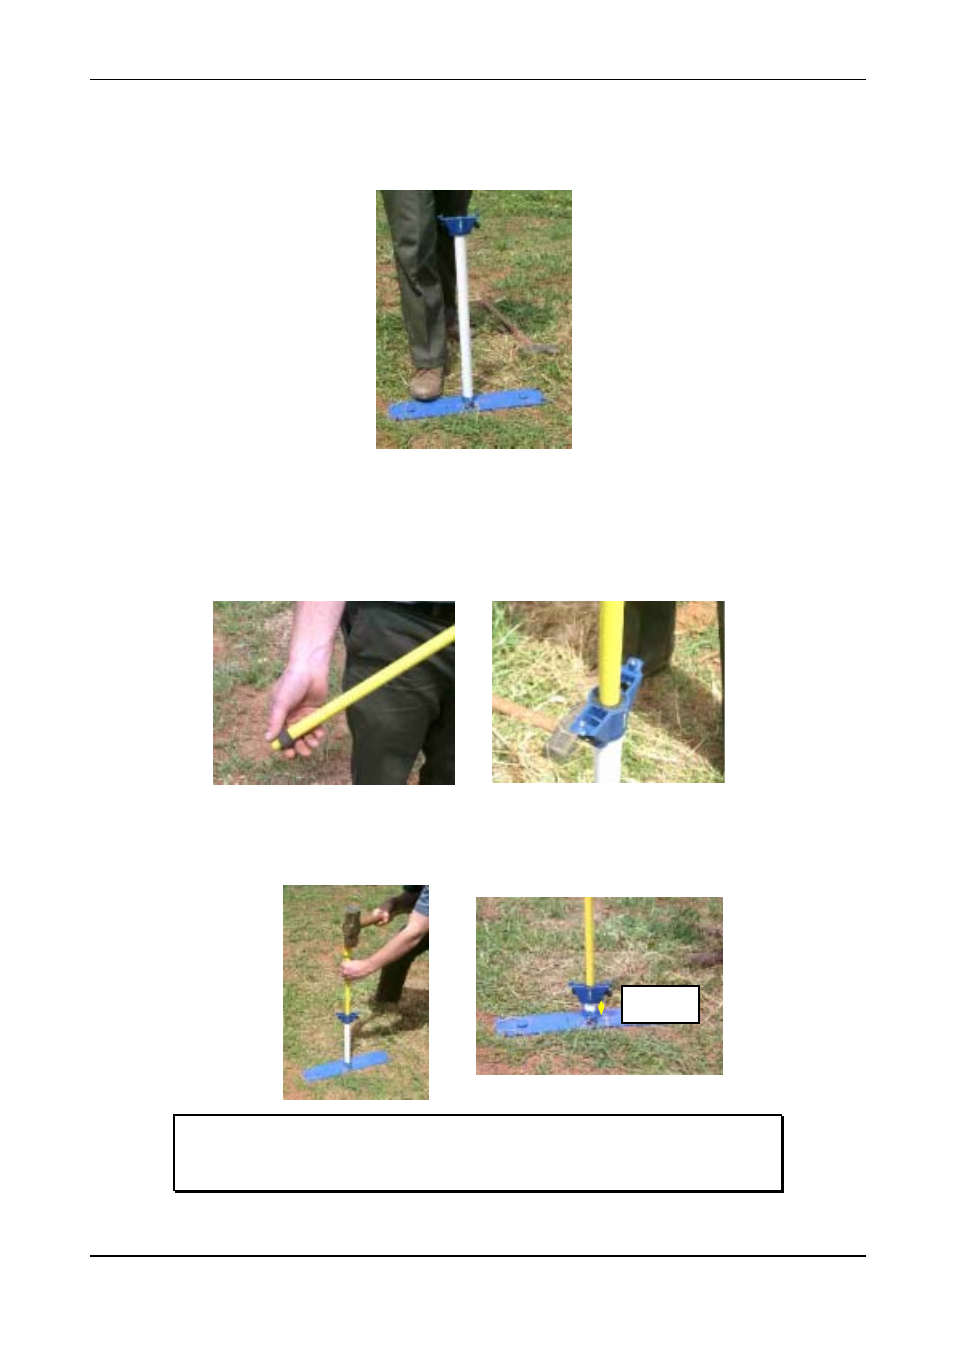
Step 5 - Inserting the access tube
1. Insert the assembled complete probe into the stabilization plate and push it into the ground in a
single gentle movement as far as it will go. Do not cause undue inflection of the access tube, as this
will destroy the integrity of the installation.
2. As the probe enters the prepared hole in the soil, it shaves off a soil residue that is eventually stored
in the cutting tip or falls to the bottom of the hole.
3. Slide
the
dolly rubber to the top of the EasyAG dolly. Insert the EasyAG dolly into the access tube
and position it on top of the joiner at the base of the access tube. Gently slide the dolly rubber into
the top cap to stabilize the EasyAG dolly.
4. Continue
inserting
the
probe by hammering on the insertion dolly with a sledgehammer until there is
a 2.5 cm (1 inch) gap between the base of the top cap and the edge of the stabilization plate tube
guide.
Note: This clearance height is important. If you hammer the probe in too far you
will not be able to lift the stabilization plate off the long stabilization plate pins.
2.5 cm