Installing easyag 50 probes – Campbell Scientific Sentek EasyAG Installation Guide v 3.0 User Manual
Page 19
Installing EasyAG 50 probes
Copyright © 1991 – 2003 Sent ek Pt y Lt d All rights reserved
Page 16
Installing EasyAG 50 probes
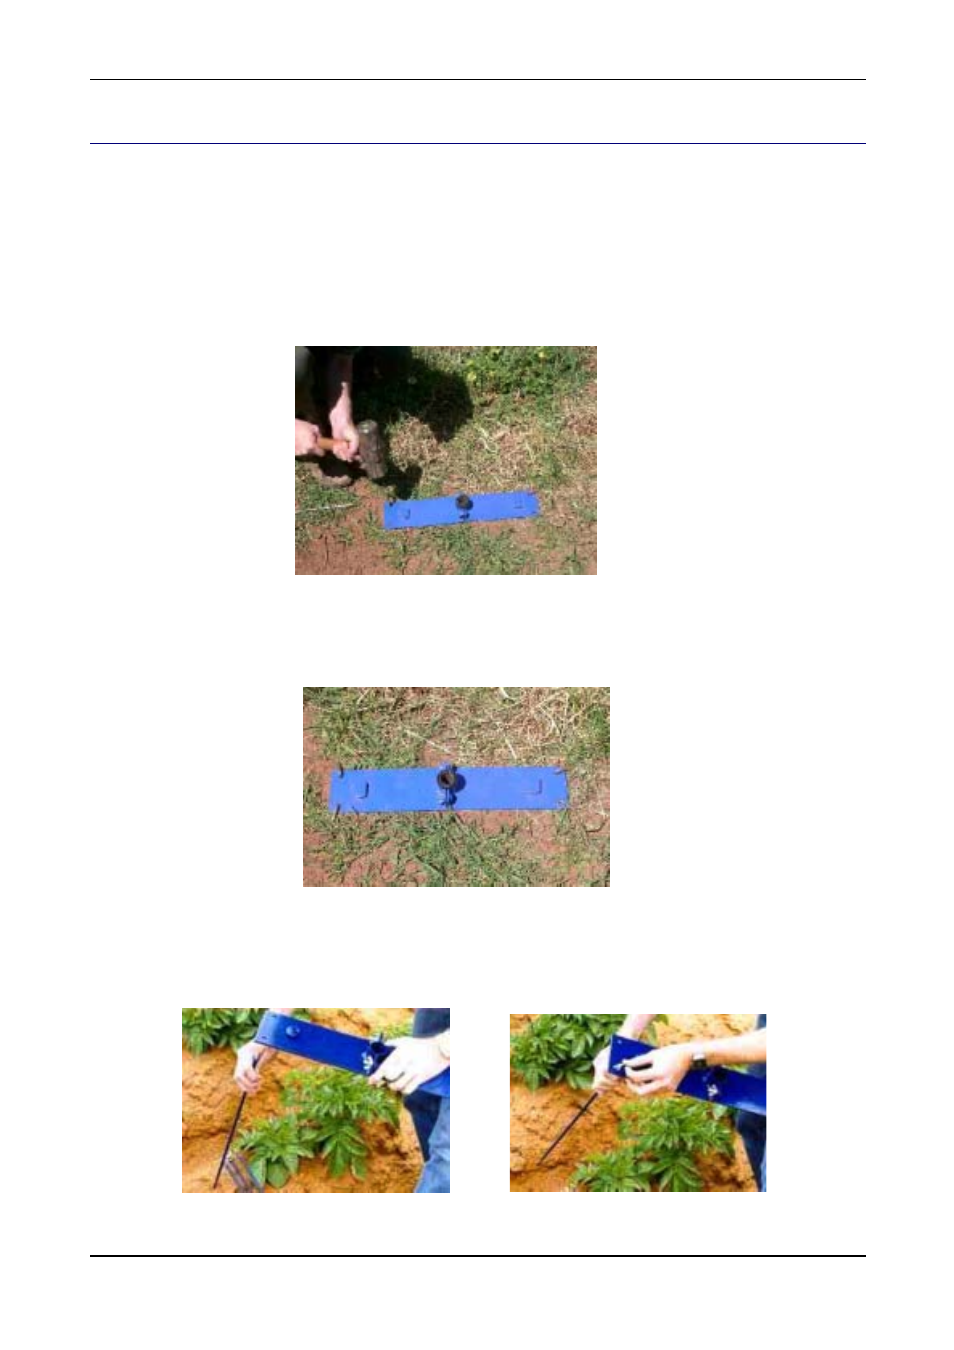
Step 1 - Assembling the stabilization plate
The stabilization plate can be used on both flat ground and raised soil beds. There are two different types of
stabilization plate pins for this reason: a short pin for flat ground and a long one for raised soil beds.
Step 2 - (option A) Fixing the stabilization plate on flat ground
1. Place
the
stabilization plate on the ground where the probe is to be situated.
2. Insert
the
short stabilization plate pins through the holes in the stabilization plate.
3. Drive
the
stabilization plate pins all the way into the ground using a sledgehammer. The stabilization
plate should be in firm contact with the soil without compressing it significantly.
4. Put the soil sampler polyguide in place. The stabilization plate is now ready for insertion of the AMS
soil sampler.
Step 2 (option B) Fixing the stabilization plate to a raised soil bed
1. Insert each of the four long stabilization plate pins into the holes in the stabilization plate and tighten
the wing nuts with light finger pressure.
2. Place the assembled stabilization plate on the ground directly above the required position of the
probe.