6 assembling and installing, 1 installation, 1 how to open the housing – Videotec HEG User Manual
Page 7: 2 how to install the camera, 3 how to install the heater
EN - English - I
nstruc
tions manual
5
If necessary use the supplied spacers and the 1/4”
screw adapters to position the camera and lens
correctly. Make the correct electrical connections for
the camera and lens.
Close the housing, proceeding in the reverse order to
that described above.
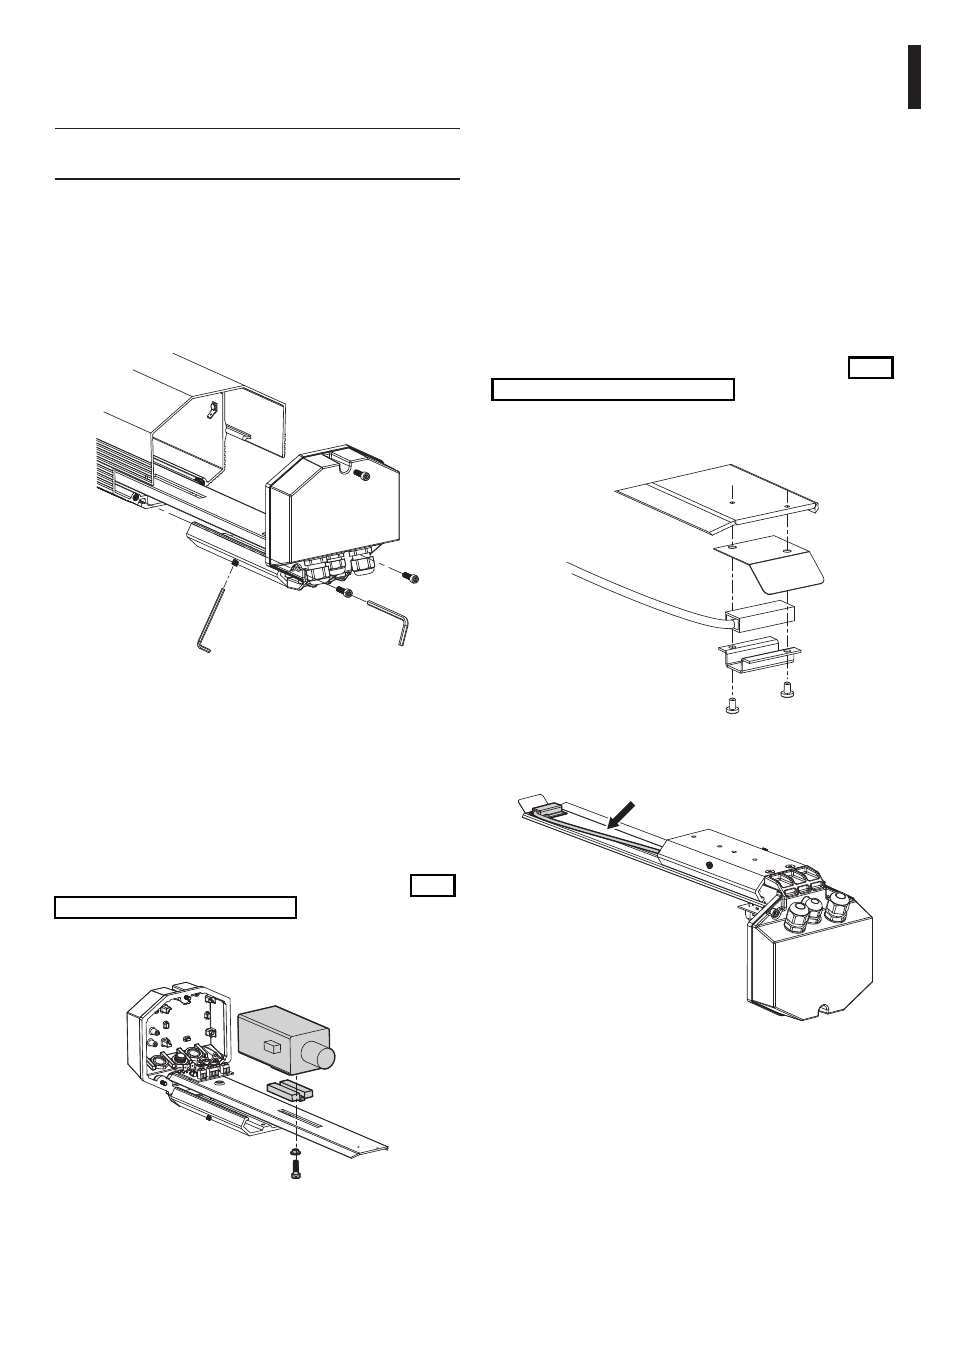
6.1.3 How to install the heater
This section describes how to install the heater kit
in those housings that do not already have one. The
heater can be supplied with an operating voltage
of 12Vdc/24Vac or 115/230Vac and includes the
dissipator, the pre-wired PTC resistance, the support
and the screws for fixing the kit.
Open the housing as in the instructions above ("6.1.1
How to open the housing", page 5).
Assemble the dissipator, the pre-wired resistance and
its support on the housing slide.
Fig. 03
Position the resistance cables under the slide.
Fig. 04
6 Assembling and
installing
h
Only specialised personnel should be
allowed to assemble and install the device.
6.1 Installation
6.1.1 How to open the housing
To open the housing, unscrew the 3 screws on the
rear cover plate and loosen the two dowels on the
outer slide, then slide out the housing body.
Fig. 01
This will give easy access to the inside of the housing,
without dismantling it from the support bracket.
6.1.2 How to install the camera
This section describes how to install the camera
inside the housing. It should be remembered that the
power supply can be taken off the circuit supplied
with the housing, after checking its suitability.
Open the housing as in the instructions above ("6.1.1
How to open the housing", page 5).
Fix the camera to the internal slide with 1/4” screw
using the insulating bush.
Fig. 02