2 attaching the housing, 4 how to install the heater – Videotec VERSO POLAR User Manual
Page 10
EN - English - I
nstruc
tions manual
8
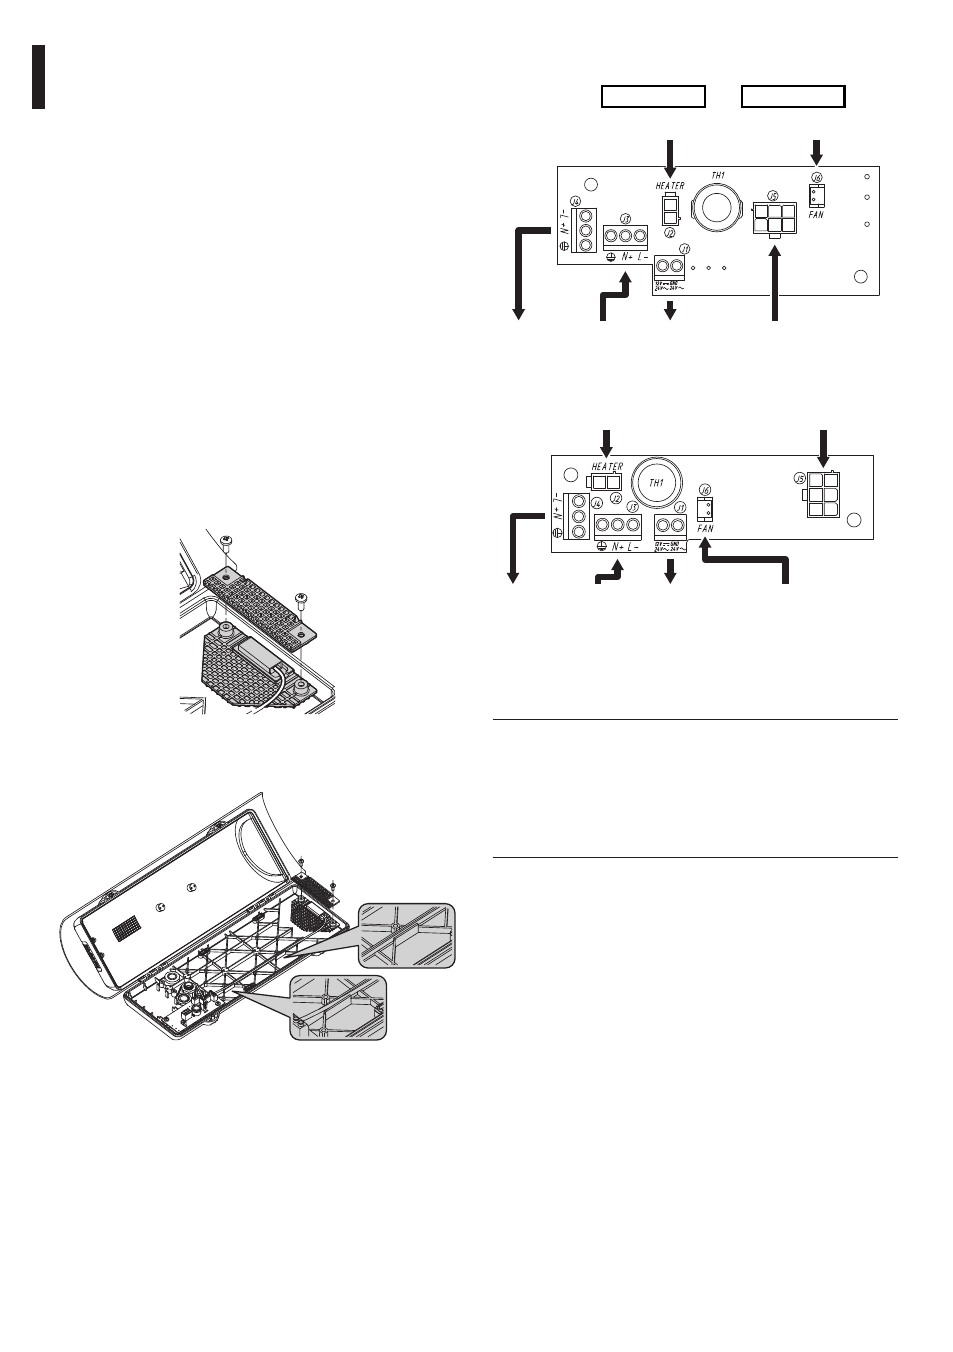
Insert the 2-pin connector at the end of the cable into
the correspondent support circuit socket, identified
by J2 HEATER (Fig. 05, page 8 and Fig. 06, page 8).
J3 - IN
J4 - OUT
J1 - Camera
OUT
J6 - Blower
J2 - Heater
J5 - Power supply
Fig. 05
VERSO.
J4 - OUT
J1 - Camera
OUT
J3 - IN
J6 - Blower
J5 - Power supply
J2 - Heater
Fig. 06
VERSO COMPACT.
Reposition the internal support slide and close the
housing.
g
h
The circuit is also able to provide the
power supply for a camera. While powering
the circuit from an external source, pay
attention to the type of working voltage
and use the correct power supply kit,
according to requirements.
6.1.3.2 Attaching the housing
The housing must be attached using suitable means,
such as brackets or supports. The fastening means
must guarantee the mechanical seal when a force
equal to at least four times the weight of the device
is applied.
6.1.4 How to install the heater
This section describes how to install the heater
option in the dust-proof housings not provided
with. Heaters can be supplied with working voltages
of 12Vdc/24Vac or 115/230Vac and include the
pre-wired heating element suitable for the working
voltage, metal dissipators and kit fastening screws.
Open the housing as described before. Fix the heater
kit to the prearranged points on the body of the
housing.
The pre-wired heating element should be positioned
between the 2 dissipators before attachment to
ensure contact and hence guarantee correct heat
diffusion.
Fig. 03
Pass the heating wire into the provided seatings.
Fig. 04