Super – Dake Model Super Technics 350SA User Manual
Page 12
12
SUPER
SUPER
SUPER
SUPER
SUPER TECHNICS 350 SA
TECHNICS 350 SA
TECHNICS 350 SA
TECHNICS 350 SA
TECHNICS 350 SA
1
7.13 - Clutch adjustment
Inside the head there is a clutch device which has already been
adjusted during assembly. If, after long use, further adjustment
is necessary, proceed as follows:
- remove the cover
- fit the template provided
- turn the motor shaft so that the ring nut ( 1 ) is in a convenient
position to allow it to be tightened or slackened enough to
calibrate the clutch system.
ANY REPLACEMENTS OF OTHER PARTS - SUCH AS THE
COMPONENTS OF THE REDUCTION GEAR, MOTOR AND
VARIOUS ELECTRIC PARTS - MUST BE CARRIED OUT BY
SKILLED OR COMPETENT PERSONNEL.
7.11 - Regulating arm blockage
- If there is insufficient blockage of the head arm in the desired
position, slacken the screw ( 1 ) on the lever, hold the bush
( 2 ) in position, turn the lever to the left and tighten the screw.
1
2
BEFORE PERFORMING THE FOLLOWING OPERATIONS,
THE ELECTRIC POWER SUPPLY AND THE POWER CABLE
MUST BE COMPLETELY DISCONNECTED.
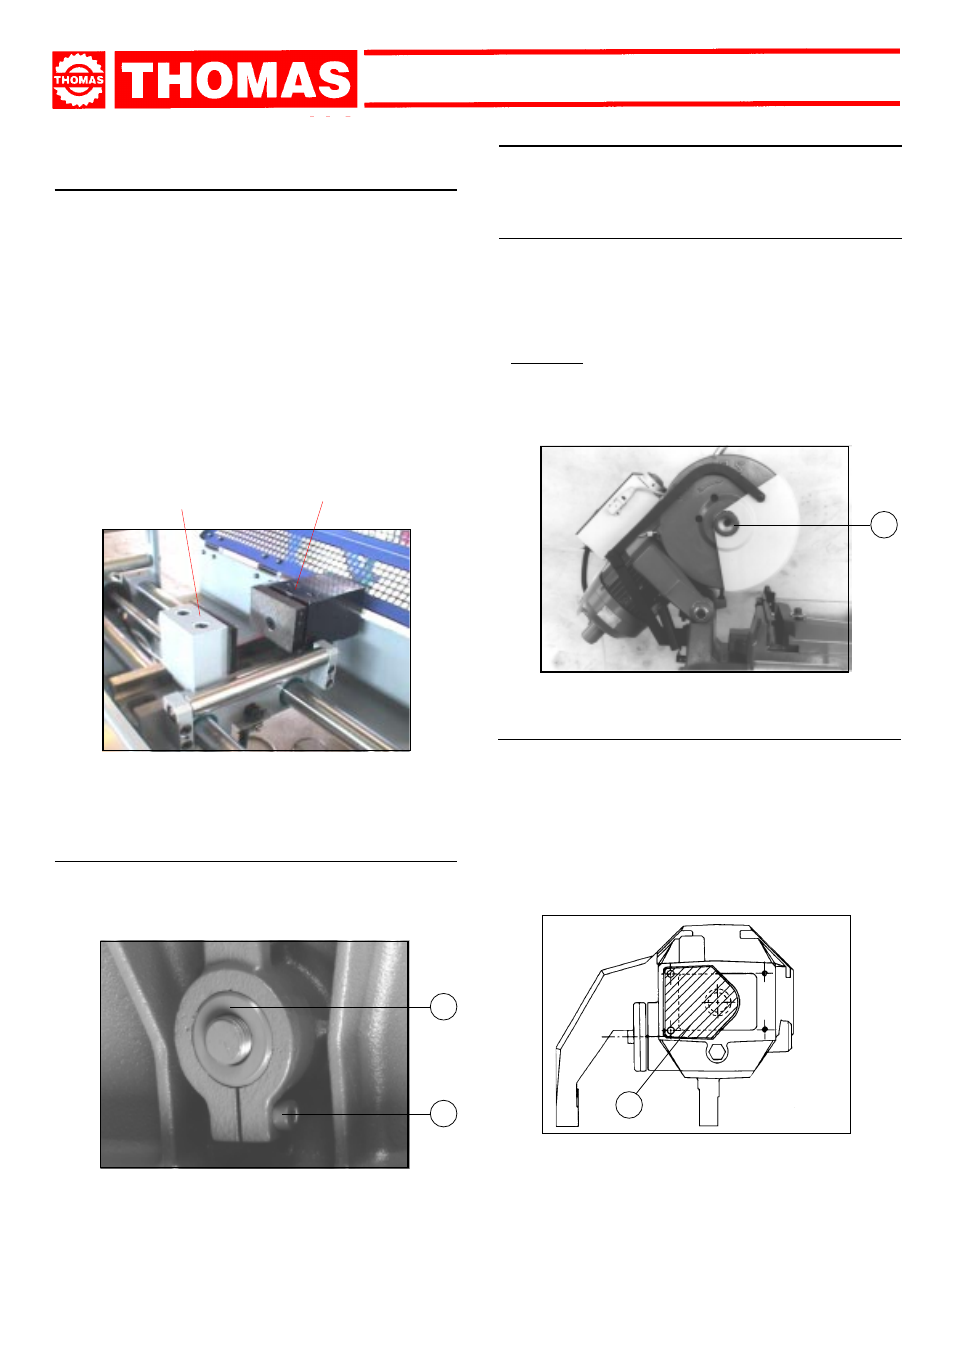
7.12 - Changing the disk
To change the disk:
- Release the mobile yellow, white or orange guard and turn it
back.
- Block a piece of wood in the vice and lean the disk on it.
- Insert the special spanner provided and remove the screw
( 1 ), slackening it in a clockwise direction because it has a
left-handed thread, then slip off the flange that holds the disk.
- Fit the new disk, checking the cutting direction of the teeth,
then replace the flange, the screw and the mobile white, yellow
or orange guard.
1
7.10 - Adjusting the feeding system
- Adjust the feeding vices as follows:
- Load the workpiece and clamp it in the bench vice by means
of the relevant handwheel.
- Loose the vice screw ( C ), approach the relevant jaw upto 4-
5 mm from the material to be cut. Tight the screw.
- Loose the vice screw ( D ), approach the relevant jaw upto
0,5 mm from the material to be cut. Tight the screw.
NOTE: carefully adjust the vices ( C ) and ( D ). On the
contrary, the microswitch controlling the presence of the
workpiece will stop the machine.
- Loose the bench vice allowing 4-5mm clearance from the vice
jaw and the workpiece.
C
D