Installation of pvdf probe – AMETEK 7330 Pro-Stik II User Manual
Page 4
4
Installation of PVDF Probe
CAUTION:
NOTE: The apparatus contains exposed
non-metallic surfaces considered to
constitute an electrostatic discharge
hazard. Clean only with a damp cloth.
Also, refer to separate Flex Probe Installation &
Handling Procedure document Z190 which is shipped
with the probe.
Assembly is basically the same as for the steel probe.
However, two people are recommended for assembly
of the 7330 Flex Probe; one to hold the probe and the
other to assemble components.
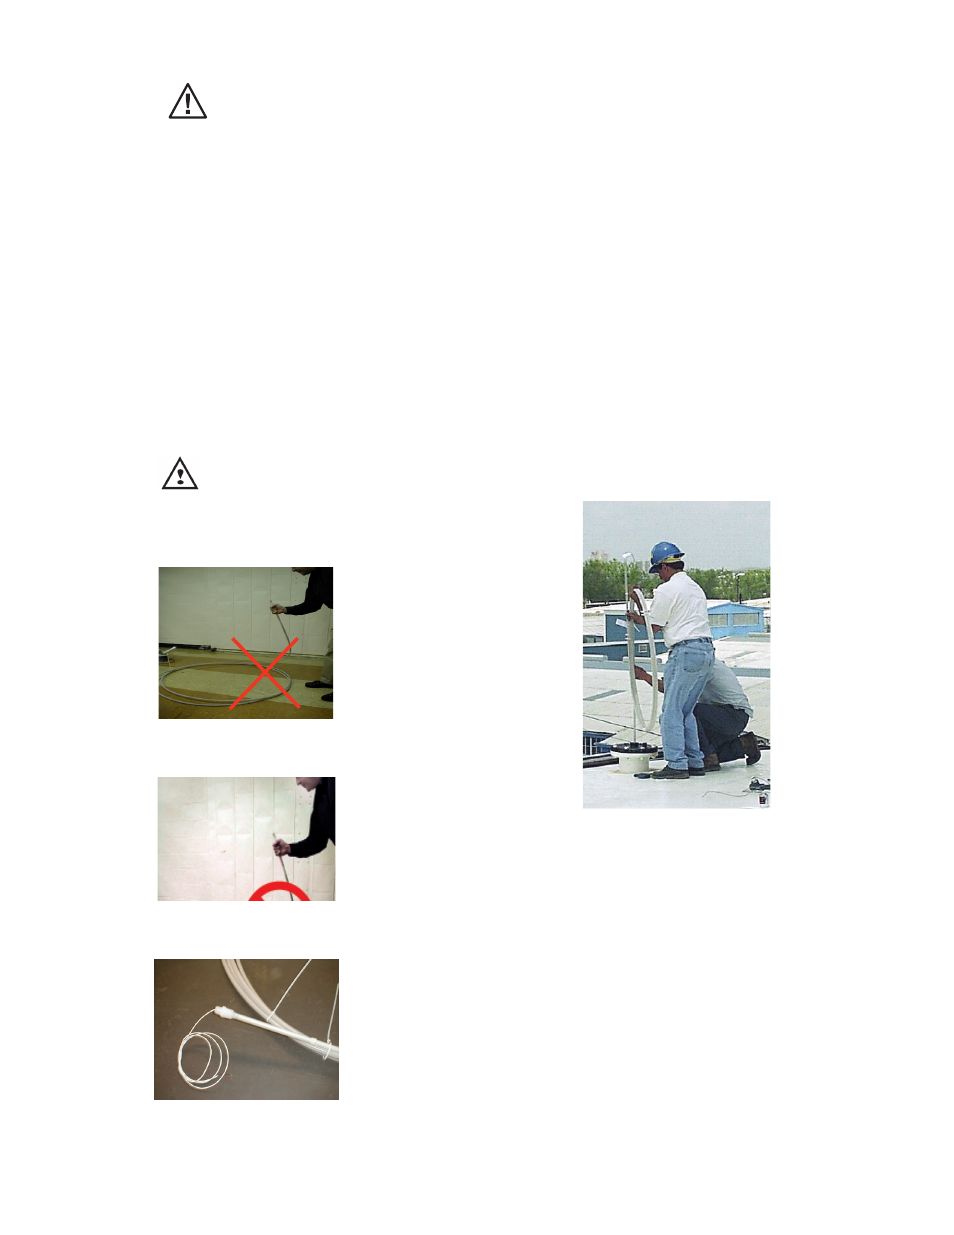
During unpacking and installation, always keep the
coils parallel. Do not let the diameter of the coils
become less than 40 inches (approx. 1 meter).
CAUTION
Kinking a probe is considered user damage
and NOT covered by warranty!
DO NOT bend top of probe!
DO NOT support probe by electrical cable!
1. Using a side cutter, cut the tie wrap at the end of
the probe.
2. Slide reducing bushing or flange (supplied by
customer) on for Style D probe.
3. Slide float onto probe. On a symmetrical steel float,
the magnet is located in the middle of the float, so
orientation does not matter.
4. Slide weight or spacer on the probe and capture all
of these parts with the SS pin.
NOTE: The span is set at the factory, however, if
it is necessary to adjust or reset the span before
installation, refer to the section on Setting the Span
first, then two people should uncoil the probe in a flat
area the length of the probe. Cut one tie wrap at a time
in sequence. When recoiling the probe, be careful to
keep the coils parallel and not to let the diameter of the
coils become less than 40 inches (approx. 1 meter). Tie
wraps to hold the coils are recommended.
5. Lower the weight and float end into the tank. Two
people are needed; one to hold the assembled
section of the probe and guide the probe into the
tank, and the other to keep the coils parallel and
unwrap them. Start with tie wrap #1.
6. After the float and weight are in the tank, thread
bushing into tank or bolt flange into position.
7. If a threaded compression fitting is used, hand
tighten it. Insure compression fitting is sealed. Turn
the fitting 1 ¼ turns after hand tightening. Do not
over tighten.
8. Make a final check to see that all of the bolts and
screws are in proper position and probe is securely
tightened.