4 - add/remove spare disks, 5 - settings – HighPoint RocketRAID 2782 User Manual
Page 19
RocketRAID BIOS Utility
19
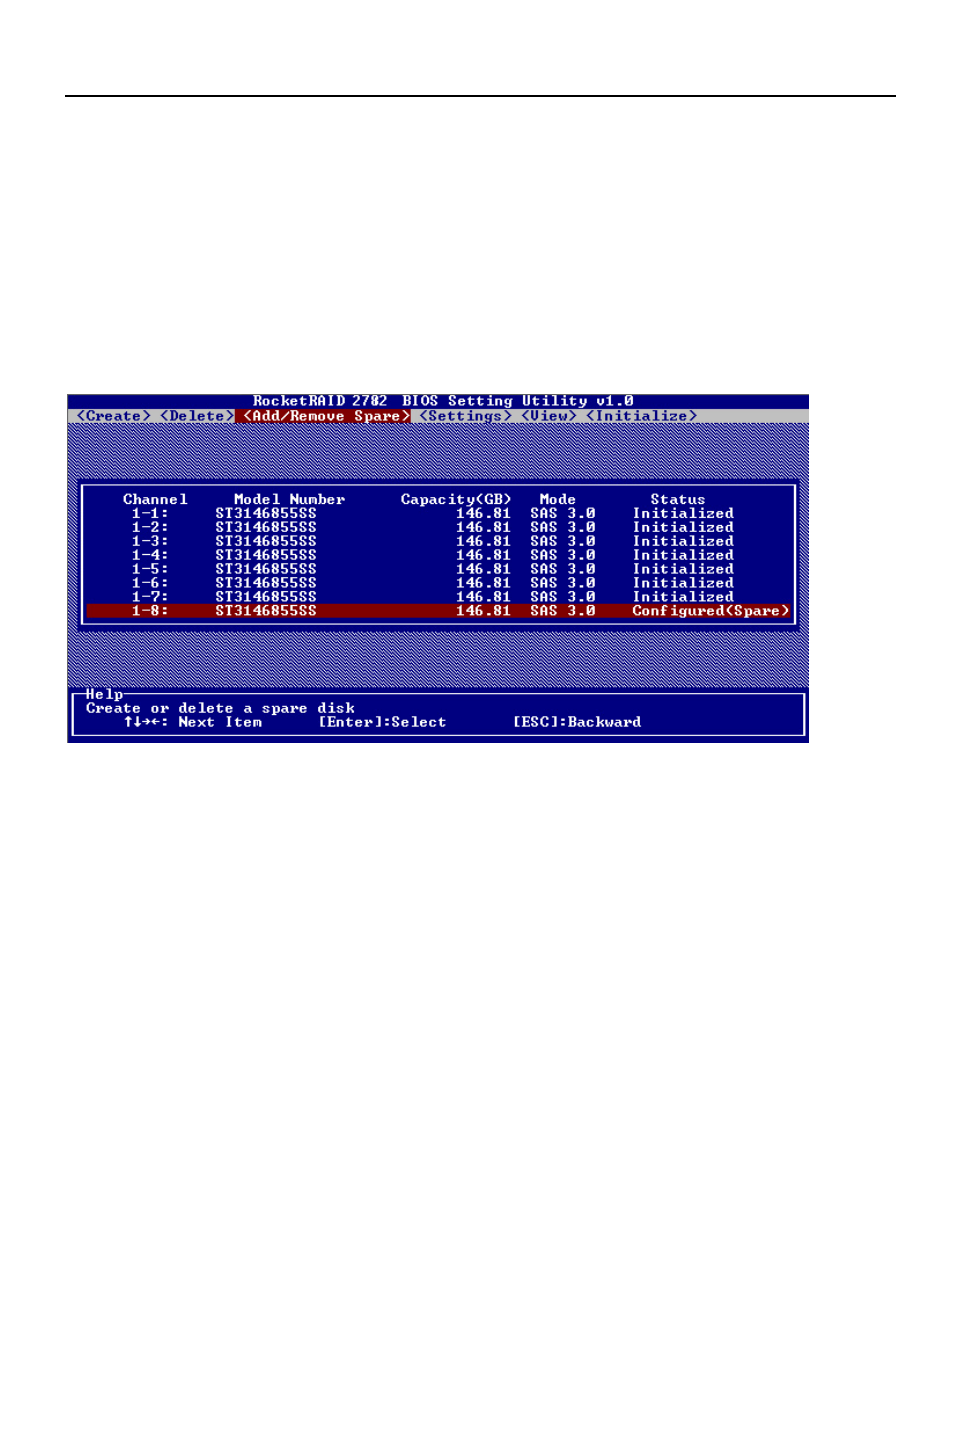
4 - Add/Remove Spare Disks
This Add/Remove Spare command is used to assign a hard disk to act as a
Spare Disk. Spare Disks are used to automatically rebuild Redundant RAID
arrays (RAID 1, 5, 10, 50) in the case of disk failure. As with creating RAID
arrays, disks must be initialized before they can be used as spares. To set a
hard disk to act as a Spare Disk, use the arrow keys to select the target disk
from the list of initialized disks, and press Enter. To remove the Spare Disk
setting from a hard disk, highlight the spare disk, and press Enter.
Generally, single disks are designated to act as spares (disks that are not
configured into RAID arrays).
However, in some instances, disks that are members of RAID arrays may
also be designated to act as a spare. If the disks in question are part of a
RAID array that did not utilize the full available capacity at the time of creation,
these disks may be used as spares. For example: a RAID 0 array was
created between two 200GB hard disks, but only 200GB of space (out of a
grand total of 400GB), was assigned to that array. In this example, 200GB of
disk space remains unallocated. This unallocated space would allow these
disks to be set as spares for a separate redundant array that falls into the
same capacity range (200GB).
5 - Settings
To access the Settings menu, highlight the Settings command from the
toolbar, and press Enter.