Sol Transit Shelter Ad Light User Manual
Page 11
11 rev. 0512 MKTG-IM-TOLAR-TSAL-BACK TO BACK-003
Installation and Owner’s Manual
|
TSAL B2B Series
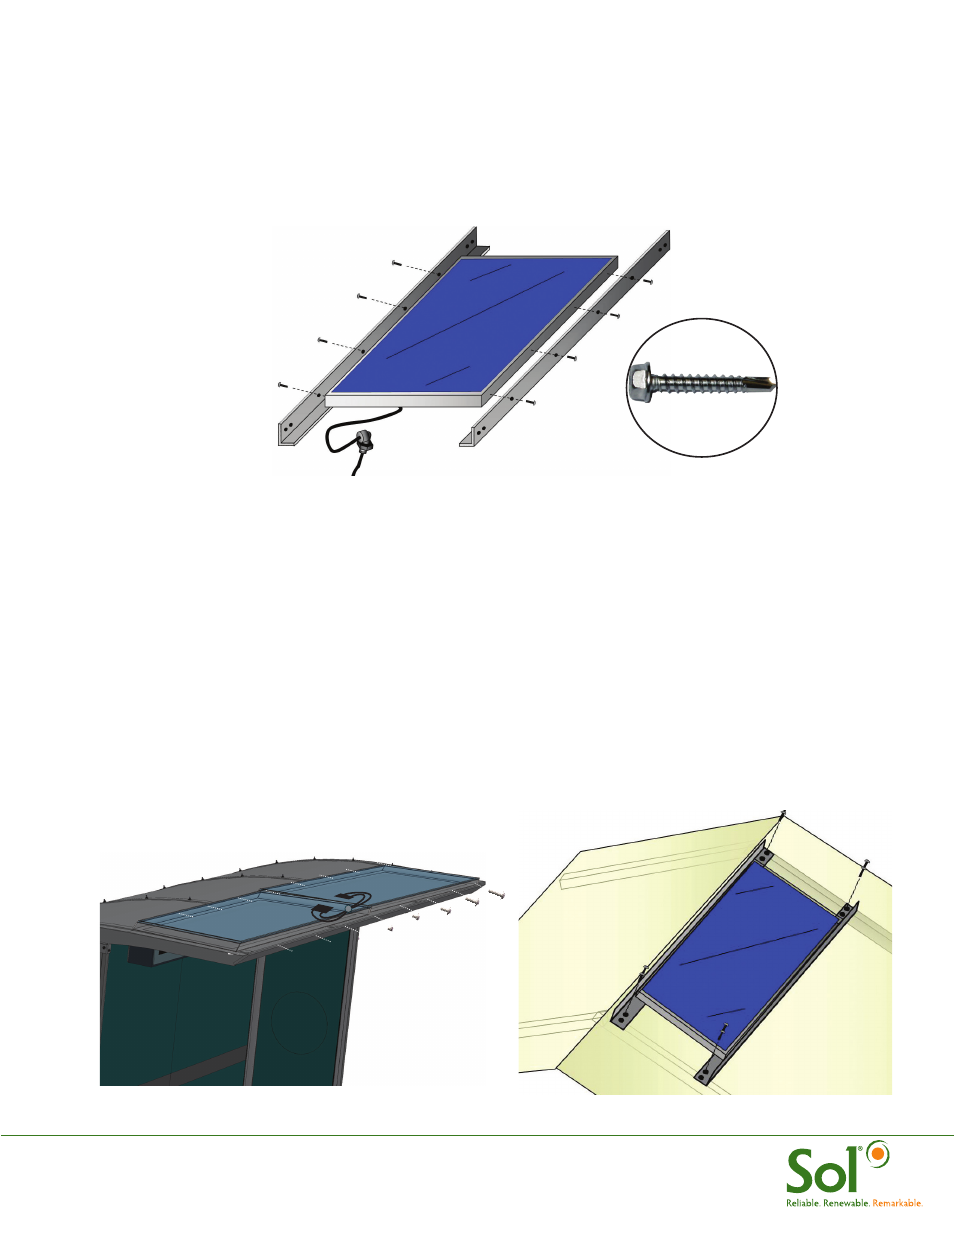
FIGURE 8
MOUNTING PV ANGLES
3. If mounting directly to shelter roof using the TEK screws, measure the distance between the roof ribs
of the shelter to determine the placement of the solar array mounting legs. Ensure that the panel is
mounted on the surface most facing towards the equator or due South in the Northern hemisphere.
4. Mark the position of the roof ribs on the solar array mounting angle.
5. Fasten the mounting angles to the PV panel frame using 16 x #14 x 1” Tek screws provided. The PV
panel(s) should be centered on the aluminum angles (Figure 8).
6. Before mounting the solar array to the roof determine the wire path of the PV harness. It will need to
go through the roof and into the ad kiosk.
7. Once the wire path has been determined drill a 3/4” hole in the shelter roof for the PV load cable and
a 7/8” hole into the ad kiosk roof for the wire seal tight. The shelter roof hole should be located under
the solar array to help keep water out.
8. Connect PV harness with each solar panel. Depending on the number of panels, the PV harness will
have the corresponding mc connectors for each panel i.e. 2-panel system has double mc connectors.
9. As you place the solar array assembly on the roof of the shelter drop the PV harness down through the
3/4” shelter roof hole.
10. Using the #14 X 1 1/2” TEK screws attach the solar array assembly to the shelter. It may be necessary
to remove and replace one of the existing shelter roof rib screws for proper mounting (Figure 9).
Tek screw
FIGURE 9
MOUNTING PV ON SHELTER ROOF