Important – Ridetech 41183000 User Manual
Page 7
Air Ride Technologies
Pu
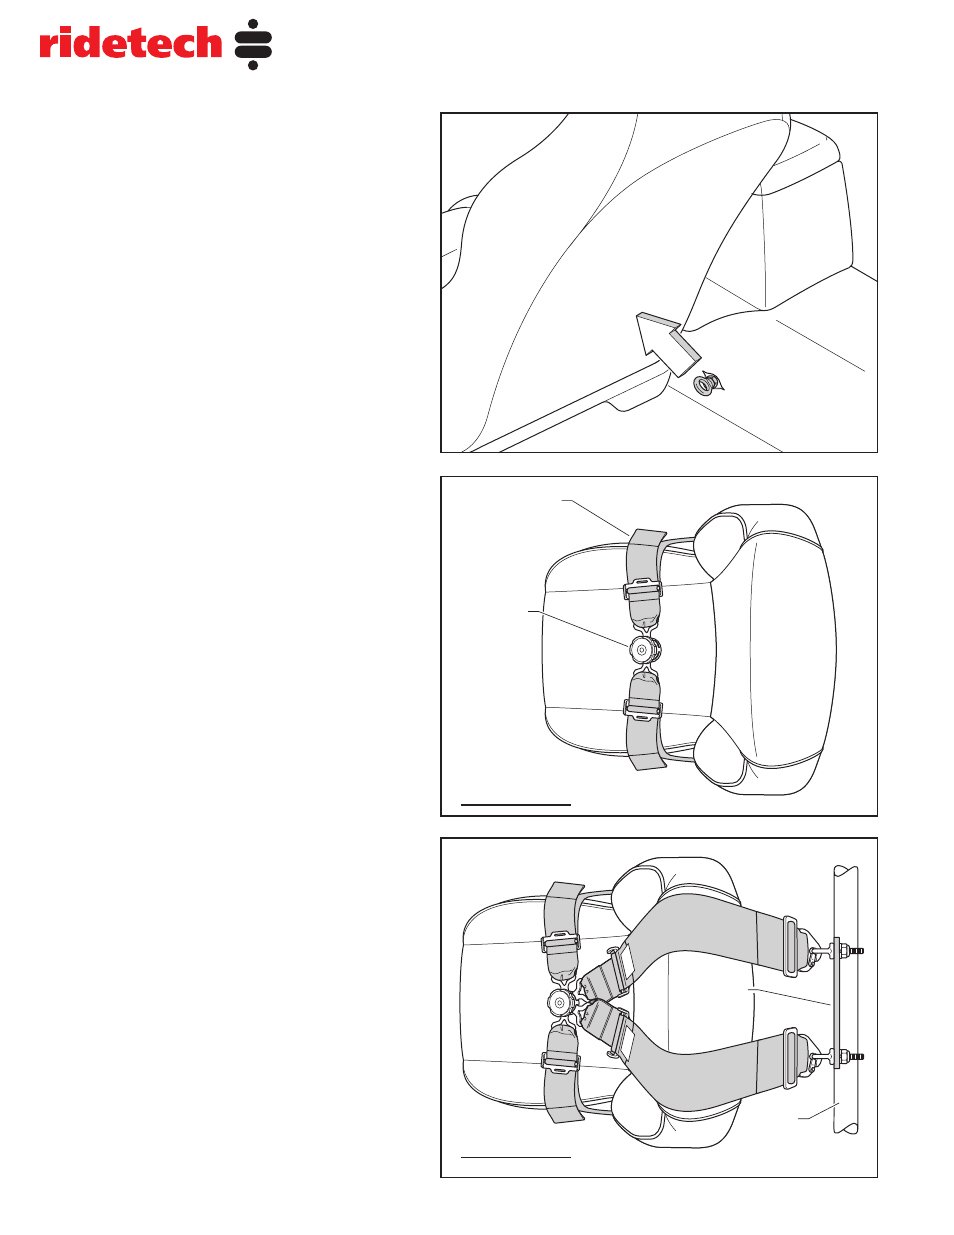
ll
Dire
ctio
n
Release
Knob
Inboard
Lap Belt
Driver Side Shown
Attachment
Plate
Shoulder
Harness
Bar
Driver Side Shown
41173000
6
70-81 Camaro TigerCage
Shoulder Harness Bar Installation
Step 7. Install an eyebolt and jamb nut, sup-
plied with harness kit
Part # 49999999, in
both the existing inboard and outboard seat
belt mounting holes. The jamb nut must be
bottomed out against the head of the eyebolt
when installing. Position the head of the eye-
bolt at an angle compatible with the direction
of pull on the seat belt webbing under full load
(See Fig 9). Tighten the eyebolt jamb nut to
the floor pan. Do both the driver and passen-
ger sides of the vechcle.
Step 8. Clip the lap belt with the release knob
to the inboard eyebolt in the floor pan on the
drivers side. Then clip the remaining lap belt to
the outboard eyebolt in the floor pan and route
the two belts foreward along side the seat and
connect to each other (See Fig 10). Do both
the driver and passenger sides of the vehicle.
NOTE: When installing the passenger side
lap belts, the belt with the release knob will
be clipped to the outboard eyebolt in the floor
pan. The remaining lap belt will clip to the
inboard eyebolt in the floor pan.
Step 9. Clip the two shoulder belts to each of
the eyebolts in the attachment plate on the
shoulder harness bar. Route the two belts
over the back of the seat and connect to the
release knob (See Fig 11). Do both the driver
and passenger sides of the vehicle.
IMPORTANT:
When performing step 7 make
sure the eyebolt jamb nuts are mounted flush
against the floor pan without any carpet inter-
fearance.
Fig. 9
Fig. 10
Fig. 11