Safety harness disclaimer please read – Ridetech 41183000 User Manual
Page 6
Air Ride Technologies
Front
Tiger Tab
Shoulder
Harness Bar
Front
Driver Side Shown
Driver Side Shown
Electrical
Connector
Lap Belt
Front
5
41173000
70-81 Camaro TigerCage
Shoulder Harness Bar Installation
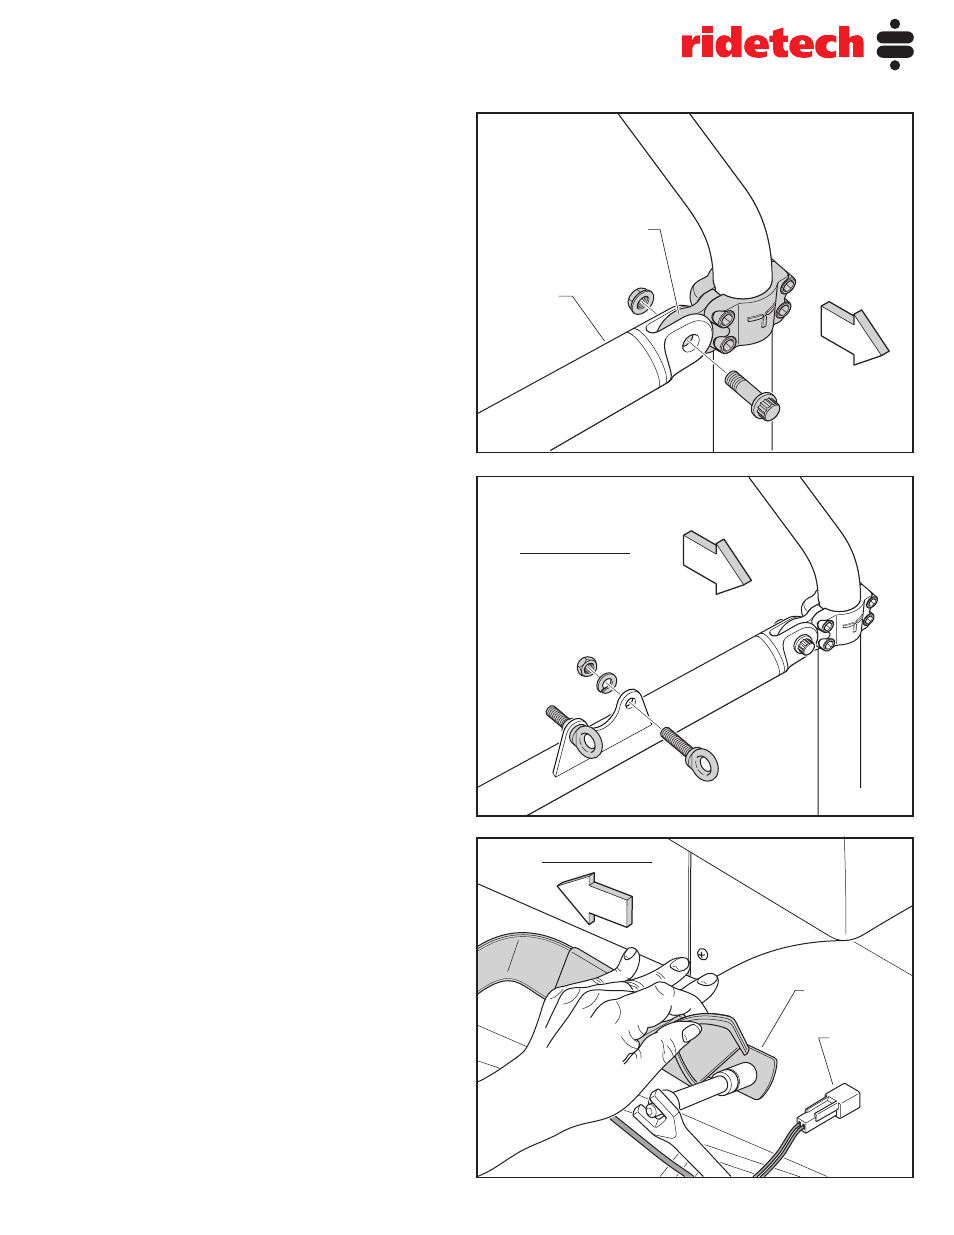
Step 4. Align the hole in the tiger tab with
those in the shoulder harness bar and secure
using a ½” x 1 ½” 12 point bolt and ½” flange
nut (See Fig 6). Do both the driver and pas-
senger sides. After the shoulder harness bar is
positioned correctly finish tightening all fasten-
ers.
Always tighten the tiger tab side of the
clamp first. Remember to use Anti- Seize on
all fasteners that are threaded into stainless
clamps. Torque all 3/8” fasteners to 45 ft-lbs
and 1/2” fasteners to75 ft-lbs.
Step 5. Install two eyebolts, supplied with
harness kit
Part # 49999999, in each of the
seat belt harness attachment plates. Secure
each eye bolt using a lock washer and jamb
nut (See Fig 7). Do both Driver and passenger
sides of the vehicle.
Step 6. Disconnect the electrical connector
from the seat belt sensor if equipped. Remove
the inboard and outboard front seat lap belts
from the driver and passenger sides of the
vehicle (See Fig 8).
NOTE: If you have purchased the five point
safety harness kit
Part # 49999999 proceed
with step 5.
SAFETY HARNESS DISCLAIMER
PLEASE READ:
The safety harness is sold
without warranty expressed or implied. No
warranty or representation is made as to the
product’s ability to protect the user from any
injury or death in any manner of use. The user
assumes that risk. The effectiveness of this
equipment is directly related to the manner in
which it is installed, used, and/or maintained.
Proper installation is solely the responsibility
of the installer, and will not be assumed by
Ridethech Air Ride Technologies.
Fig. 6
Fig. 7
Fig. 8