Important – Ridetech 41183000 User Manual
Page 5
Air Ride Technologies
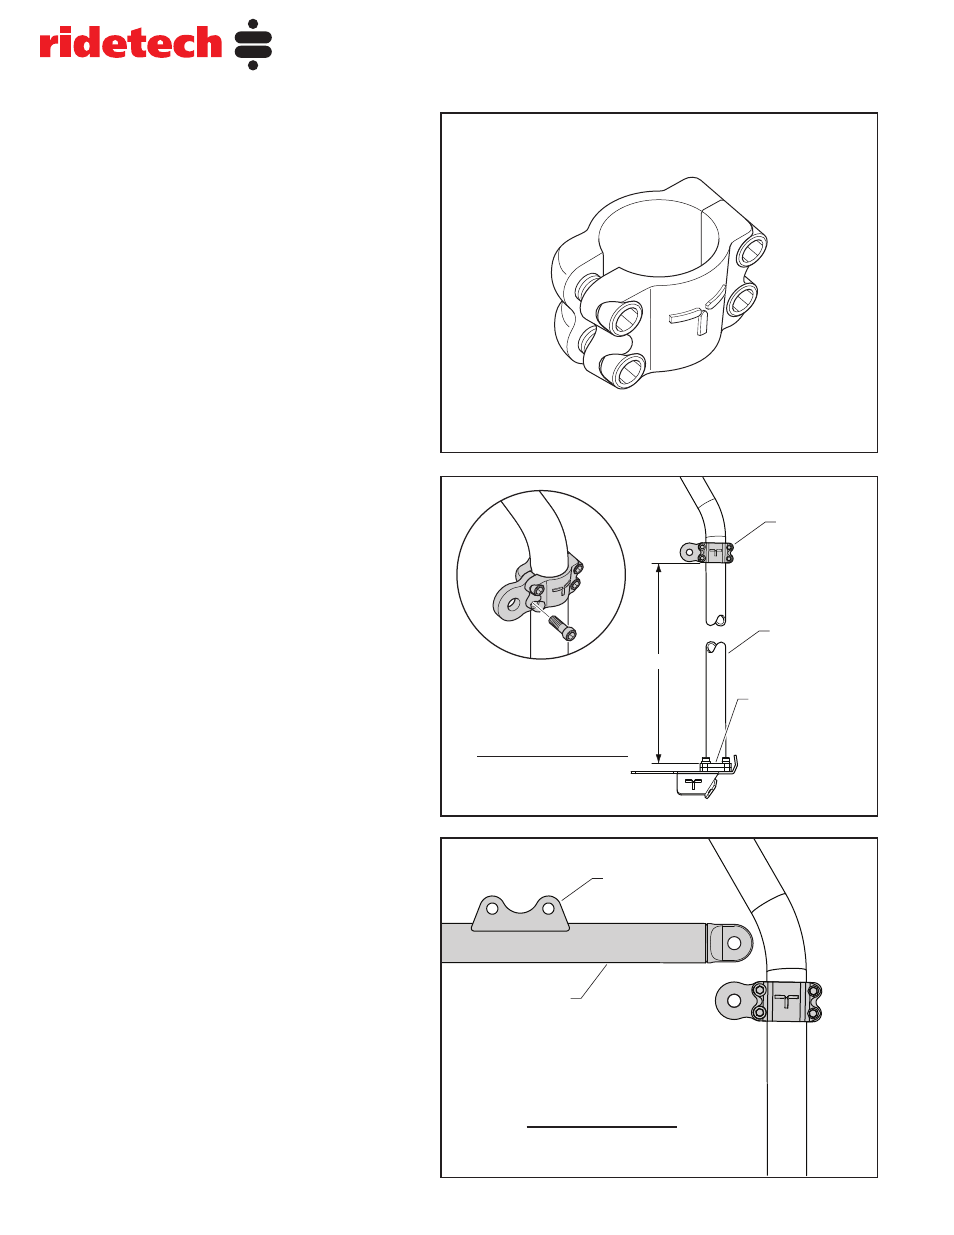
Main Hoop
Main Hoop
Flange
Tiger Clamp
“D” Assembly
(Shown)
Partial View of Main Hoop
Looking Rearward
(Driver Side)
18-7/16”
Partial View of Main Hoop
Looking Rearward
(Driver Side)
Seat Belt Harness
Attachment Plate
Shoulder
Harness Bar
41173000
4
70-81 Camaro TigerCage
Shoulder Harness Bar Installation
IMPORTANT:
Before performing step 2 be
aware there are two different direction clamps
that make up a tiger clamp assembly. Care
must be taken as to which clamp halves are
bolted together. The “T” in the casting must be
facing up at all times and there must be a gap
on one side for the tiger tab to slide into (See
Fig 3).
NOTE: Fig 2 on page 3 shows the proper
clamp locations for the Shoulder Harness Bar.
Step 1. Position the driver and passenger
front seats towards the front of the vehicle and
fold the seat backs forward to gain access to
the rear seat.
Step 2. Loosely fasten the tiger clamp “D”
assembly to the main hoop on the driver side
and clamp “P” on the passenger side using
four 3/8” x 1” socket head cap screws. Posi-
tion the clamps just below the bend in the
main hoop approximately 18-7/16” above the
main hoop flange (See Fig 4).
Step 3. With the seat belt harness attachment
plate upright and facing forward in the vehicle,
slide the ends of shoulder harness bar into the
tiger clamp assemblies (See Fig 5). The tiger
clamps may need to be adjusted slightly to
achieve proper fit. Be careful not to scratch the
main hoop when positioning the tiger clamps.
Fig. 3
Fig. 4
Fig. 5