Nitrous Express Hitman EFI User Manual
Nitrous Express For the car
“HITMAN” FUEL INJECTED APPLICATIONS
INSTALLATION INSTRUCTIONS
Congratulations on the purchase of your Nitrous
Express EFI system. You have chosen the finest
nitrous system ever. Nitrous Express utilizes only the
highest quality components designed for the use of
liquid nitrous oxide. To properly utilize these specially
designed components and obtain the trouble-free
operation that this system is capable of producing, it
is extremely important that you read all instructions
carefully. Pay special attention to the important notes
at the end of the installation steps and the tuning tips
listed on the back page of this instruction sheet.
You have selected a “Hitman” series nitrous
system. It’s low cost and simplicity make this system
a great horsepower value. However in order to keep
the cost of this system to a minimum all convince
hardware has been deleted. We strongly recommend
that all listed optional components be added to this
system before it is used.
The “Hitman” EFI is calibrated for cars with 38-
48 PSI injection systems. If your car has a higher or
lower pressure fuel system contact the factory for the
correct jets. All NX Stage 1 EFI and Hitman systems
are designed to operate with stock fuel pumps and no
timing retards are required. If you have an aftermar-
ket ECU chip that advances the stock timing, deto-
nation could be a problem. These chips can still be
retained if higher-octane fuel or NX Power Booster
(PN# 16000) fuel additive is used. On Dual Stage or
EFI Race systems an aftermarket, high capacity fuel
pump must be installed. Depending on your combina-
tion and level of nitrous boost, timing retard may be
required.
To insure proper system assembly and operation,
carefully read the following installation procedures
thoroughly before beginning. Use only Teflon based
thread-sealing PASTE on ALL pipe thread connec-
tions. DO NOT allow sealant to extend past threads.
DO NOT use Teflon tape. Thread sealant is not
required on any flared fittings, hose or bottle connec-
tions.
NOTE: Due to shipping restrictions all NX
nitrous bottles arrive empty. Before beginning the
installation the N2O bottle should be filled by an NX
accredited filling station. For filling station locations
log on to: www.nitrousexpress.com.
Before starting any installation procedures care-
fully disconnect the vehicle negative battery cable. If
there is any question about this operation consult the
vehicle owners manual!
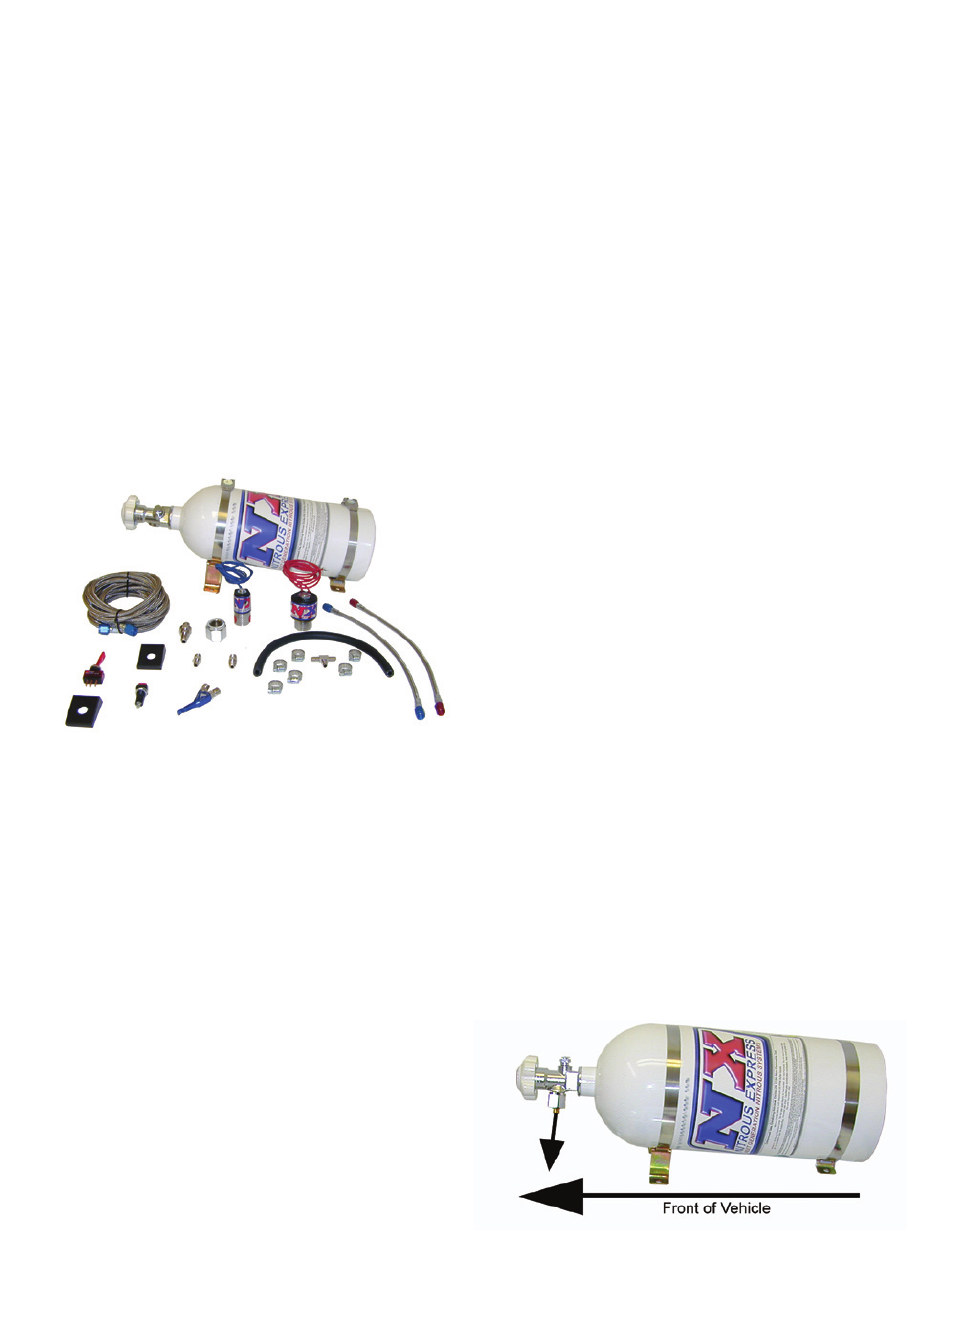
MOUNTING THE BOTTLE
Insert the bottle nipple into bottle nut and securely
tighten on the bottle valve. (See Illustration A.) Slide
bottle into bottle brackets. Use illustration as a guide
for proper alignment. Locate bottle assembly in a
mounting area that will provide easy access to bottle
valve, for hose connection and bottle removal. Using
the bottle unit as a pattern, mark and drill four 3/8”
holes. Note: Before drilling holes be sure to check
beneath the area being drilled for obstructions, fuel
lines or fuel tank. Then secure unit to mounting sur-
face. (Recommended minimum of four 5/16” grade
five bolts). Align bottle in brackets so that the valve
outlet is pointing downward to the mounting surface
(see illustration A) and tighten the bottle bracket
bolts.
ILLUSTRATION A