Malco SRC24A Channel Shear User Manual
Page 2
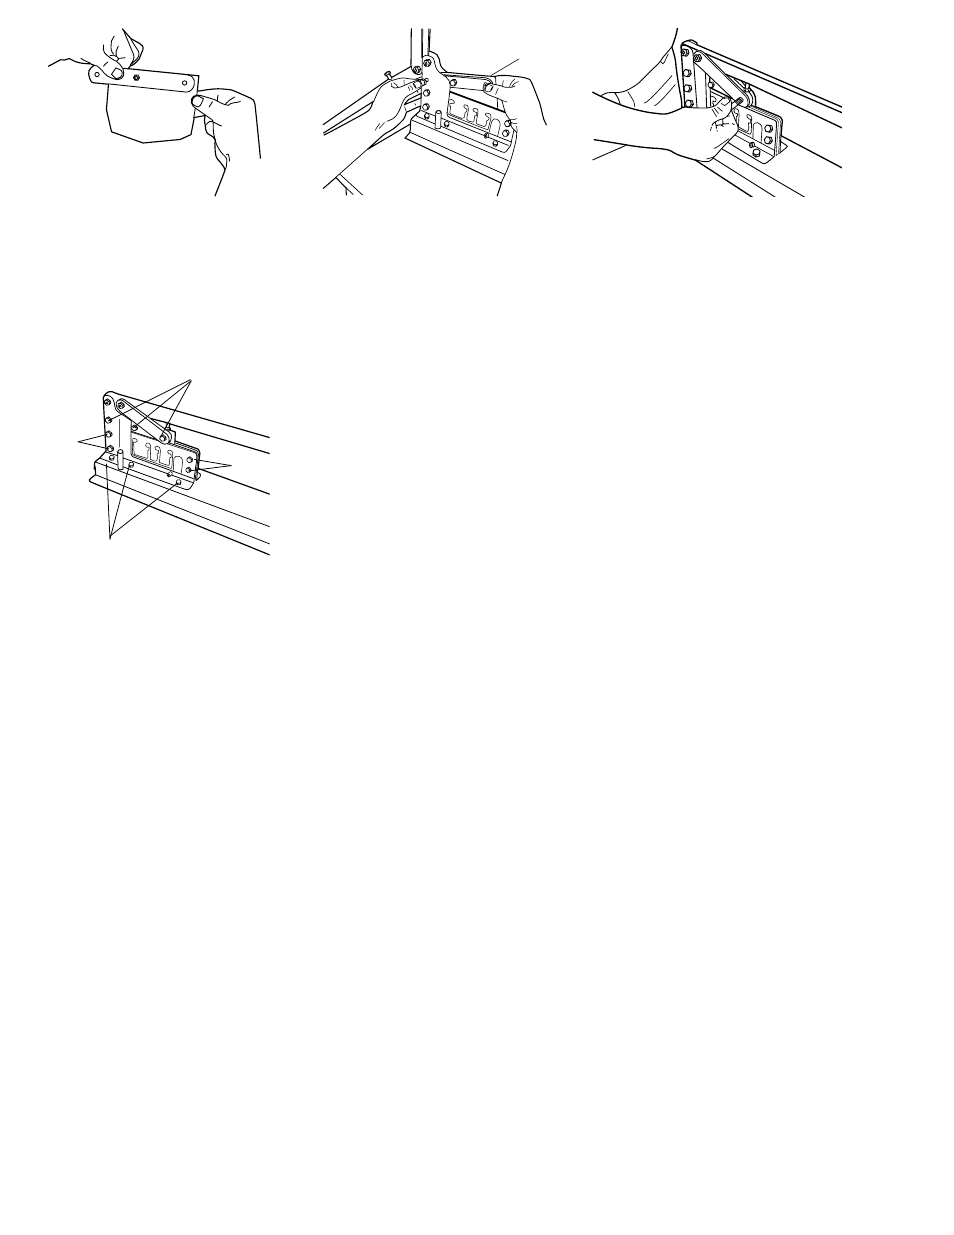
Step #11: Before removing the next fastener
note the blade support to blade orientation.
Remove the last (1) 1/4-28 x 7/8” long, hex bolt from
the blade support. Remove the old blade and install
the replacement. Re-install the same (1) 1/4-28
x 7/8” long, hex bolt through the blade and blade
supports. Do not tighten at this time.
Step #12: Slide the blade/blade support assembly
between the die housings and visually align with the
lower 5/16” hole. Insert the (1) 5/16-24 x 1-1/4”
long, hex head bolt. Do not tighten at this time.
Step #13: Move the handle until the link and blade
support holes align, and insert the (1) 5/16-24 x
1-1/2” long, hex head bolt.
Step #14: Install the (2) 5/16” & (1) 1/4” locknuts
and tighten. Note: No need to over tighten, just make
them snug so the handle will move freely. (Hex
head and locknut wrench size is 1/2” for the 5/16”
diameter bolts and 7/16” wrench size for the 1/4”
diameter bolts.)
Note: It is very important that the tightening
sequence from this step forward is followed
to achieve proper tool adjustment and cutting
clearances.
Step #15: Tighten all (4) 1/4-28 hex head bolts.
(Hex head and locknut wrench size is 7/16”)
Step #16: Tighten all (6) 1/4-28 x .550” long die
housing to base fastening bolts. (Hex head and
locknut wrench size is 7/16”)
Step 16 both sides
Step 14
Step 15
Step 15