Inserting the key card, Installation and setup – Aastra Telecom 6731I User Manual
Page 22
16 Model 6731i IP Phone Installation Guide
Installation and Setup
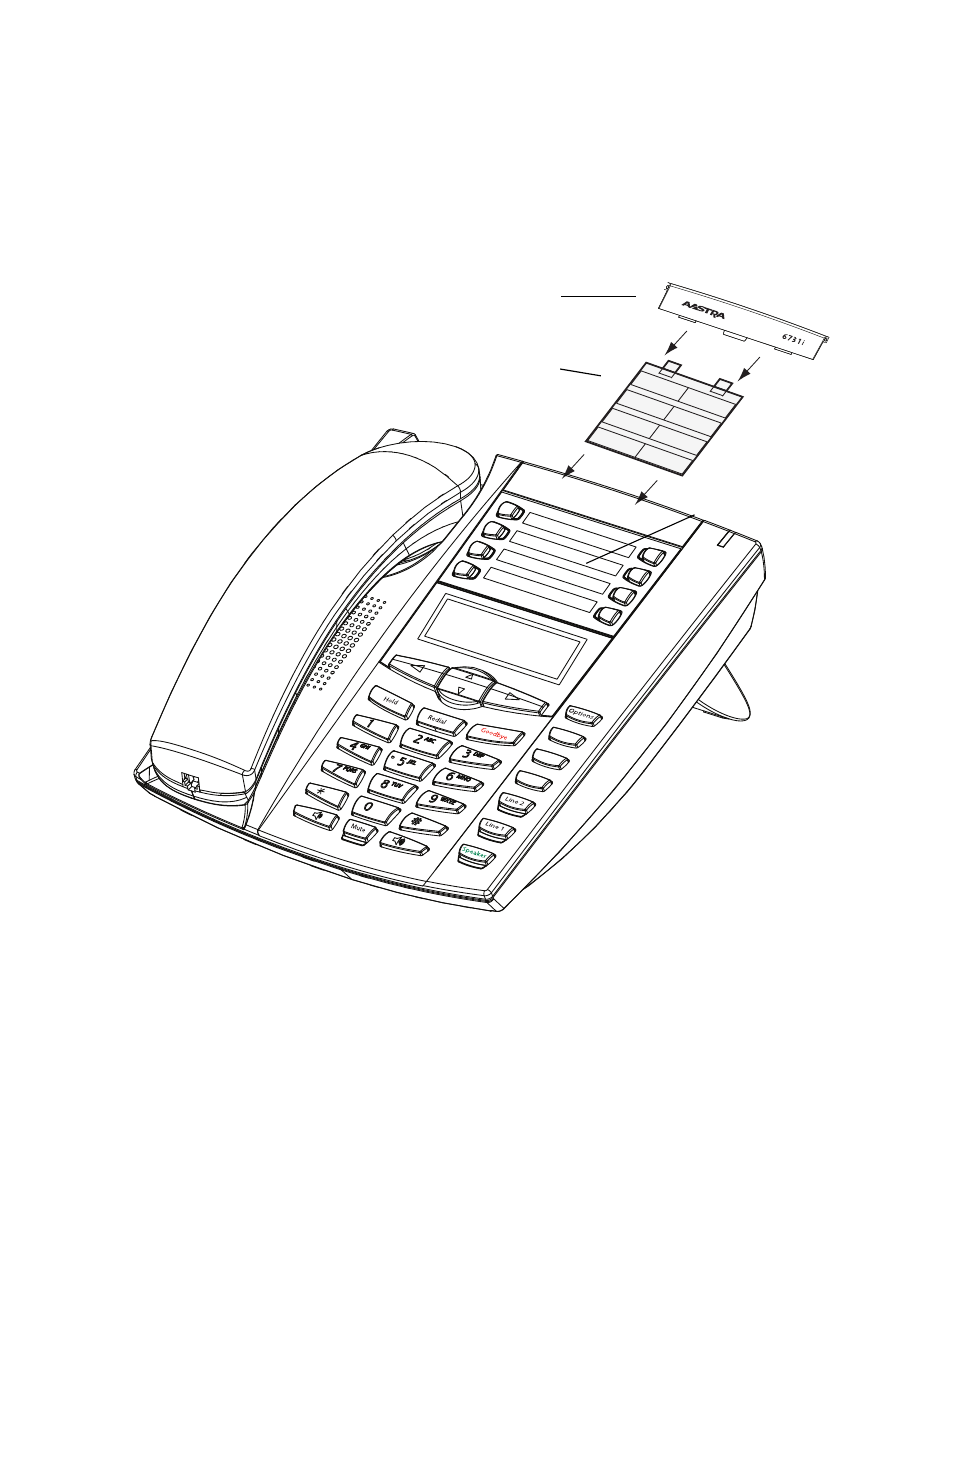
Inserting the Key Card
This card contains the label identification spaces for 8 programmable keys.
1. Remove the logo plate from the top front panel of the telephone by gen-
tly pressing down and sliding upward.
2. Slide the card into the programmable key card slot on the top front
panel of the telephone using the display slots for alignment. Ensure the
tabs are sticking out for future removal of the card.
3. Gently slide the logo plate back in place, covering the paper tabs.
Callers
Conf.
Transf
er
Logo Plate
Key Card
Display Slots
See also other documents in the category Aastra Telecom Phones:
- 57i CT IP Phone (166 pages)
- 9112I (22 pages)
- AastraLink RP 500 (16 pages)
- SIP 480I CT (504 pages)
- 6739I (32 pages)
- 9110 (15 pages)
- AastraLink RP 6753i RP (2 pages)
- AASTRA 9133 I (60 pages)
- 5i Series (16 pages)
- 9316CW (2 pages)
- AastraLink RP 6757i CT RP (110 pages)
- SIP 57I CT (818 pages)
- 8009 (2 pages)
- IP Phone (210 pages)
- 9112i IP PHONE (47 pages)
- 9133i (USER GUIDE) (53 pages)
- 536M (2 pages)
- 480i (54 pages)
- 9143i (72 pages)
- M760E (60 pages)
- 57I (2 pages)
- 6755i (276 pages)
- MERIDIAN 9417CW (52 pages)
- Telephone 9110 (2 pages)
- 9116LP (28 pages)
- 53i IP Phone (102 pages)
- AastraLink RP 6751i RP (2 pages)
- 57i IP Phone (142 pages)
- 480i CT (Release 1.4.2) (18 pages)
- VentureIP (48 pages)
- M6320 (48 pages)
- AastraLinkRP IP-PBX (2 pages)
- Aastra 51i (9 pages)
- SISIP 57I (602 pages)
- 480i SIP (21 pages)
- 57I CT (40 pages)
- POWERTOUCH 390 (2 pages)
- 6751I (128 pages)
- 470 (27 pages)
- 53I (124 pages)
- 55i IP Phone (152 pages)
- Dialog 4000 (4 pages)
- IP TELEPHONES 51I (2 pages)
- 9417CW (52 pages)
- 6757I (276 pages)