JELD-WEN JII104 Fiberglass Gliding Patio Doors with Applied Nailing Fin User Manual
Page 5
INSTALLATION INSTRUCTIONS
for Fiberglass Gliding Patio Doors with Applied Nailing Fin (JII104)
5
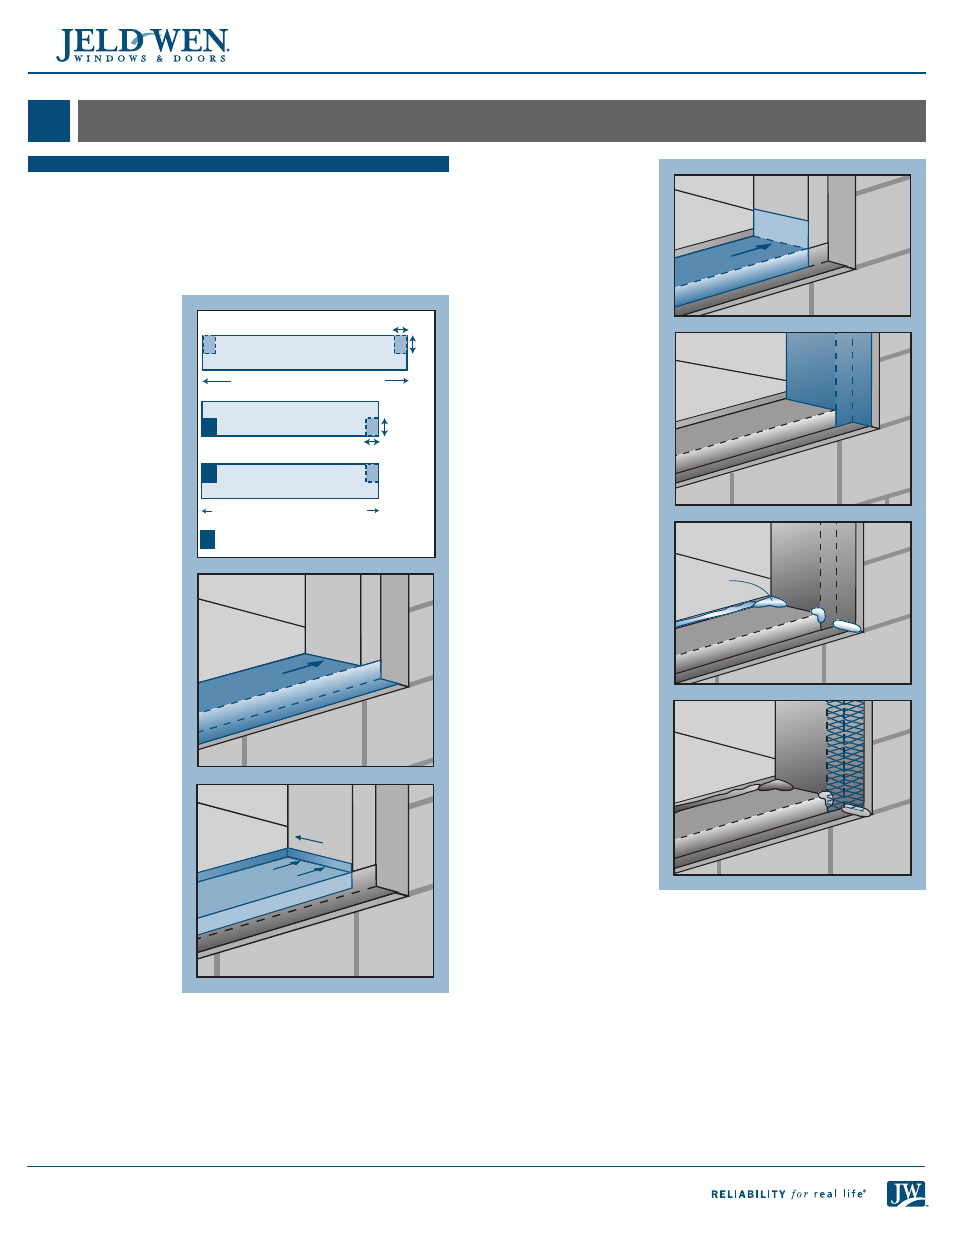
d. Apply the sill
pan piece of
self-adhesive
flashing over
the sill pan as
shown. The
bottom of the
sill pan should
be sealed by the
flashing.
e. Remove the
upper end
corner of each
side piece, and
for step-down
landings,
remove the
lower end
corner.
f. Apply the
side pieces of
self-adhesive
flashing.
g. Remove the
corners of the
header piece
and apply.
3. Apply sealant across
flashing/masonry
joints at corners of
masonry opening.
4. Apply diamond lath
to all flashed surfaces
to be covered by
stucco.
PREPARE BUCK (MASONRY/BLOCK WALL ONLY)
1. On the exterior, coat the buck and surrounding concrete/masonry
with self-adhesive flashing primer. Follow manufacturer’s instructions
for application procedures.
2. Seal the joint between the buck and the concrete/masonry with
self-adhesive flashing as follows:
Note!
Do not allow gaps or bubbles beneath the flashing (remove and
replace if necessary).
a. Cut five pieces
of self-adhesive
flashing for the
sill, sides, head,
and sill pan as
shown.
5
PREPARE BUCK
Top
= Remove for step down only
3"
1.5"
Rough opening side jamb +3"
Rough opening head/sill +3"
1.5"
3"
Head/Sill piece
Side piece
Side piece
b. Apply the sill
piece as shown.
c. Place the sill pan
in the rough
opening.
Sealant