Re-installation of ididit column – ididit Retrofit Steering Column: 1978-79 Ford Truck User Manual
Page 4
2
7.) Once the column has been removed from your vehicle, remove the
firewall mount and original seal. Place them off to the side for these
items will be re-used when installing the new column. You may want
to clean these items and repaint them prior to re-installation. Since
this seal is stopping fumes and water from coming in the cab inspect it
and replace it if they are cracked or damaged in anyway.
RE-INSTALLATION of ididit Column:
It is now assumed that you have prepped and painted the new column
(if necessary)
. It is recommended that the lower 8 inches of the column
is wrapped with masking tape when installing it to prevent scratches to
your paint, powder coat or chrome!
1.) Slip firewall mount and seal up the column
approximately 6 inches and loosely tape the
mount to the column to keep it out of the way.
2.) A. 2 wheel drive: From inside the truck
slip the column into the rag joint. Then loosely
install the bolts through the dash mount and
into the dash. It may be necessary to move the column in or out
slightly to install the pinch bolt on the rag joint. Tighten the rag joint
bolt before tightening the column dash bolts. Make sure the rag joint is
not under stress, the rubber part of the rag joint should be flat and not
pushed or pulled by the column.
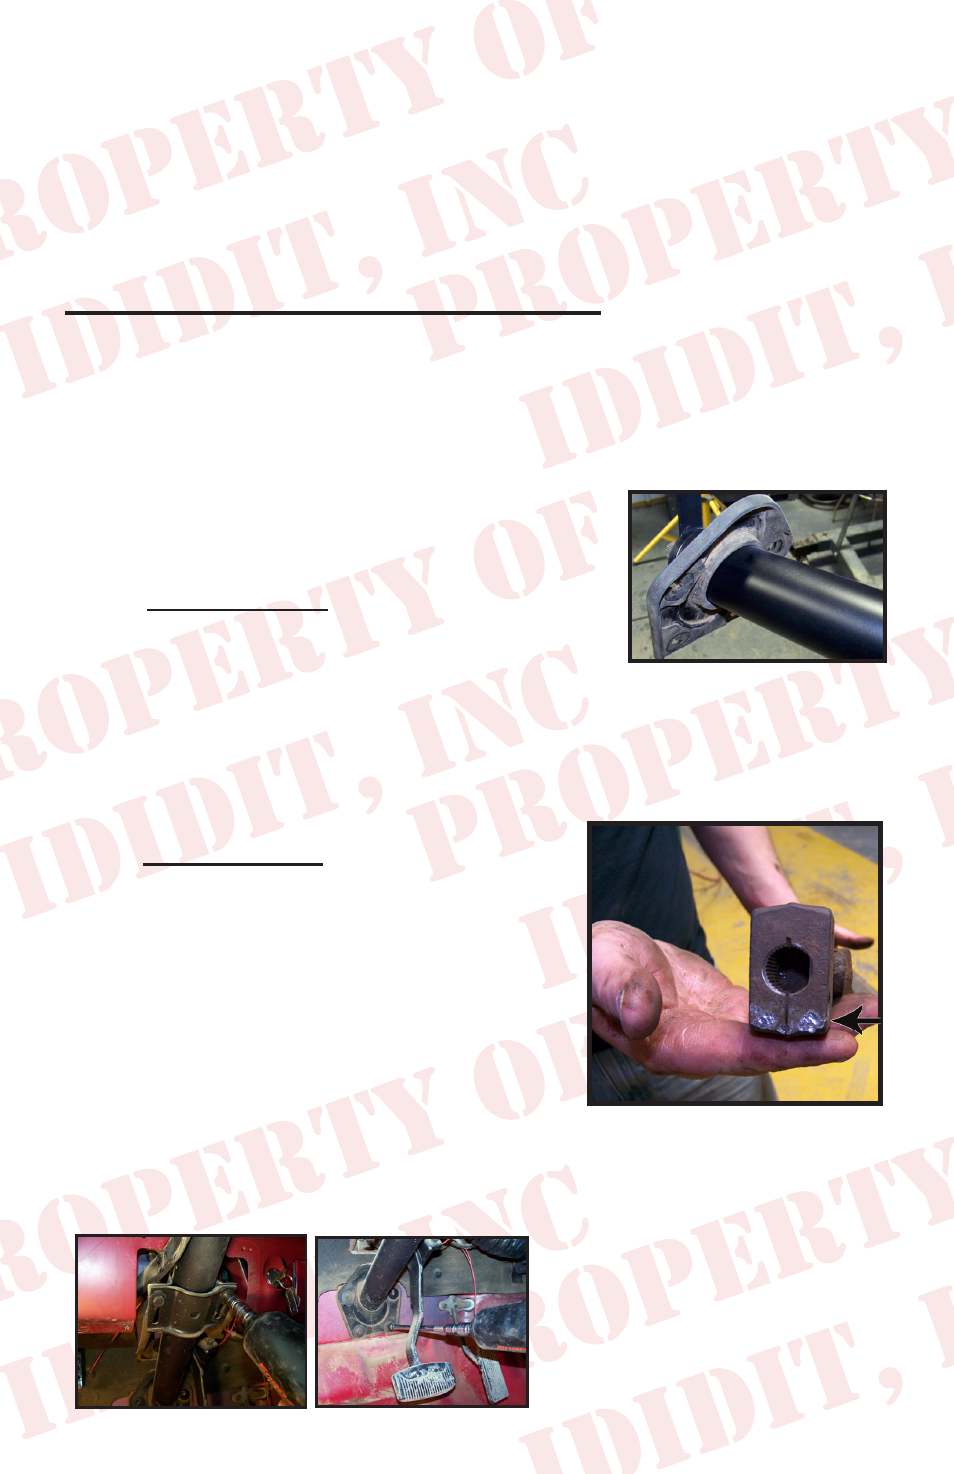
B. 4 wheel drive: It is recommended
that you have a helper to align the u-joint
onto the splined shaft as you install the
column. This person can also verify the
joint is slipped over the column correctly.
You can now install the pinch bolt onto the
joint. Once the pinch bolt is installed on
the column it can be bolted to the dash
loosely.
3.) Now remove the tape holding the firewall mount. Install the firewall
mount loosely making sure the seal lines up with the mount. Next in-
stall the 4 screws for the firewall mount loosely.
4.) Tighten the dash and fire-
wall mounts to the vehicle
securely.