Adding an snmp trap destination – HP 1.10GB Virtual Connect Ethernet Module for c-Class BladeSystem User Manual
Page 46
Domain management 46
Field name
Description
Community String
The Community String acts like a password for a given trap destination. The
trap receiving application can use the community string to filter the incoming
traps.
Default: public
Format
Format of the new trap. Select SNMPv1 or SNMPv2.
To add a trap destination, right-click on the header row of the destination table, and then select Add
Destination. See "Adding an SNMP trap destination (on page
)."
To edit or delete a trap destination, right-click on that trap destination row, and then select Edit
Destination or Delete Destination.
To apply changes made on this screen, click Apply.
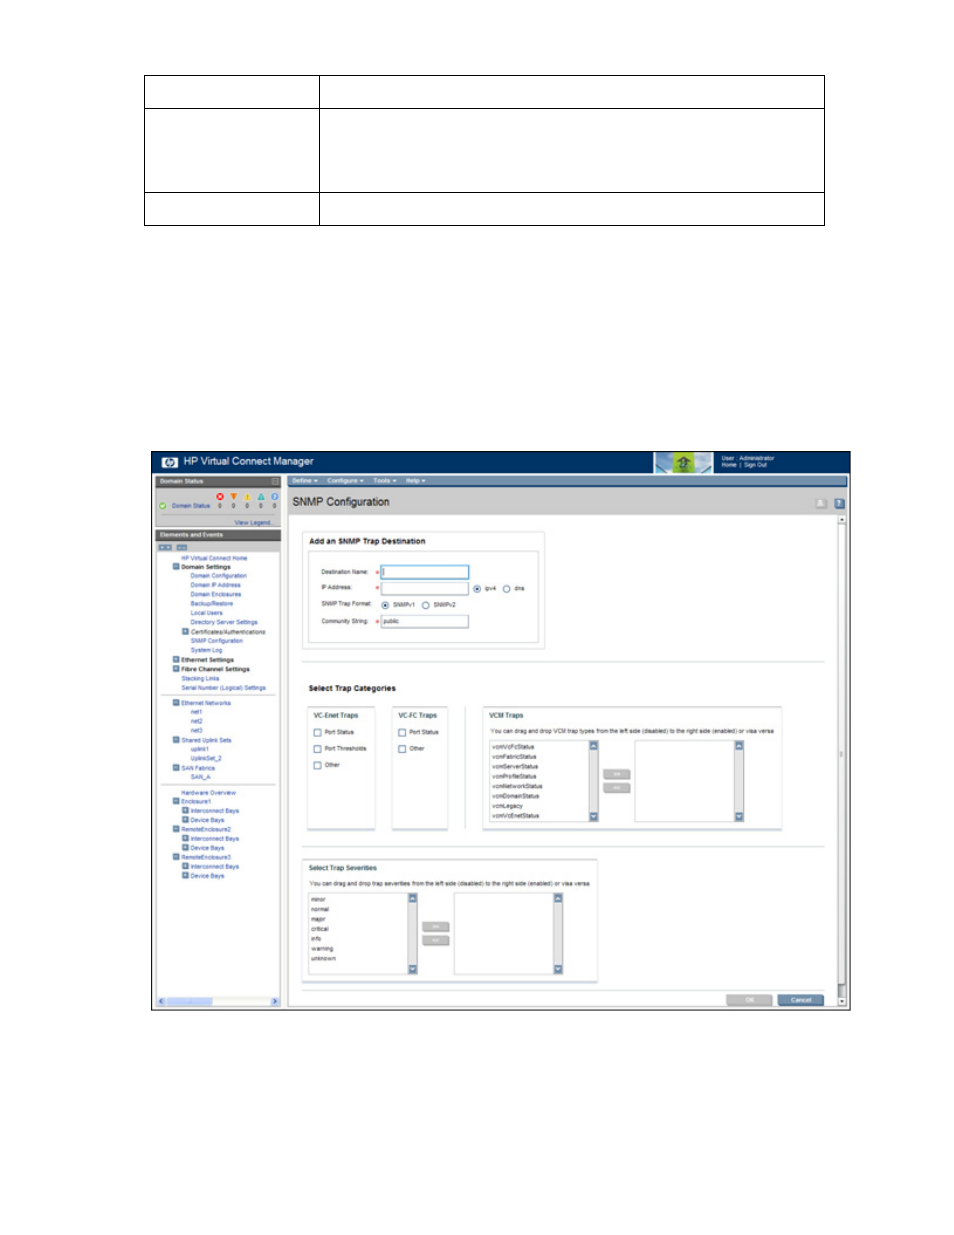
Adding an SNMP trap destination
To add an SNMP trap destination, right-click on the header row of the SNMP Trap Destination table.
1.
Enter a unique name for the new trap being added. No spaces are allowed.
2.
Enter the IPv4 address or DNS name for the trap destination.
3.
Select the Trap Format: SNMPv1 or SNMPv2.
4.
Enter the SNMP trap community string for the specified trap. The default is "public."
- Virtual Connect 4Gb Fibre Channel Module for c-Class BladeSystem Virtual Connect 8Gb 20-port Fibre Channel Module for c-Class BladeSystem Virtual Connect Flex-10 10Gb Ethernet Module for c-Class BladeSystem Virtual Connect 1.10Gb-F Ethernet Module for c-Class BladeSystem 4GB Virtual Connect Fibre Channel Module for c-Class BladeSystem Virtual Connect 8Gb 24-port Fibre Channel Module for c-Class BladeSystem