Time intervals – AMX SIP Communications Gateway CSG-500 User Manual
Page 53
Telephone System Configuration
45
CSG SIP Communications Gateway Operation/Reference Guide
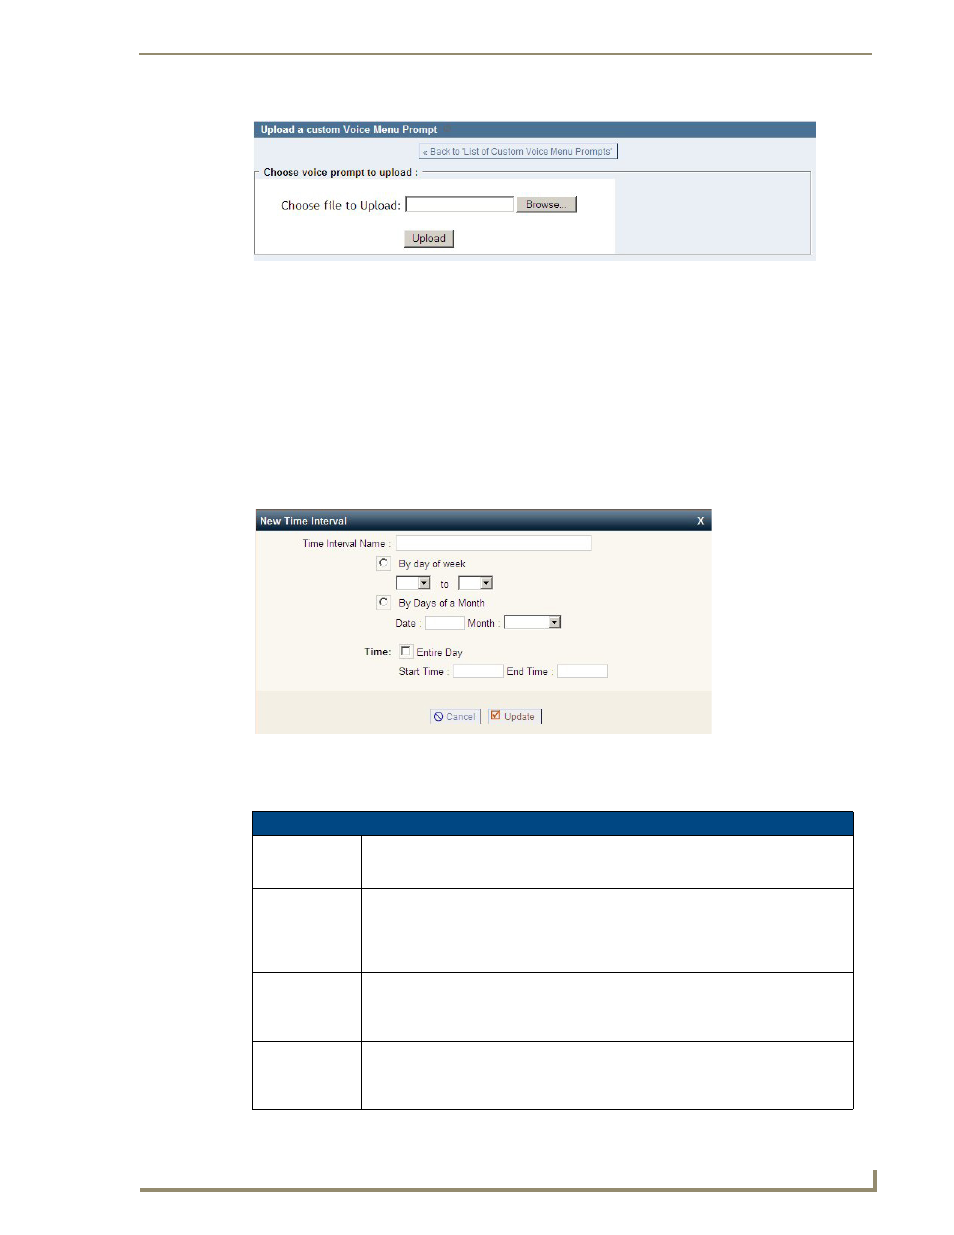
Click Upload a Voice Menu prompt to upload a custom voice menu prompt. You will be prompted to specify
the path to the audio file that you wish to upload. Each file uploaded must be less than 10 megabytes, in 8KHz
mono, and in GSM or WAV format.
Once your recording or upload of a custom voice menu prompt is finished, it will be listed on the Custom
Voice Menu Prompts
page. You will be able to play back the prompt, re-record the prompt, or delete the
prompt. The prompts can now be included when creating voice menus.
Time Intervals
Time intervals are definitions of a period of time during a day, week, month, etc. which are used to route calls.
Time interval definitions are utilized in the Incoming Calling Rules section. To define a time interval, select
Time Intervals
from the left menu, and then New Time Interval from the Time Intervals page.
Creating a Time Interval definition is fairly simple. You just need to define a range of time in which you expect
to receive calls. The following fields are used to create the definition:
FIG. 37
Upload Menu Prompts
FIG. 38
New Time Interval
New Time Interval Page Options
Time Interval
Name
Specify a unique name to help you identify this time interval when it is referred to in the
creation of calling rules. A name can be anything such as BusinessHours, OffHours, or
Holiday.
By Day of Week
Select this radial button if you wish to specify one or more days of any week. Select the
range of days using the drop-down lists. For example, if you were creating the time
interval “Business Hours” you would specify Monday in the first drop-down list and
Friday in the second drop-down list. For time intervals that occur on a single day, select
that day in both drop-down lists.
By Days of a
Month
Select this radial button if you wish to specify a day of a specific month instead of a day
of a week. Enter the day of the month, and then select the month from the drop-down
list. For example, if you were creating a time interval named Christmas, you would enter
“25” and then select “December” from the drop-down list.
Time
You need to specify a time during which this interval should be applied. Select either the
Entire Day checkbox, or a Start Time and End Time. In the Business Hours example,
which is from Monday to Friday, you would specify a start time of 8:00 AM and an end
time of 5:00 PM. In the “Christmas” example you would select the Entire Day checkbox.