Changing the embroidery foot – Brother PC-8500 8500D User Manual
Page 35
32
(Programmed
5
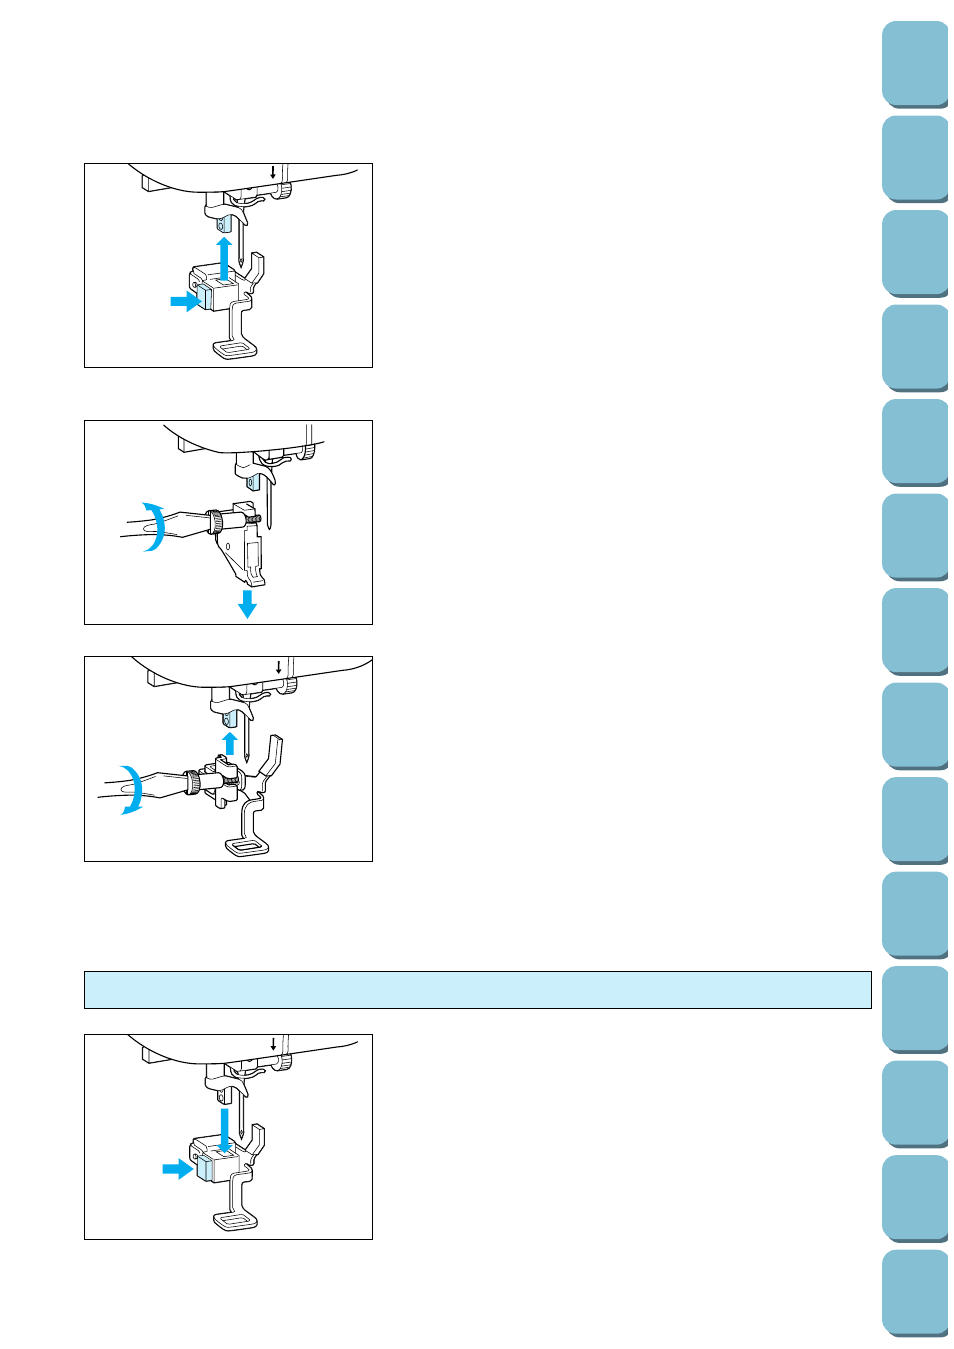
4. Raise the presser foot lever to the highest position. While
pressing the black button to the left of the embroidery foot
“Q”, push embroidery foot “Q” upward with both hands as far
as it will go to install it.
CAUTION
Be careful not to touch the needle during this time,
otherwise injury may result.
1. Press the “NEEDLE POSITION” button to raise the needle,
and then turn off the power.
2. Raise the presser foot lever.
3. Loosen the screw to remove the presser foot holder.
5
4. Attach the embroidery foot “Q”.
5. Set arm of embroidery foot “Q” on needle bar, use the metal
disk provided with your machine (accessory #14 on page 7)
or a screwdriver to tighten the screw firmly.
CAUTION
Be careful not to touch the needle during this time,
otherwise injury may result.
NOTE
–
Make sure that there is no gap between the needle bar and
embroidery foot “Q”.
–
It is recommended that a 90/14 needle should be used
when embroidering on thicker fabrics or stabilizing products.
(for example denim, puffy foam . .) A 75/11 needle might be
bent or broken, which could result in injury.
5
1. Raise the presser foot lever to the highest position. While
pressing the black button to the left of embroidery foot “Q”,
pull embroidery foot “Q” downward to remove it.
Changing the embroidery foot
Optional