Dwyer SSM User Manual
Page 5
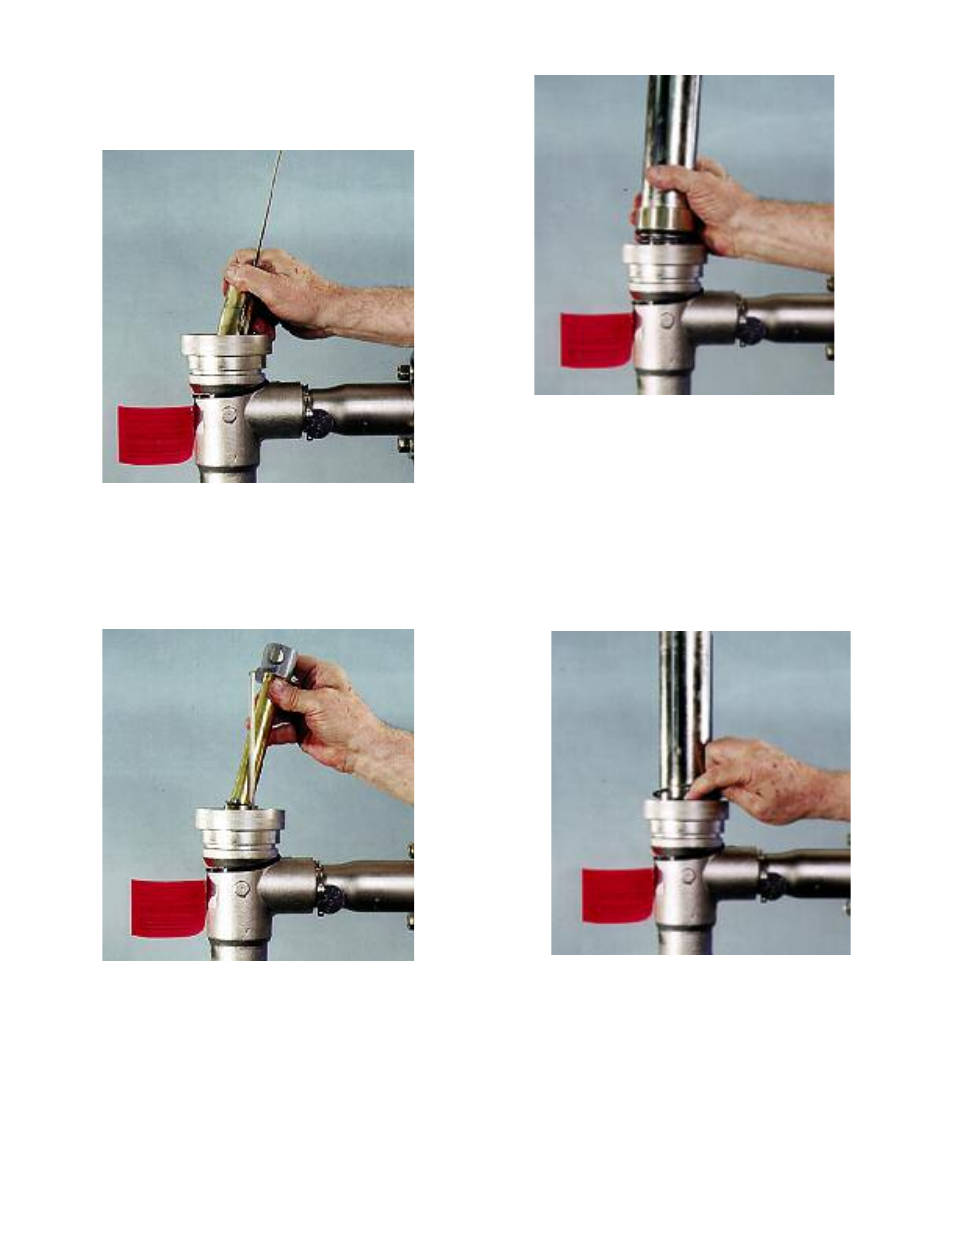
fLoWMeteR aSSeMBLY
In general, replace all parts in reverse order of the disassembly.
1. Place the slotted meter tube into the body, aligning the “key” at the
bottom of the tube with the keyslot in the bottom of the body.
2.
3.
Place the spider over the meter tube with the “notched leg over the
snorkel tube or guide rod. Slide the spider down to the meter tube’s
shoulder.
Place the meter float in the meter tube, aligning the notch in the
indicator disk with the snorkel.
4.
5.
Seat the O-ring on the sight tube, lubricating it with a small amount of
service-compatible silicone grease or petroleum jelly to facilitate
replacement.
Using hands only, press the sight tube firmly down into the meter
body with a twisting motion. Be careful not to rock the sight tube side
to side and bend the snorkel tube/guide inward where it might
interfere with float movement. Rotate sight tube as necessary for
scale visibility and/or alignment of the raceway screw.
6.
7.
Slide the inner flange ring over the sight tube. When properly seated,
the top of the flange ring should be flush with the bottom edge of the
snap ring groove.
Separate the coils of the spiral retaining ring, and insert one end into
the body groove. Wind the ring into the groove, making sure the ring
is properly seated. Then replace the ball indicator (the tip of a
screwdriver can be used to help locate the magnet), and replace the
raceway and raceway cover.
If reassembled correctly, the center of the ball indicator should lineup
with the scale “zero” (either dotted black or scribed line). If it does not,
disassemble the meter completely and carefully reassemble it, making
sure the slotted meter tube is completely seated in the body.
If new flow internals are used, the scale may have to be remounted on
the sight tube. Depending on the model type, this can be done either by
loosening the mounting screw, or reattaching the scale with double sided
adhesive (new flow internals are shipped with a new scale).